


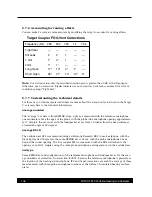


Real-Ear Measurements
97
5.6.1.1 To perform the coupler measurement
The coupler measurement part of the RECD is saved into the analyzer’s permanent memory until
another measurement is stored on top of it. This saves a lot of time because it means you only have
to perform the real-ear part of the RECD for each client instead of performing both the coupler and
the real-ear measurements.
Note:
Steps 1-7 are optional but good to do in order to get the most accurate RECD.
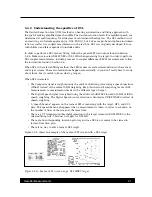
1. Press F1 from the Main Coupler screen (not the Target 2-cc screen) to enter the setup menu.
2. Press F4 — CAL MIC(S).
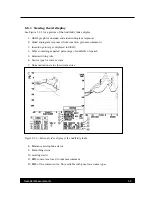
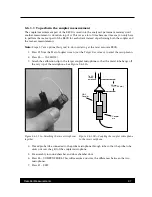
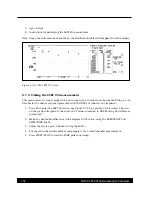
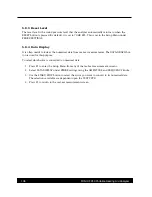
3. Attach the calibration clip to the larger coupler microphone so that the metal tube hangs off
the very tip of the microphone. See Figure 5.6.1.1A.
Coupler
mic
HA-2
Coupler
To 3A
insert
earphone
25 mm
(I.D. 1.93 mm)
Figure 5.6.1.1A—Attaching the two microphones Figure 5.6.1.1B—Coupling the coupler microphone
together
to the insert earphone.
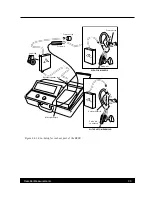
4. Thread probe tube connected to the probe microphone through tube so that the probe tube
sticks out over the grill of the coupler microphone.
5. Put assembly in sound chamber and close chamber door.
6. Press F6 – COMPEN PROBE. This will measure and store the differences between the two
microphones.
7. Press F1 – EXIT.


