perfect bevels everytime
Marking Out the Mount
1. Set the Border Width Gauge to the 60mm mark.
Place the mount under the hinged cutting rail and align it up against the Border Width Arm.
2. Draw a line from top to bottom using a 2H pencil.
3. Rotate the mount board 90
O
clockwise and draw the next line.
4. Repeat until you have marked all 4 sides (see fig.3).
Note: (i) Use a 2H pencil for fine light lines. Carry the line to the outer edges of the board
- this makes cutting double mounts easier.
(ii) You can also use the production stop - see “Cutting a Single Mat using Stops”.
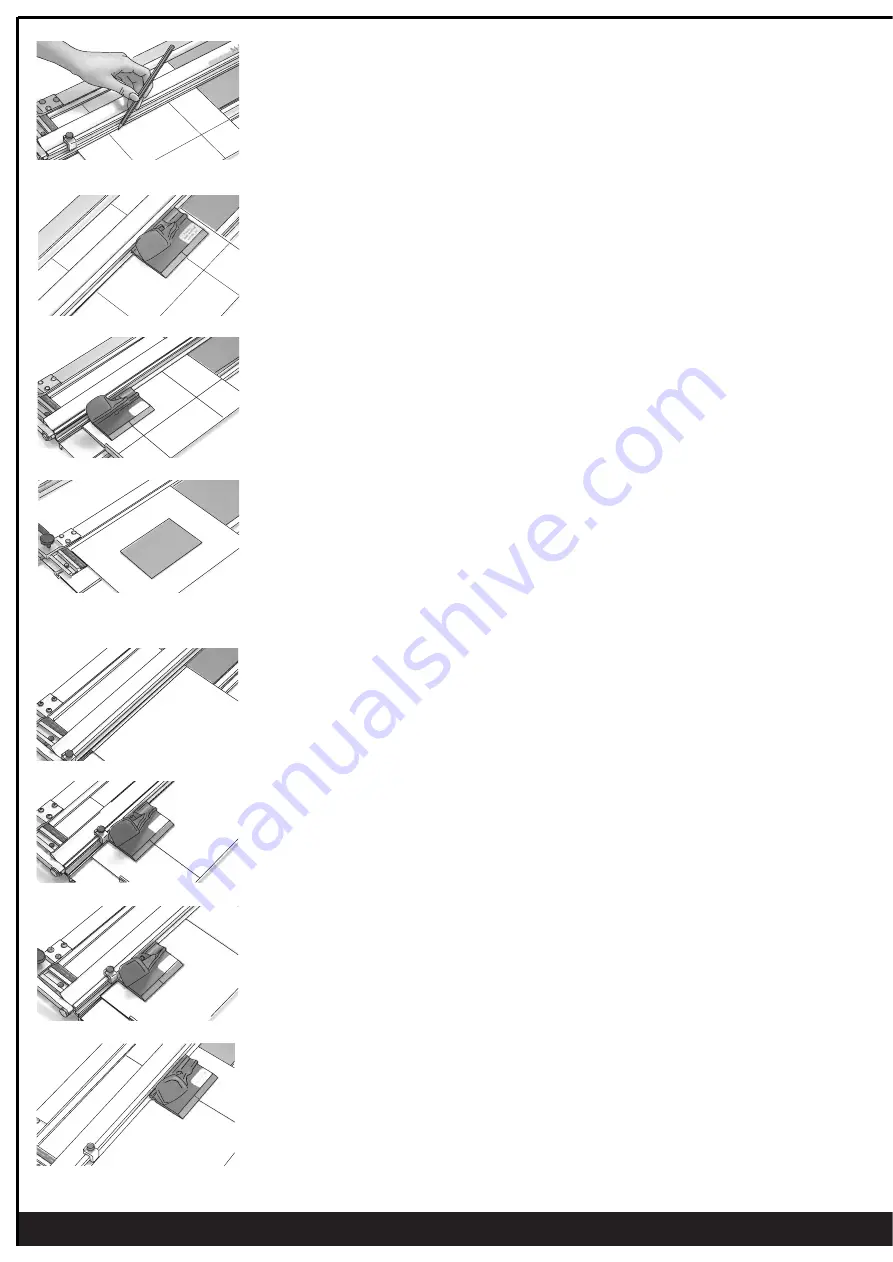
fig. 3 Use 2H Pencil
1. After marking out the mount, position the cutting head on the cutting rail (see fig. 6).
2. To begin cutting, align the start/stop silver line on the cutting head just before the start
(or bottom) border line.
Press the blade into the board and push the cutter away from you up towards
the finish line. With practice you will be able to eliminate any over cuts or undercuts
(see fig. 7). - See tip on overcuts and undercuts page 7.
3. Release the handle and the blade will retract from the mount board.
Rotate the mount anti-clockwise and repeat for the other three sides.
Cutting a Single Mount using “Pencil Lines”
Cutting a Single Mount using “Stops”
An alternative method for cutting a single mount is to use the production stop and the cut marks
as start/stop reference points. This is a faster and more convenient method.
1. Insert the mount, face down, under the cutting rail and position it against the Border Width
Arm as before. Rule a single line top to bottom on the mount (see fig. 9).
2. Move the production stop to the bottom of the cutting rail. Rotate the mount 90Þ so that the
single pencil line is now across the bottom ie. at the start position. Fit the cutting head to
the rail, and align the start/stop mark with the pencil line. Slide the production stop up until
it touches the bottom of the cutting head, and lock it into position (see fig. 10).
3. To start - Firstly Rotate the mount 180Þ so that the single pencil line is now at the top, ie.
finishing position (see fig. 11).
4. To begin cutting, position the cutting head down against the stop, push the blade into the
mount and cut up to the finish pencil line (see fig. 12).
Rotate the mount clockwise, cut from the stop position to the cut line, just made from the
previous cut.
fig. 6
fig. 7
fig. 8
fig. 12
fig. 11
fig. 10
fig. 9


