VG-450 User Manual
4
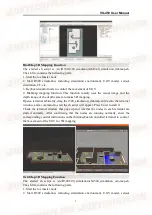
2. Turn on the remote controller and turn the SWB shift lever to the middle position to
switch the UGV to the remote control mode, so that the UGV can move to the test site
(*Because the point when the navigation control panel is activated is considered to be
the home point, it is recommended to restart the UGV after arriving at the test site)
3. Connect to the UGV’s WiFi, and use the Mission Planner ground station and
NoMachine to connect to the UGV
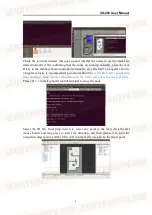
4. Click the flight plan in the upper left corner in the ground station to enter the
waypoint setting interface. And click any point on the map with the left mouse button
to set the waypoint. The attributes and settings of the waypoint will be displayed in
the upper left corner and the lower corner, which can be modified according to the
situation. After setting the waypoint, click the write waypoint on the right. (*After
completing the above steps, restart the onboard computer to obtain a new waypoint.)
5. Turn on the onboard computer power, connect to the UGV X86 computer through
NoMachine, and open the sh script folder on the desktop
6. Click the right mouse button in the folder, select Open in Terminal option to open a
terminal, and enter the following command to start waypoint planning and VFH
obstacle avoidance function
./r300_vfh.sh
7. In the Mission Planner ground station, select Action -> Mode (AUTO or GUIDED)
-> Set Mode to set the UGV to AUTO or GUIDED mode (* In AUTO mode, the UGV
will move according to the waypoint plan. In GUIDED mode, the UGV will move
according to the waypoint plan and has the VFH obstacle avoidance function)
2D Mapping
1. Press the power button of the UGV
2. Turn on the remote controller
3. Connect to the WiFi of the UGV, and start NoMachine to connect to the UGV's
onboard computer
4. Find the sh script folder of the UGV's onboard computer desktop in the NoMachine
interface
5. Click the right mouse button in the folder, select Open in Terminal option to open a
terminal, and enter the following command to start 2D mapping function
./r300_cartographer_slam.sh
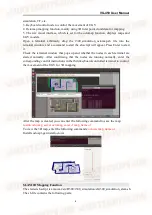
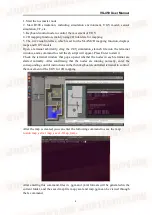
6. Under normal circumstances, each node starts normally, and you can see the map
displayed in rviz
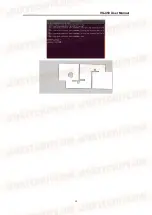
7. Use the remote controller to control the UGV to move. After the map of the area is
built, enter the following command to save the map
rosrun map_server map_saver -f map_name
*tip (map_name in the command is the name of the saved map-related file, and a pgm
and yaml format file will be generated. The file will be saved in the folder path of the
terminal where the command is entered)
3D Mapping
1. Press the power button of the UGV


