17
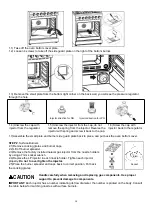
4.2)Use open wrench to remove the gas line from the injector holder. Replace the broil burner injector from the
orifice holder.
4.3)Assemble the bracket back to place.
Injector diameter for oven broil burners:
Model#
FFSGS6291-30
FFSGS6291-36
FFSGS6291-48
NG
1.38
1.38
1.38
LPG
0.94
0.94
0.94
IMPORTANT:
Keep the injectors removed from the range for future use.
STEP 5:
Air Shutter for Oven Bottom & Top Burner (Optional)
The air shutter for the oven burner may need adjustment, especially if the unit has been converted for use with LP
from NG. The approximate height of the flame at the oven burner is one inch (distinctive inner blue flame).
To determine if the air shutter of oven burners need to be adjusted:
Set the oven knob to 350°F position or broil and observe the flame color. If yellow flame can be seen, need to
increase the air shutter opening. If the flame is blue and lifting away from the burner, need to reduce the air shutter
opening.
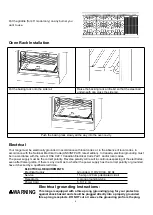
5.1)Turn off the oven and allow it to cool before adjusting the air shutter.
5.2)Disassemble the burners to access the air shutter.
5.3)To adjust the air shutter, loosen the lock screw, re-position the air shutter and tighten the lock screw.
5.4)Assemble the burners back to place.
5.5)Retest the burner. When the flame is a distinct blue color and burning steadily, the air shutter is adjusted
correctly.
STEP 6:
Gas valve (adjusting gas inlet orifice for surface burner)
After converting nozzle for different gas type, the gas inlet hole of surface burner needs to be adjusted.
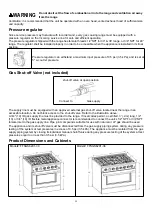
6.1)Remove control knobs.
6.2)Disassemble the control panel and hold it. Be careful not to damage the wiring connected to the temperature
gauge.
6.3)Take out the heat-isolating gasket (black silicon gasket).
6.4)Use screwdriver to adjust main burner bypass screw clockwise or anticlockwise until the flame is normal.
6.5)Place the silicon gasket and control panel back to place, tighten properly.
6.5)Put back knobs to the correct position.
STEP 7:
Reconnect Gas and Electrical Supply
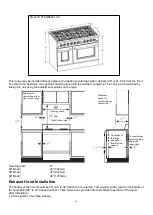
Leakage testing of the range shall be conducted according to the installation instructions provided with the range.
Before operating the range after the gas conversion, always check for leaks with a soapy water solution or other
acceptable method at gas connections installed between the gas inlet pipe of the range, gas regulator, and the
manual shut-off valve.
Use soapy solutions to check for leakage on all joints.

