


8
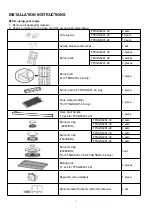
TOOLS NEEDED FOR INSTALLATION (not supplied with the range)
Screwdriver
Wrench
Socket wrench
Allen key
Tape measure
&Pencil
Protective
gloves
Hammer
Adjustable
wrench
Adjustable pliers
Drill
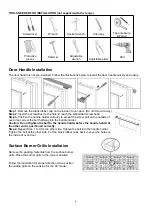
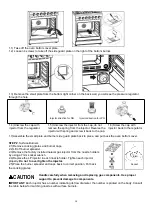
Door Handle Installation
The door handle is not pre-installed. Follow the illustrations below to install the door handle quickly and easily.
Step 1.
Remove the black rubber cap on the inside of oven door. (Do not throw it away).
Step 2.
Insert the screwdriver to the hole to reach the embedded screw head.
Step 3.
Position the handle holder correctly to accept the screw bolt on the outside of
oven door, screw the bolt half way into the handle holder.
Caution: Do not tighten the bolt to the handle holder before the handle holder of
the other end is positioned correctly.
Step 4.
Repeat Step 1 to 3 for the other side. Tighten the bolt into the handle holder.
Tighten the bolt at the other side. Put the black rubber caps back to cover the holes on
the inside of oven door.
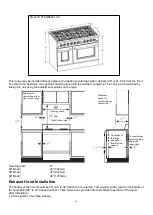
Surface Burner Grills Installation
Remove the packing materials from the surface burner
grills. Place the burner grills to the correct position.
Follow the illustration for proper direction when position
the middle grills on the cooktop for the 48” model.