


Thermal Imager Camera
Installation
9
When installing the ThermoView
®
infrared camera, check for any high-
intensity discharge lamps or heaters that may be in the field of view (either
background or reflected on a shiny target)! Reflected heat sources can
cause a sensor to give erroneous readings.
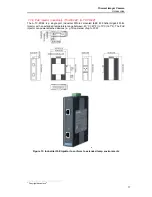
5.4. Geometry
The camera provides different lens models to accommodate a wide range of applications. Each
individual lens provides different thermal images (Field of View) and minimum detectable pixel
sizes (Instantaneous Field of View). The optical diagram below shows the principal graphical
representation for measuring distance over the field of view.
Figure 6: Field of View for the Camera
5.4.1. Spot size (IFOV) calculation of aperture angle for different lens types
It is important that the ThermoView® camera is mounted at a distance from the target, sufficient
to be able to “see” the entire area of interest. For this reason, the manufacturer provides a web-
based software tool, which allows the pixel size or Instantaneous Field of View (IFOV)
calculation for a given lens, based on a specific camera mounting distance. The web-based
spot size calculator also covers several other infrared temperature measurement devices and
will be found in the product specific section under the following web-link address:
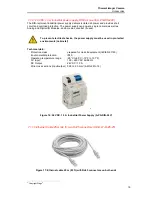
Figure 7: Picture extract of the ThermoView® Field of View Calculator
Minimum detectable spot size
(Instantaneous Field of View)
Thermal Image
(Field of View
)


