


22
By using the arrow keys and the Select button, move the focus onto the desired field;
Year/Month/Day Hour/Minute/Second and press the Select button.
Select a field you want to change by using the arrow buttons and press the Select button.
②
Date
Display
Type
Select Time Display Format among [Day/Month/Year] / [Month/Day/Year] / [Year/Month/Day].
(3) Time Zone
A) Time Zone
①
Select {Standard Time Zone}.
②
On the selection window, select the standard time zone you want to set.
B) Daylight Saving Time
①
By using the arrow keys and the Select button, select {Summer Time}.
②
On the selection window, select On/Off by using the arrow keys and the Select button.
※
For a weekly setting in the {Start Time} and {End Time} fields, set Day to 0.
※
After the Daylight Saving Time is selected, the existing data will be displayed
as “OLD_” in the search and log list.
(4) Auto Reboot
Auto Reboot is for system stability, rebooting itself regularly.
4
-
6
-
2
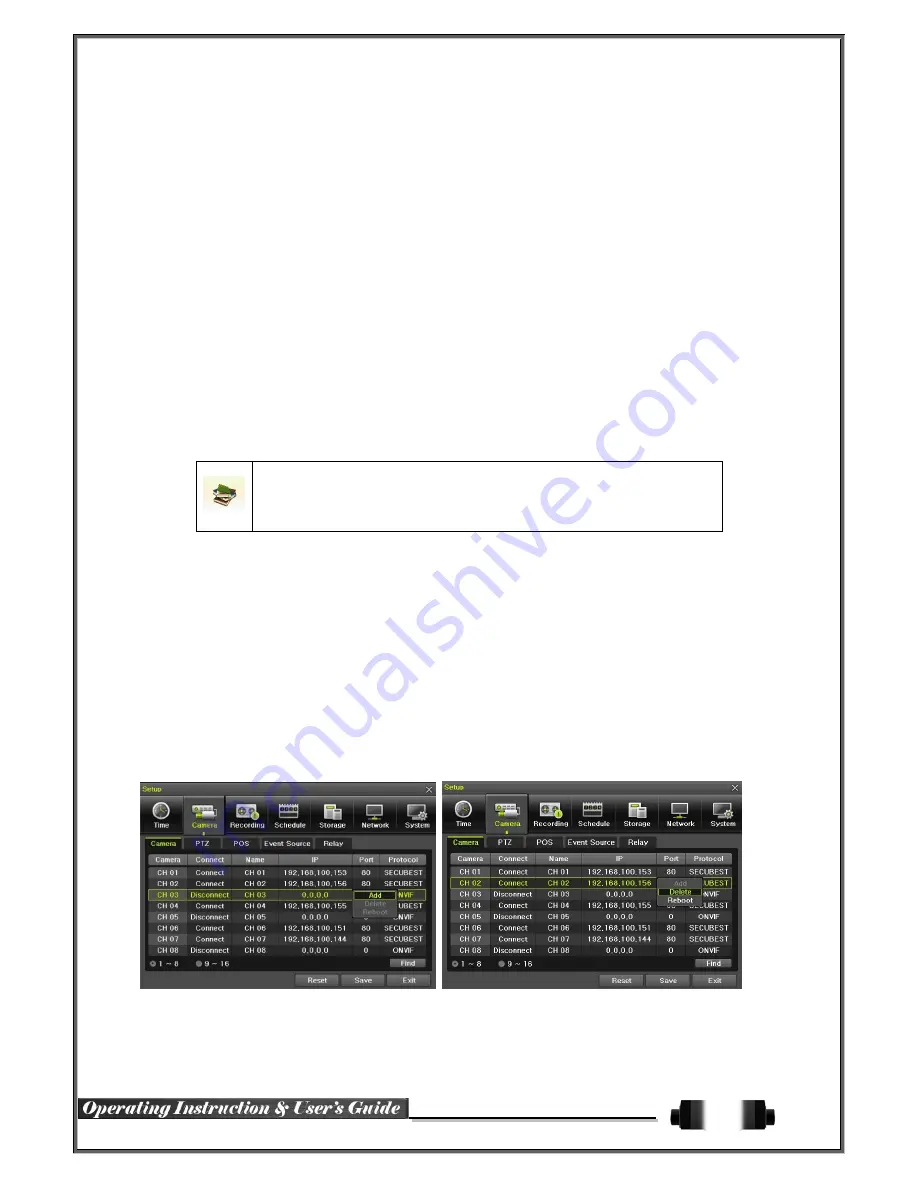
Camera
(1) Camera
①
Camera ADD & Delete
Camera
Up to 16 ONVIF supported IP Cameras can be connected.
IP Cameras can be ‘added’ to channels with the ‘Disconnect’.
“Connected” IP Cameras – after selection can be ‘Delete’ or ‘Reboot’, (Reboot – the NVR can reboot the IP
Camera).
When an IP Camera is ‘Added’, the user can input the IP camera’s IP, Port, ID, password, protocol in order to
connect. Please take careful note that if there is any mistake or ‘typo’ in any of the 4 Settings (Port, ID, PW,
Protocol), then connection will not be possible.


