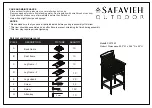
background image

18

• 

To tighten the waist straps:

 Feed the anchored end of the waist 

strap up through the buckle to form a loop 

A

. Pull the free end of 

the waist strap 

B

.

• 

To tighten the shoulder straps: 

Hold the adjuster and pull the 

shoulder strap down 

C

• 

Para apretar los cinturones de la cintura:

 Introducir el extremo 

fijo del cinturón de la cintura en la hebilla para formar una 
onda 

A

. Jalar el extremo libre del cinturón de la cintura 

B

.

• Para apretar los cinturones del hombro: sujetar el ajustador 

y jalar hacia  abajo el cinturón anterior del hombro 

C

• 

Pour serrer les courroies abdominales :

 Glisser une portion de 

l’extrémité fixe de la courroie abdominale vers le haut dans le 
passant de façon à former une boucle 

A

. Tirer sur l’extrémité 

libre de la courroie 

B

.

• 

Pour serrer les courroies d'épaule : 

 Tenir le régleur et tirer 

l’avant de la courroie d’épaule vers le bas 

C

Free End

Extremo libre

Extrémité libre

Anchored End

Extremo fijo 

Extrémité fixe

Adjuster

Ajustador

Régleur

TIGHTEN

APRETAR

SERRER

• 

To loosen the waist straps: 

Feed the free end of the waist

strap up through the buckle to form a loop 

A

. Enlarge the loop 

by pulling on the end of the loop toward the buckle. Pull the 
anchored end of the waist strap to shorten the free end of the 
waist strap 

B

.

• To loosen the shoulder straps: Lift the adjuster 

C

Note:

 After adjusting the restraint system to fit your child, make 

sure you pull on it to be sure it is securely fastened.

• 

Para desabrochar los cinturones de la cintura:

 Introducir el 

extremo libre del cinturón de la cintura en la hebilla para formar 
una onda 

A

. Agrandar la onda jalando el extremo de la onda 

hacia la hebilla. Jalar el extremo fijo del cinturón de seguridad 
para acortar el extremo libre del cinturón de la cintura 

B

.

• Para desabrochar los cinturones de los hombros: levantar

el ajustador 

C

Nota: 

después de ajustar el sistema de sujeción a la medida del 

niño, jalar del mismo para cerciorarse que está seguro.

• 

Pour desserrer les courroies abdominales :

 Glisser une portion 

de l’extrémité libre de la courroie abdominale dans le
passant de façon à former une boucle 

A

. Agrandir la boucle 

en tirant dessus vers le passant. Tirer sur l’extrémité fixe de la 
courroie abdominale pour raccourcir l’extrémité libre de la
courroie abdominale 

B

.

• Pour desserrer les courroies d’épaule : remonter le régleur 

C

Remarque 

: Après avoir réglé le système de retenue, tirer dessus 

pour s’assurer qu’il résiste bien.

Free End

Extremo libre

Extrémité libre

Anchored End

Extremo fijo 

Extrémité fixe

Adjuster

Ajustador

Régleur

LOOSEN

AFLOJAR

DESSERRER

2

3

Secure Child    Asegure al niño    Comment installer l'enfant

Summary of Contents for W3066

Page 1: ...W3066 W3066 www fisher price com...

Page 2: ...s que se puedan sentar derechos sin ayuda Siempre aseg rese de bloquear las ruedas No usar cerca de escalones Pr venir les blessures graves ou mortelles qui pourraient survenir si l enfant tombait ou...

Page 3: ...5V no incluidas Herramienta necesaria para el montaje desatornillador de cruz no incluida Las caracter sticas y decoraci n del producto pueden variar de los mostrados Si el juguete no funciona correct...

Page 4: ...Frames 2 armazones 2 structures Back Base Base trasera Base arri re Pad Almohadilla Coussin Seat Bottom Asiento Si ge Seat Back Respaldo Dossier du si ge Hinge Rod Varilla de bisagra Tige de support 2...

Page 5: ...sserrer toutes les vis l aide d un tournevis cruciforme Ne pas trop serrer les vis Shown Actual Size Se muestran a tama o real Dimensions r elles 8 x 3 4 1 9 cm Screws 8 Tornillo N 8 x 1 9 cm 8 Vis n...

Page 6: ...tico Anneaux en plastique Seat Bottom Tubes Tubos del asiento Tubes du si ge Plastic Rings Aros de pl stico Anneaux en plastique IMPORTANT Before assembly and each use inspect this product for damaged...

Page 7: ...rciorarse de que los orificios de tornillo de los tubos y de los aros de pl stico est n alineados Volver a ajustar los tornillos Aligner les trous des anneaux en plastique avec les tubes du si ge Ins...

Page 8: ...down Insert the hinge rod through the hinge on the seat back and seat bottom as shown Insert a 10 x 7 8 2 2 cm black screw into the hinge rod Tighten the screw Set the seat assembly aside for Assembl...

Page 9: ...do que el lado decorado quede hacia afuera Introducir la pata trasera de un armaz n en la base trasera Ajustar un sujetador de tornillo sobre el orificio de la base trasera tal como se muestra Introdu...

Page 10: ...ou may need to push the frames apart slightly to fit the seat bottom tubes into the seat height adjuster sockets Ajustar la unidad del asiento entre los dos armazones Introducir los tubos del asiento...

Page 11: ...ne vis noire n 10 de 2 2 cm dans la fixation pour vis jusque dans la base Serrer la vis R p ter ce proc d pour fixer l autre extr mit de la base l aide de la fixation pour vis et la vis noire n 10 de...

Page 12: ...fuerza partir de l arri re et de la partie inf rieure du si ge ins rer une vis n 8 de 1 9 cm dans chaque r gleur jusque dans l extr mit du tube du si ge Serrer les vis Cela peut demander une certaine...

Page 13: ...ad onto the seat back Coloque el bolsillo en el tope de la almohadilla sobre el respaldo Glisser le repli sur le haut du coussin sur le dossier Clips Sujetadores Pinces Fit the clips on the front edge...

Page 14: ...enganche el extremo de la correa de la entrepierna a la clavija Remarque Ne pas d tacher le syst me de retenue Il est plus facile de l attacher au produit ou de l en d tacher s il est boucl Placer le...

Page 15: ...orn Pillow Almohada de reci n nacido Oreiller pour nouveau n Shoulder Straps Correas de los hombros Courroies d paule Larger Baby From the front of the product insert the ends of the shoulder straps t...

Page 16: ...pueden desprender l quido corrosivo que puede provocar quemaduras o da ar el producto Para evitar el derrame de l quido corrosivo No mezclar nunca pilas nuevas con gastadas cambiarlas todas al mismo...

Page 17: ...sition the crotch belt between your child s legs Fasten both waist shoulder belts to each side of the crotch belt Make sure you hear a click on both sides Check to be sure the restraint system is secu...

Page 18: ...strap to shorten the free end of the waist strap B To loosen the shoulder straps Lift the adjuster C Note After adjusting the restraint system to fit your child make sure you pull on it to be sure it...

Page 19: ...tions of the restraint system out and then fit them back through the desired shoulder strap slots in the seat pad and in the seat back From behind the product attach the ends of the shoulder straps to...

Page 20: ...rmrest Reposabrazos Accoudoir Fit the base tray onto the seat armrests Push down until the base tray snaps into place Hint Before use thorougly wash all parts the trays that may contact food The base...

Page 21: ...base comme illustr Remarque Avant l utilisation nettoyer tous les l ments qui peuvent entrer en contact avec des aliments ou des boissons les plateaux Le plateau pour aliments ne va pas au micro onde...

Page 22: ...nique Retirer le jouet lectronique Slide the power mode switch to Short play rainforest sounds and music Long play rainforest sounds and music OFF Press the lizard button or turn the turtle to start t...

Page 23: ...r la patte des quatre roues jusqu ce qu un clic se fasse entendre POUR D VERROUILLER Lever la patte des quatre roues Prevent serious injury or death from falls or sliding out Always leave wheels locke...

Page 24: ...to be sure it is latched in position Para ajustar el ngulo del asiento Apretar el asa del respaldo y empujar el respaldo hacia adelante o jalarlo hacia atr s a la posici n deseada Empujar el respaldo...

Page 25: ...nto en una de las siete posiciones disponibles Remarque R gler la hauteur du si ge l une des sept positions 15 With the legs all the way open lower the seat to position 7 the lowest position Pull the...

Page 26: ...che la almohadilla del borde del frente del asiento Levante el tope de la almohadilla del respaldo Para reemplazar la almohadilla refi rase a los pasos de ensamblaje 14 al 21 IMPORTANTE No usar este p...

Page 27: ...del usuario de usar el equipo Este dispositivo cumple con la Parte 15 del reglamento FCC El uso est sujeto a las dos condiciones siguientes 1 Este dispositivo no debe causar interferencia da ina y 2 e...

Page 28: ...05 51 00 Ext 5205 01 800 463 59 89 CANADA Mattel Canada Inc 6155 Freemont Blvd Mississauga Ontario L5R 3W2 M XICO Importado y distribuido por Mattel de M xico S A de C V Insurgentes Sur 3579 Torre 3 O...

Reviews: