FVA-IP Camera
Installation and Operation Manual
Revision Date: June, 2019
P/N 06-523 (Rev. 5)
21
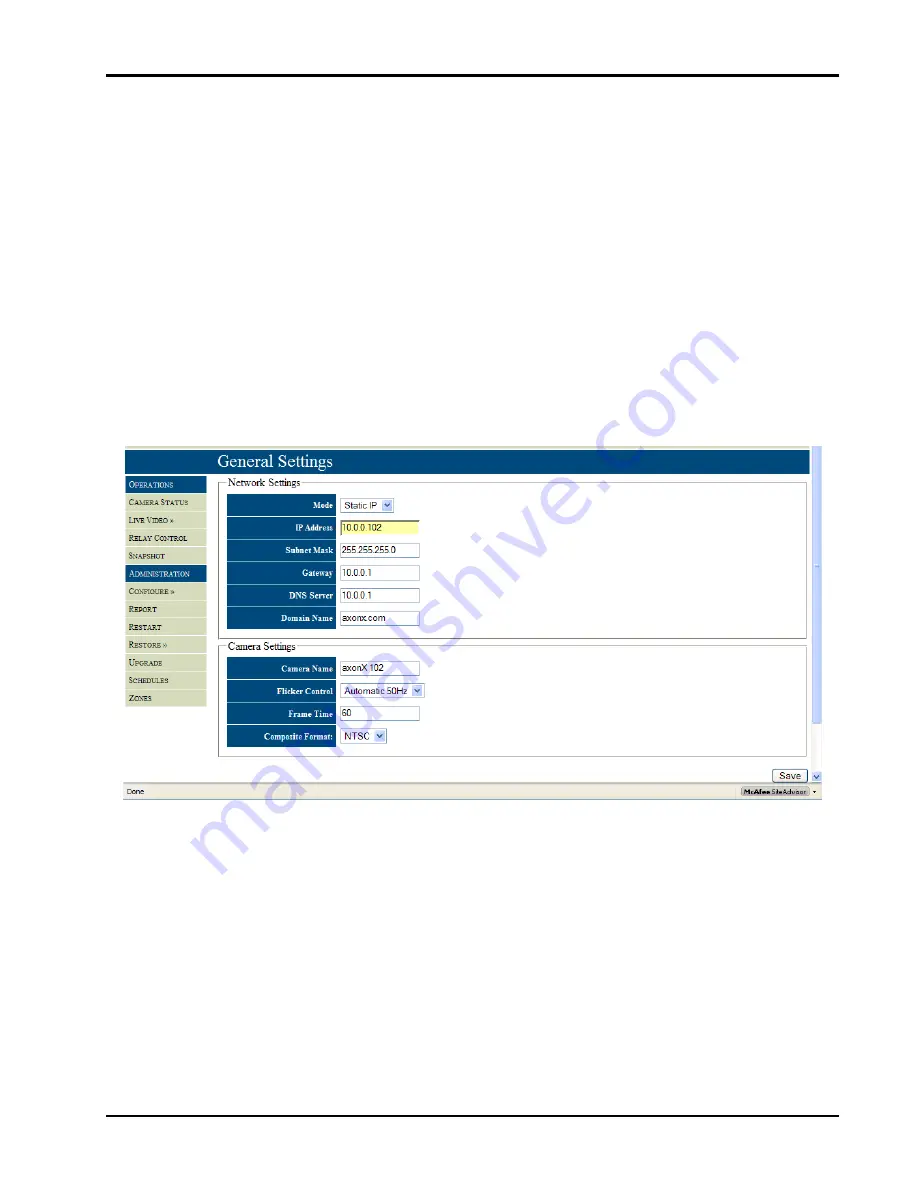
The
General Setting
is a sub‐menu found in the
Administration Section
under the
Configure
selection, Figure 17. This
is where the mode (static IP or Dynamic Host Configuration Protocol (DHCP)) of the camera is set. If the camera will be
on a static network the IP address, Subnet Mask, Gateway, DNS server, and domain name must be filled out. If DHCP is
selected the fixed IP settings can be left in their default setting. The IP cameras can work on both a fixed and DHCP
network. However, due to the fact that any physical location will be tied to the IP address, care should be taken in
setting up a DHCP network so the physical location can be determined and the camera location can be identified by the
IP address. When using a DHCP configuration the best way to ensure a camera gets the same address is to fix the given
IP address to the cameras MAC address and give the camera an appropriate name. Contact the IT personnel to assist in
configuring the network setup.
After the network setup comes the camera setting, which define the camera name, flicker control, frame time, and
video format (NTSC or PAL). The camera can be given a name of up to 24 characters. It is best to name the camera
after the physical location to expedite response to the event scene.
The flicker control is used to set the frequency and mode of the flicker control. The frame time is used to increase or
decrease the rate at which images are capture by the camera. A value of 60 represents a frame rate of approximately
16 fps (1000/60); at 30, the frame rate would increase to 32 fps (1000/30). The video format should be set depending
on the standard in use in the country of installation. For North America it is NTSC and PAL for European countries.
Fig 17 – General settings used to configure the Network settings and Camera settings.
Once proper operation of the camera is confirmed and the appropriate communication scheme (static IP or DHCP) is
selected, all further steps for camera configuration may be completed after the camera is physically installed.
However, further set‐up may be continued at this point.
Summary of Contents for FVA-IP
Page 40: ...Installation and Operation Manual FVA IP Camera 36 P N 06 523 Rev 6 Revision Date June 2019...
Page 41: ...FVA IP Camera Installation and Operation Manual Revision Date June 2019 P N 06 523 Rev 5 37...
Page 42: ...Installation and Operation Manual FVA IP Camera 38 P N 06 523 Rev 6 Revision Date June 2019...
Page 48: ...Installation and Operation Manual FVA IP Camera 44 P N 06 523 Rev 6 Revision Date June 2019...
Page 49: ...FVA IP Camera Installation and Operation Manual Revision Date June 2019 P N 06 523 Rev 5 45...
Page 50: ...Installation and Operation Manual FVA IP Camera 46 P N 06 523 Rev 6 Revision Date June 2019...
Page 51: ...FVA IP Camera Installation and Operation Manual Revision Date June 2019 P N 06 523 Rev 5 47...
Page 52: ...Installation and Operation Manual FVA IP Camera 48 P N 06 523 Rev 6 Revision Date June 2019...


