


www.fieldpiece.com www.fieldpiece.com www.fieldpiece.com www.fieldpiece.com www.fieldpiece.com www.fieldpiece.com www.fieldpiece.com www.fieldpiece.com www.fieldpiece.com www.fieldpiece.com www.fieldpiece.com
1 8
1 9
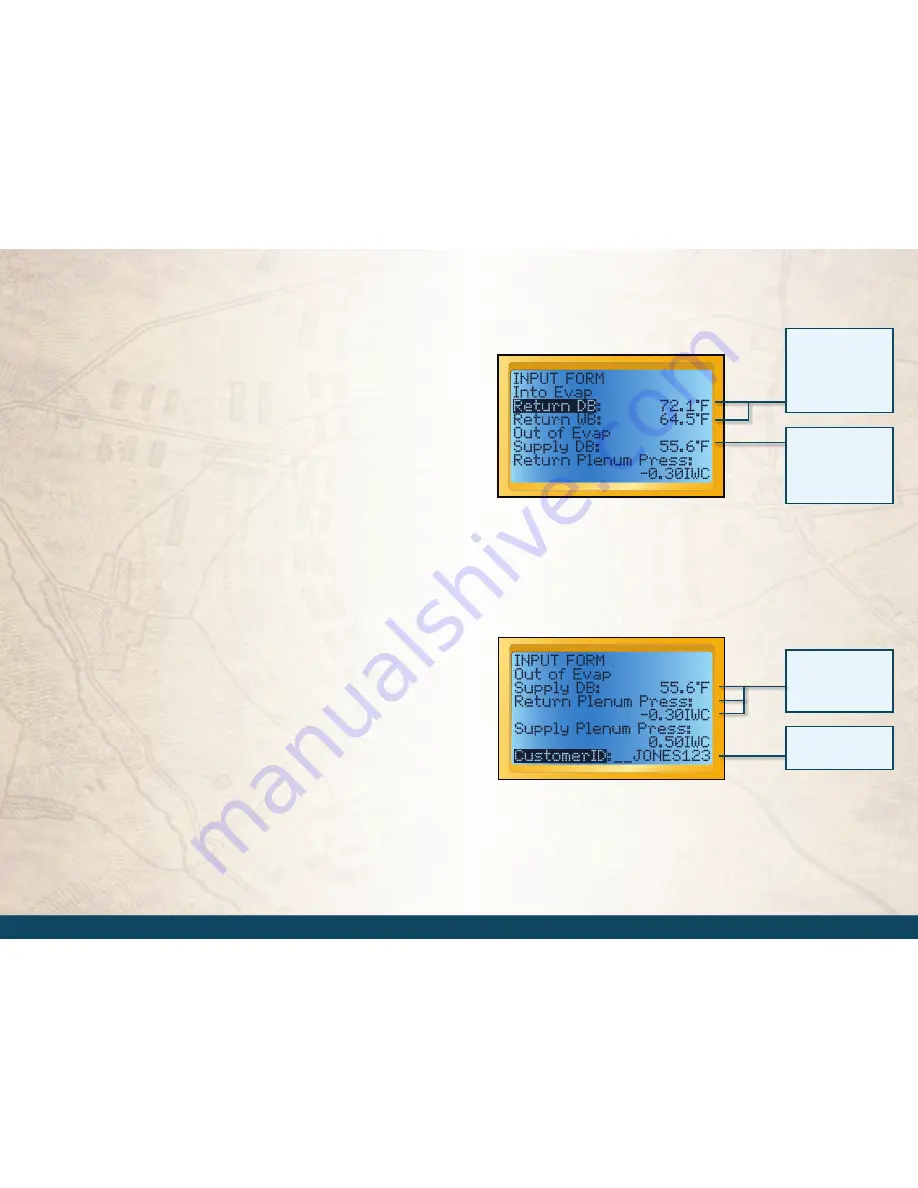
1.2 Target Evap Exit Temp INPUT FORM
Inputs
Into Evap Return DB
(Into Evaporator Return Dry Bulb)
Air tempera-
ture going into the evaporator. Take measurements as close to the air
handler as possible. If the filter is directly before the air handler clip the
included dry bulb thermocouple (ATA1) onto the filter. If the filter is
not just before the air handler drill small holes in the return plenum and
take measurements. Seal any holes before leaving the job site. Suggested
Accessories: ATH4, ATA1.
Into Evap Return WB
(Into Evaporator Return Wet Bulb) Use the wet
bulb thermocouple (ATWB1) and take measurement at the same place
as the Into Evap Return DB. Suggested Accessories: ATH4, ATWB1.
Out of Evap Supply DB
(Out of Evaporator Supply Dry Bulb) Air tem-
perature coming out of the evaporator. Punch or drill a small hole in
the supply plenum and measure in the center of the plenum. Suggested
Accessories: ATH4, ATB1.
Return Plenum Press
(Return Plenum Pressure) Optional. Static pres-
sure in the return plenum before the evaporator. Suggested Accessories:
ADMN2, ASP2.
Supply Plenum Press
(Supply Plenum Pressure) Optional. Static pres-
sure in the supply plenum after the evaporator. Suggested Accessories:
ADMN2, ASP2.
Customer ID
Used in the file name to save, recall and download tests. Use
arrow buttons to "type" in each character.
Units
Select English or Metric units.
Press enter to see a list of
saved Customer IDs or use
arrows to enter a new ID.
Target Evaporator Exit Temperature Test INPUT FORM filled.
Target Evaporator Exit Temperature Test INPUT FORM
continued from above.
Connect Accessory Head.
Scroll to highlight desired
parameter. Press enter to
start taking measurement.
Press enter again to lock
it in.
Take measurements using
Fieldpiece Accessory Heads
to automatically input
onto the INPUT FORM.
Measurements can also be
taken wirelessly. See page
12 for wireless instructions.
You can also enter
measurements manually
with the arrow buttons.
The negative sign is found
between 9 and 0.


