background image

1. Set your gateway to permit pairing. (Add new device). 

2. Power on the Water Leak Sensor.  
Use a pin to press the reset button in the Water Leak Sensor for two seconds until the LED rapidly 
flashes yellow.  
The sensor will join the gateway’s network.  
The LED light will turn solid for a while when it has successfully added. 

3. Now you can see the Water Leak Sensor under "Security" in the mobile App. 

3.3 Mounting instructions 

1. Make sure that the surface is clean to ensure good bonding. 
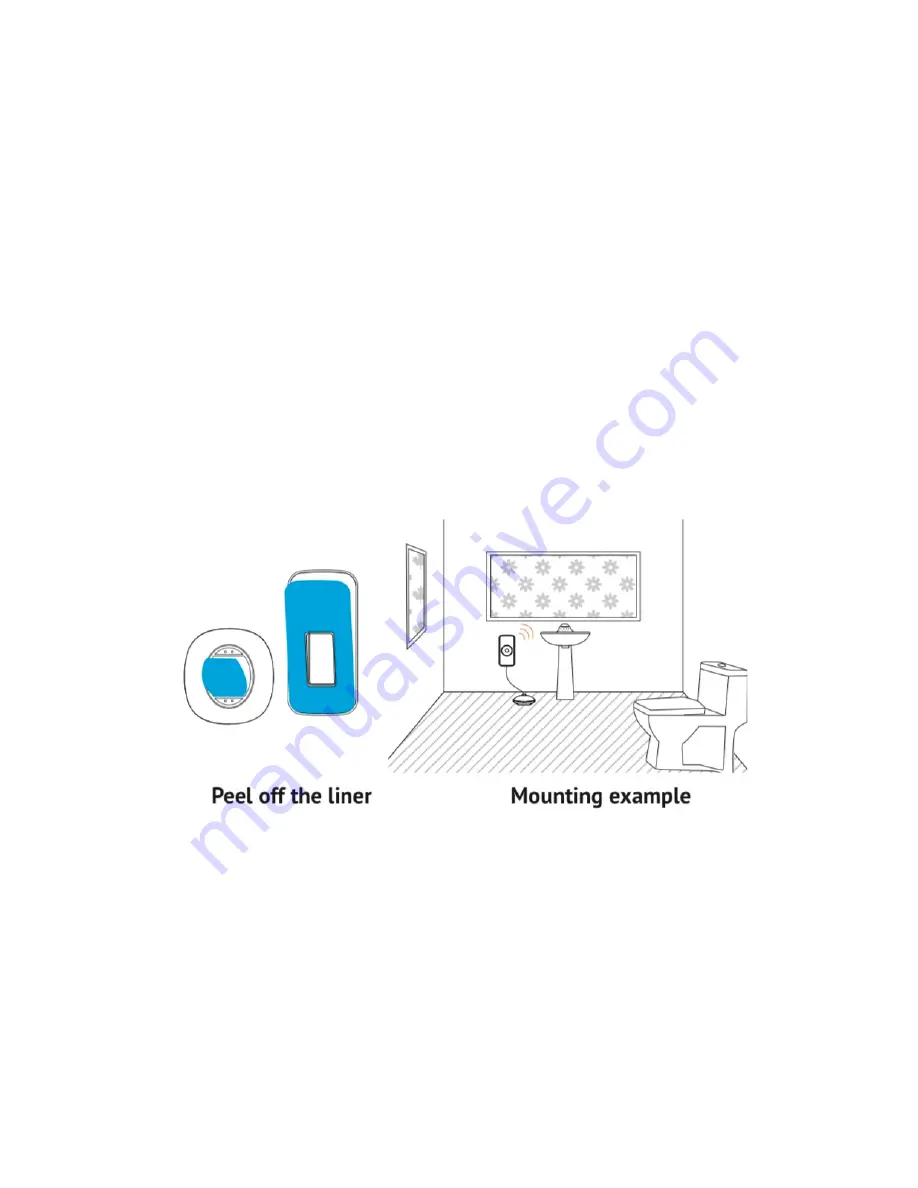
2. Peel off the liner on the double-sided tape and place the bracket to the wall. 
3. Mount the sensor to the bracket. 

Please refer to the mounting example below. 

!


Refer to FCL TRAINING MANUAL - PRODUCT SPECS for Technical specifications. 

Summary of Contents for FSAC201

Page 1: ...de for Installation of Smart Home Devices Home Automation All in One Hassle Free Installation Multiple Control Devices Property of FIBERSERV CARIBBEAN LIMITED 868 731 8097 Info fiberservcl com www fiberservcl com ...

Page 2: ...atform for your smart home system It allows you to add up to 50 Smart Devices into the system It connects to the Internet to be controlled by the mobile app 2 Get to know your device 2 1 FSSEG X3 at a glance Models are available in these sockets 2 2 Buttons Z button Permits device pairing Resets the ZigBee network ...

Page 3: ...om Google play store or Apple App store Note Refer to Manual 2 User Guide for Installation of Fiberserv Mobile App Step 4 Create a new account Step 5 Add devices to the smart gateway Tap the Adding new devices of the mobile app to allow other ZigBee devices to join the network Tip You can also press the Z button for two seconds until the LED indicator turns solid blue Then the Smart Gateway will a...

Page 4: ...o allow other ZigBee devices to join its network Tip You could also press the Z button until the blue LED indicator turns solid blue to allow ZigBee devices to join the network then set the ZigBee devices into pairing mode following the relevant user guides Q6 How can I use this system locally when the Internet is not available A6 As long as your phone is connected to the same Wi Fi as the Smart G...

Page 5: ...2 Reset button Press and hold the reset button for ten seconds until the LED indicator flashes green three times to reset to default factory setting 2 3 LED Indicator The LED indicator status is as below 3 Get started 3 1 To get started you will need FSSEG X3 Smart Gateway FSDWS312 Door Window Sensor The Fiberserv mobile app LED Status What it means Red LED flashing three times Device has not join...

Page 6: ...eway s network 2 Select Add new devices in the app menu Tip You can also press the Z button of the gateway for two seconds until the LED indicator turns solid blue 3 The sensor will join the gateway s network automatically The LED indicator will flash green for three times when it has successfully joined 4 Now you can see the Door Window Sensor under the Security Tab in the mobile app ...

Page 7: ...oor window Be sure that the two sensor parts should be within 1 8 of each other when the door window is closed Please refer to the mounting example below 4 FAQ Q1 How can I return the device to factory default settings A1 Press and hold the reset button until the LED flashes red three times Refer to FCL TRAINING MANUAL PRODUCT SPECS for Technical specifications ...

Page 8: ...tects movement in your property It allows you to receive notifications from the mobile app when movement is detected This can be used to trigger an alarm or a light etc 2 Get to know your device 2 1 FSPIR303 at a glance 2 2 Reset button Set the device to join the ZigBee network Reset this device to factory default settings ...

Page 9: ...ing the device is in its warm up state After 30 seconds the LED will turn off and warm up complete Tip If the there is no battery inside please install a CR123A battery Step 2 Select Add new devices in the menu of the app LED Status What it means Green LED flashes The device is prepared to join a network when you press and hold the reset button for two seconds Green LED flashes six times The devic...

Page 10: ...system The LED will turn solid for a while when pairing is successful Ensure it is successful added by checking the app Step 4 Install the device Note The position of the device effects the range and performance of the sensor Please see sensing range 2 4 and 2 5 Option 1 Please ensure all surfaces are clean dry flat and the temperature is over 10c before attempting to place the devices or the adhe...

Page 11: ...acket Your motion sensor is now ready for use 4 FAQ Q1 How can I return the device to factory default settings A1 Use a pin key tool to press and hold the reset button for five seconds until the LED flashes six times Refer to FCL TRAINING MANUAL PRODUCT SPECS for Technical specifications ...

Page 12: ...ed IP Camera Quick Start Guide 1 Introduction The IP Camera allows you to monitor your home anywhere using your mobile phone It is designed with a high definition processing chip that gives high quality fast loading images day and night ...

Page 13: ... the back of the IP camera you can also manually input the device ID under the QR code then tap Next 4 For Android the mobile phone will now connect to the IP camera s Wi Fi hotspot automatically For iOS go to Settings and choose the IP camera s Wi Fi and go back to the app 5 From a list of available Wi Fi networks choose a network and enter the password on the next screen to connect the IP camera...

Page 14: ...its temperature Set an on off schedule 2 Get started 2 1 To get started you will need FSSEG X3 Smart Gateway FSLED622 CCT Tunable LED Bulb The Fiberserv mobile app Then follow the steps below Step 1 Turn OFF the light switch Step 2 Fit the LED622 LED Bulb into the light or lamp socket Step 3 Turn ON the switch and check if the LED622 LED Bulb flashes twice if so follow the below steps otherwise pl...

Page 15: ...p Turn ON OFF Adjust the adjust brightness Adjust the colour and temperature 3 FAQ Q1 How can I return this device to default factory settings A1 Toggle the power to the LED622 LED bulb off on off on off on off on off on off on six on and six off in slow succession The LED will flash twice if it successfully returns to the factory default settings Q2 Can I use a dimmer switch to control this LED62...

Page 16: ...roduction The FSSLC603 ZigBee Dimmer Switch is designed to control the following features of a CCT Tunable LED bulb Turn on off the LED bulb Adjust the brightness of the LED bulb Adjust the colour and temperature of the LED bulb 2 Get to know your device 2 1 FSSLC603 at a glance ...

Page 17: ...stment 3 Get started To get started you will need A SEG X3 Smart Gateway A LED622 ZigBee CCT Tunable LED bulb A SLC603 ZigBee Dimmer Switch The Fiberserv mobile app Then follow the steps below Step 1 Install the batteries Remove the device from its back plates as described previously fit the batteries and re assemble Step 2 Check the switch status Press the rotary button and check if the LED indic...

Page 18: ...ocess 3 Press and hold the reset button of the Dimmer Switch for three seconds until green LED flashes three times 4 After successful pairing the LED bulb will stop flashing and the LED indicator of the Dimmer Switch will flash three times You are now able to control the LED bulb using the Dimmer Switch 4 FAQ Q1 How can I return this device to default factory settings A1 Please use a pin key tool ...

Page 19: ...eaters fans window A Cs etc Controls your home devices on off globally via the mobile app 2 Get to know your device 2 1 FSWSP404 at a glance Reset button Reset Press and hold the Reset button for ten seconds until the LED indicator flashes three times to restore the smart plug to default factory settings Pair mode Press and hold the Reset button for about three seconds until the LED indicator flas...

Page 20: ...g 1 Plug your appliance into the smart plug s socket so you can remotely switch it on off 2 Check real time energy usage via your mobile App Refer to FCL TRAINING MANUAL PRODUCT SPECS for Technical specifications Safety Notice WARNING Failure to follow these safety notices could result in fire electric shock other injuries or damage to the Smart Plug and other property Read all the safety notices ...

Page 21: ...ch can be determined by turning the equipment off and on the user is encouraged to try to correct the interference by one or more of the following measures Reorient or relocate the receiving antenna Increase the separation between the equipment and receiver Connect the equipment into an outlet on a circuit different from that to which the receiver is connected Consult the dealer or an experienced ...

Page 22: ... devices either at one time or individually For e g to control CCT Tunable LED bulbs the Remote Control can be used to Turn the LED bulbs ON OFF together or individually Individually adjust the brightness of a CCT tunable LED bulb Individually adjust the color and temperature of a CCT tunable LED bulb 2 Get to know your device 2 1 FSRC204 at a glance ...

Page 23: ...______________________________________________________________________ 2 2 Buttons and Switch All ON and all OFF button Turn on and off all the paired devices such as LED bulbs smart plugs and power relays ...

Page 24: ...ightness of the corresponding light Only when light can support this function Color temperature adjustment button Adjust the color temperature of the corresponding light Only when light can support this function Tip operational details will be described below 2 2 Switch Lock Switch Set the device to be unable to bind with other devices 2 4 Micro USB The micro USB is used to charge the battery of t...

Page 25: ... ...

Page 26: ...tep 1 Check the FSRC204 status Press any button to check if the main LED indicator flashes red for three times Tip if not please return it to default factory settings by using a pin key tool to press and hold the reset button for ten seconds until the LED light flashes twice The main LED indicator should flash fast around ten times Step 2 Select Add new devices in the menu of the app ...

Page 27: ...e main LED indicator flashes red three times means it hasn t added into the gateway You will need to repeat from step 2 Step 5 Pair with 1 4 CCT Tunable LED bulb LED622 Note please make sure the LED622 is also added into the network of the gateway and can be controlled by the mobile app before proceed 1 Make sure the LED bulbs that want to bind with this remote control are powered on 2 Go to the A...

Page 28: ... Lighting Link profile If you have a ZigBee Lighting Link version CCT tunable LED bulb please follow the steps below to use this device to bind them together Note all devices need to be returned to factory default settings before you continue Step 1 place the remote control near to the LED bulb press and hold one of the individual buttons for about three seconds until the LED flashes green three t...

Page 29: ...a glance 2 2 Reset button Join the ZigBee gateway Press and hold the reset button for two seconds until the LED indicator rapidly flashes yellow to join the gateway Reset Press and hold the reset button for five seconds until the LED indicator flashes yellow six times to reset the sensor to default factory setting Battery pull tab Power on Water Leak Sensor Pull out the battery pull tab to power o...

Page 30: ...ight will turn solid for a while when it has successfully added 3 Now you can see the Water Leak Sensor under Security in the mobile App 3 3 Mounting instructions 1 Make sure that the surface is clean to ensure good bonding 2 Peel off the liner on the double sided tape and place the bracket to the wall 3 Mount the sensor to the bracket Please refer to the mounting example below Refer to FCL TRAINI...

Page 31: ...Quick Start Guide 1 Introduction The FSSD324 ZigBee smoke detector is integrated with an ultra low power ZigBee wireless module It is a warning device that allows you to detect the presence of smoke in real time 2 Get to know your device 2 1 FSSD324 at a glance ...

Page 32: ...tor The Fiberserv mobile app Then follow the steps below Step 1 Remove the pull tab to power on the device Tip If the there is no battery inside please install a CR123A battery into it Step 2 Select Add new devices in the menu of the app LED Status What it means Alarm sound Red LED flashes quickly 1 Testing 2 Alarm Rapid beeps Red LED flashes every 40 seconds 1 Lower power mode 2 Fault Beeps every...

Page 33: ...l the LED flashes green to add it to the system The LED will turn solid for a while if pairing is successful Ensure it is successful added by checking the app Step 4 Install the device The bracket should be affixed using screws or double side tape Please ensure all surface are clean dry flat and the temperature is over 10c before attempting to place the devices or the adhesive will not be fully ef...

Page 34: ...rotate the smoke detector main body onto the bracket 4 FAQ Q1 How can I return the device to factory default settings A1 Use a pin key tool to press and hold the reset button for five seconds until the LED flashes six times Refer to FCL TRAINING MANUAL PRODUCT SPECS for Technical specifications ...

Page 35: ...nds wireless transmission distance The gas detector adopts high stability semi conductor gas sensor with little sensitivity drift 2 Get to know your device 2 1 FSGD334 at a glance Reset button Reset Press and hold the reset button for five seconds until the LED indicator flashes green six times to reset to default factory setting Test button Test Press the test button to enter test mode The LED in...

Page 36: ...ork automatically The LED light will be off and then light up in green again indicating the gas detector has successfully joined the gateway s network 4 Now you can see the gas detector under Security in the mobile App 3 3 Mounting instructions Before installation please confirm whether the gas density is heavier or lighter than the air If the gas is heavier than the air such as LPG etc install at...

Page 37: ... Refer to FCL TRAINING MANUAL PRODUCT SPECS for Technical specifications ...

Page 38: ...electrochemical sensor that has a high stability and little sensitivity drift There is also an alarm siren and flashing LED 2 Get to know your device 2 1 FSCMD344 at a glance Reset button Join the ZigBee gateway Press and hold the reset button for two seconds until the LED indicator rapidly flashes yellow to join the gateway Reset Press and hold the reset button for five seconds until the LED indi...

Page 39: ...shes in yellow and it will join the gateway s network The LED light will become steady when it has successfully joined 4 Now you can see the CO Detector under Security in the mobile App 3 3 Mounting instructions To increase safety factors in single floor house it is suggest to install at least one sensor in each bedroom Please install the sensor at least 6m away from chimney or gas fixture To incr...

Page 40: ...he liner of the double sided tape on the bracket and place the bracket to where you want to place it 3 Screw the CO detector into the bracket Refer to FCL TRAINING MANUAL PRODUCT SPECS for Technical specifications ...

Page 41: ...nal and sends real time alarm signal to the siren 2 Get to know your device 2 1 FSSIR216 at a glance Reset button Reset Press and hold the reset button for five seconds until the LED indicator flashes green six times to reset the smart siren to default factory setting 3 Get started 3 1 To get started you will need FSSEG X3 Smart Gateway FSSIR216 Smart Siren The Fiberserv mobile app 3 2 Connect to ...

Page 42: ...cally The LED indicator on the siren will light up green when it has successfully joined 4 Now you will be able to see the siren under Security in the mobile App 3 3 Mounting instructions Please install the siren on a flat surface in a highly visible position for maximum deterrence against potential intruders ...

Page 43: ... Refer to FCL TRAINING MANUAL PRODUCT SPECS for Technical specifications ...

Page 44: ... Conditioner Control converts control commands sent using a ZigBee signal into IR Infra Red signal to control your AC system It allows you to control the system mode temperature fan speed ventilation and swing of the air conditioner remotely from the mobile app on your mobile phone 2 Get to know your device 2 1 FSAC201 at a glance ...

Page 45: ...on Switch to the previous option Enter the Brand code selection mode Next button Switch to the next option Enter the Brand code selection mode Reset button Set the device to factory setting 2 3 IR Transmitters Display IR Transmitters The IR transmitters are used to communicate with the air conditioner s IR receiver normally sent by the AC units remote control Display ...

Page 46: ...Step 1 Insert the AC201 Split AC Control into a power socket facing your air conditioner that you would like to connect to See the diagram below to guide you in selecting a suitable position in the range of the grey bars Wait for the LED indicator to turn solid red Tip If the LED indicator is not in solid red then please press and hold the reset button for about ten seconds until the display shows...

Page 47: ...ll add into the gateway the LED indicator will turn orange when pairing is successful Please check the App Comfort tab to ensure that it has paired with the system Step 4 Now pair your AC201 with your air conditioner by pressing Pair After pairing with your AC unit the interface will look like this To control your AC unit Tap and the interface below will open ...

Page 48: ... Refer to FCL TRAINING MANUAL PRODUCT SPECS for Technical specifications ...

Page 49: ...ZigBee Thermostat is designed to work with the ZigBee gateway so that you could control your Thermostat remotely It can control Cooling one and two stages Y1 Y2 Heating one and two stages W1 W2 Heat pump with auxiliary and emergency heat Fan G Power C RH RC 2 Get to know your device 2 1 FSPCT503 at a glance ...

Page 50: ...s Adjust temperature Home button Switch between home screen and date time screen Away button Switch between home screen and away screen Hold button Enter Permanent hold Tip operational details will be described below 2 3 LED Indicator The LED indicator status is as below ...

Page 51: ...ould be on off automatically 2 5 Display 3 Get started To get started you will need FSSEG X3 Smart Gateway FSPCT503 Z Thermostat The Fiberserv mobile app Then follow the steps below Step 1 Install the FSPCT503 Thermostat Please follow the Installation Guide on page 59 to install this device ...

Page 52: ...evices in the menu of the app Tip for this step you could also press the Z button of the gateway for two seconds until the LED indicator turn solid blue Step 4 The Thermostat will add into the gateway system The LED indicator will be off when pairing is successful Please check the app to ensure that it is added to the system ...

Page 53: ... Refer to FCL TRAINING MANUAL PRODUCT SPECS for Technical specifications ...

Page 54: ... ...

Page 55: ...This protects yourself and your equipment Turn off the power at the breaker box or switch that controls your heating cooling system Please check that your system is off Step 2 Remove the old thermostat s cover Some covers pop off while others need to be unscrewed Step 3 Check your system ...

Page 56: ...res see if there s C wire If you have the C wire skip this step 5 and go to step 6 if you don t have the C wire continue with step 5 The C wire provides power to the smart thermostat If you don t have a C wire in your old system you need to install the wiring module to use the exiting wires to power your thermostat 1 Find the control board of your HVAC system Use the tags provided to label the wir...

Page 57: ...G wire you can connect the Y wire to S terminal G wire to C terminal then change the label of the Y wire to the S wire the G wire to the C wire Take a picture of your wires with new labels to help you remember 3 Generally the control board will have R G Y W C terminal connect the pre wired side of the wiring module 5 terminals to the corresponding terminals ...

Page 58: ...n the base If you have installed a wiring module in step 5 use the picture to help you remember the name of wires Take a picture of the wires when you are done to help you remember You will be asked for the wiring configuration in the setup wizard Step 9 Switch the DIP switch Switch the DIP switch in the back of the thermostat to RC if you have connected both RC wire and RH wire to the wall plate ...

Page 59: ...the wiring diagrams for the common HVAC equipment Remove the jumper for RC or RH switch the DIP switch in the back of the thermostat to RC if you have connected both RC wire and RH wire to the wall plate otherwise switch it to the RC RH side ...

Page 60: ... RH wire to the wall plate otherwise switch it to the RC RH side Remove the jumper for RC or RH switch the DIP switch in the back of the thermostat to RC if you have connected both RC wire and RH wire to the wall plate otherwise switch it to the RC RH side Refer to FCL TRAINING MANUAL PRODUCT SPECS for Technical specifications ...

Reviews: