3.
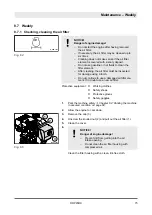
Clean the area around the bleeding screw (1) and filling/drain
plug (2).
4.
Tilt the machine slightly towards the oil drain side and secure
it properly.
5.
Unscrew the bleeding screw.
6.
Unscrew the filling/drain plug and collect any oil running out.
7.
Tilt the machine to the opposite side and secure it properly.
NOTICE!
Components may get damaged!
Do not use low-ash engine oils for the exciter shaft
housing.
8.
Fill in new oil.
9.
Stand the machine horizontally and check the oil level.
ð
Nominal value:
Bottom edge of filling/drain bore.
10.
Clean the bleed screw and filling/drain plug and screw them
in with a low-strength sealing agent (e.g. spare parts number:
DL 009 700 16).
11.
Dispose of oil in line with environmental regulations.
1
2
B-695-0179
Fig. 96
B-695-0181
Fig. 97
B-695-0180
Fig. 98
Maintenance – Annually / every 250 operating hours
DRP45DX
89
Summary of Contents for DYNAPAX DRP45DX
Page 6: ...Table of contents DRP45DX 6...
Page 7: ...1 Introduction Introduction DRP45DX 7...
Page 11: ...2 Technical data Technical data DRP45DX 11...
Page 15: ...3 Concerning your safety Concerning your safety DRP45DX 15...
Page 41: ...4 Indicators and control elements Indicators and control elements DRP45DX 41...
Page 47: ...5 Checks prior to start up Checks prior to start up DRP45DX 47...
Page 53: ...6 Operation Operation DRP45DX 53...
Page 61: ...7 Loading transporting the machine Loading transporting the machine DRP45DX 61...
Page 64: ...Loading transporting the machine Lashing the machine to the transport vehicle DRP45DX 64...
Page 65: ...8 Maintenance Maintenance DRP45DX 65...
Page 102: ...Maintenance As required DRP45DX 102...
Page 103: ...9 Troubleshooting Troubleshooting DRP45DX 103...
Page 114: ...Troubleshooting DCI faults DRP45DX 114...
Page 115: ...10 Disposal Disposal DRP45DX 115...
Page 117: ......
Page 118: ......


