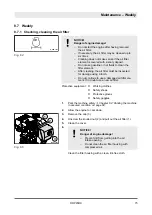
Valve clearance:
Intake valve (IN)
0.10 mm (0,004 in)
Exhaust valve (EX)
0.10 mm (0,004 in)
1.
Crank the engine, until the exhaust valve (EX) is fully open.
2.
Check the valve clearance on the intake valve (IN) with a
feeler gauge (1); adjust if necessary.
3.
Crank the engine further, until the intake valve is fully open.
4.
Check the valve clearance on the exhaust valve; adjust if
necessary.
1.
Loosen the screw (3) on the rocker arm.
2.
Adjust the hexagon nut (2), until the feeler gauge (1) can be
inserted and pulled out with noticeable resistance after the
screw (3) has been tightened.
1.
Install the valve cover (2) with a new seal.
2.
Tighten the fastening screws (1) evenly.
Checking the valve clearance
B-HAT-0012
EX
IN
1
Fig. 82
Adjusting the valve clearance
B-HAT-0013
2
3
1
Fig. 83
Concluding work
B-HAT-0011
2
1
1
Fig. 84
Maintenance – Annually / every 250 operating hours
DRP45DX
83
Summary of Contents for DYNAPAX DRP45DX
Page 6: ...Table of contents DRP45DX 6...
Page 7: ...1 Introduction Introduction DRP45DX 7...
Page 11: ...2 Technical data Technical data DRP45DX 11...
Page 15: ...3 Concerning your safety Concerning your safety DRP45DX 15...
Page 41: ...4 Indicators and control elements Indicators and control elements DRP45DX 41...
Page 47: ...5 Checks prior to start up Checks prior to start up DRP45DX 47...
Page 53: ...6 Operation Operation DRP45DX 53...
Page 61: ...7 Loading transporting the machine Loading transporting the machine DRP45DX 61...
Page 64: ...Loading transporting the machine Lashing the machine to the transport vehicle DRP45DX 64...
Page 65: ...8 Maintenance Maintenance DRP45DX 65...
Page 102: ...Maintenance As required DRP45DX 102...
Page 103: ...9 Troubleshooting Troubleshooting DRP45DX 103...
Page 114: ...Troubleshooting DCI faults DRP45DX 114...
Page 115: ...10 Disposal Disposal DRP45DX 115...
Page 117: ......
Page 118: ......


