background image

32 Using the CD Color Printer with Macintosh

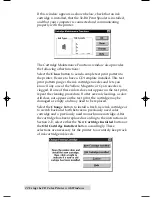
click on the 

Set Profile… 

button, select the 

FARGO Default

System (icc) 

profile, and click on the 

Select 

button. The profile

is now selected.

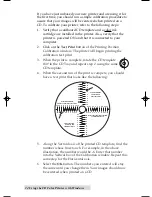
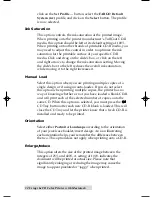
Ink Saturation

This option controls the ink saturation of the printed image.
When printing onto the printer manufacturerÕs TuffCoat CD-R
media, this option should be left at its default setting of 100%.
When printing onto other brands of printable CD-R media, you
may need to adjust this control in order to optimize the ink
saturation for the printable surface of your specific CD-R
media. Click and drag on the slideÕs box, or click on the left
and right arrows to change the ink saturation setting. Moving
the slideÕs box to the left reduces the overall ink saturation,
while moving it to the right increases it.

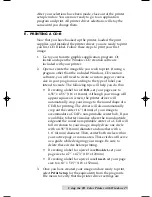
Manual Load

Select this option when you are printing multiple copies of a
single design or if using an auto-loader. If you do not select
this option when printing multiple copies, the printer has no
way of knowing whether or not you have loaded a blank CD-R
and will print each of the selected number of copies onto the
same CD. When this option is selected, you must press the
CD Tray button after each new CD-R blank is loaded. This will
close the CD Tray and let the printer know that a fresh CD-R is
installed and ready to be printed.

Orientation

Select either 

Portrait

or 

Landscape

according to the orientation

of your jewel case booklet/insert design. An icon illustrating
each orientation helps your remember the difference between
the two. This option does not apply when printing onto a CD-R.

Enlarge/reduce

This option alters the size of the printed image between the
integers of 25% and 400%. A setting of 100% indicates the
document will be printed at actual size. Please note that
significantly enlarging or reducing the image may cause the
image to appear pixelated or ÒjaggyÓ when printed.

510225 Fargo/CD Color Prtr  7/29/98 2:39 PM  Page 32

Summary of Contents for 510225

Page 1: ...971015 510225 01 User s Manual 1997 by FARGO Electronics Incorporated CD Color Printer...

Page 2: ...l not occur in a particular installation If this equipment does cause harmful interference to radio or television reception which can be determined by turning the equipment off and on the user is enco...

Page 3: ...ter with Macintosh A Connecting the Printer to Your Computer 27 B Installing the Printer Driver 28 C The Chooser 29 D Setting Up the Printer Driver 30 E Printing a CD R 35 Section 5 Using the Print Ba...

Page 4: ...new CD Color Printer A CHOOSING A GOOD LOCATION Place the printer in a location with adequate air circulation to prevent internal heat build up Do not place the printer near heat sources such as radia...

Page 5: ...the current print job if a print error occurs and to reset the printer for the next print job The CD Tray Button opens or closes the CD Tray for loading and ejecting CD s The Ink Cartridge Button pos...

Page 6: ...s auxiliary port is for factory use only unless otherwise directed For more information on each of the interface ports please refer to Appendix A D APPLYING POWER 1 Locate the power cord supplied with...

Page 7: ...ince different brands of CD R s have different printable coatings however you may need to adjust the printer driver settings to accommodate your specific brand of CD R media Refer to Section 3 or 4 fo...

Page 8: ...carrier copper end first 6 Push the cartridge back until it snaps into place 7 Press and release the Ink Cartridge button again to reset the cartridge carrier 8 Close the printer s front cover NOTE A...

Page 9: ...CD Tray is fully extended place the blank CD R onto the tray with the printable side facing upward Handle the CD R only along its edges and DO NOT touch its printable surface 3 Press and release the C...

Page 10: ...pine and back of the jewel case To load either refer to the following 1 With the printer s front cover shut press and release the CD Tray button 2 Once the CD Tray is fully extended place the blank je...

Page 11: ...e CD Tray IMPORTANT After you have loaded the CD R media you must also select the appropriate Media option from within the printer driver setup window Please refer to Section 3 or 4 for more informati...

Page 12: ...rom Windows 95 please refer to the following steps 1 With the CD Tray closed open the printer s front cover by pulling down on its top left corner 2 If installing a new replacement ink cartridge remov...

Page 13: ...river must be installed and that the printer must be connected to your computer see Section 3 in order to complete this step 5 Remove the installed ink cartridge by grasping the top of the cartridge a...

Page 14: ...w Cartridge Installed or the Old Cartridge Installed button to indicate whether you installed a fresh new cartridge or simply switched between a previously used color cartridge and a previously used m...

Page 15: ...ich it receives data from your computer To connect the printer to your computer simply obtain a shielded bidirectional parallel cable and refer to the following steps NOTE You may experience printing...

Page 16: ...ing Use the following steps to install the printer driver Once the driver is installed put it away in a safe place in case it ever needs to be re installed NOTE This section of the Operator s Manual a...

Page 17: ...ter driver versions always delete the existing printer driver version from your system To do this simply select the printer driver icon from within the Printers folder and press the Delete key Windows...

Page 18: ...button Check that the box called Fast Printing Direct to Port is selected Although this option is not necessary it helps optimize printer driver speed and performance Select OK to exit the Connect win...

Page 19: ...spooler version from your system To do this simply select 32 Bit Print Spooler from the list of programs in the Add Remove Programs Properties window and click on the Add Remove button To print with...

Page 20: ...ng and also allows you to configure the timeout setting In most instances the settings under this tab rarely need to be changed The Job Queue tab appears only when a print job is being sent to the pri...

Page 21: ...want to change a setting or option in the printer driver These applications will usually give you the same choices and options but in a slightly altered format 3 In Windows 3 1x and Windows 95 the CD...

Page 22: ...inly printing text lines and graphics Color Matching Click on the Color Matching down arrow and choose the color matching option that s right for you Select None if you are more interested in print sp...

Page 23: ...of a single design or if using an auto loader If you do not select this option when printing multiple copies the printer has no way of knowing whether or not you have loaded a blank CD R and will pri...

Page 24: ...he 32 Bit Print Spooler rather than to the Windows 95 print spooler See Part C of this section for complete details on the 32 Bit Print Spooler This option and the 32 Bit Print Spooler software will n...

Page 25: ...of the Yellow Magenta or Cyan nozzles is clogged If one of these colors does not appear on the test print repeat the cleaning procedure If after several cleanings a color still does not appear on the...

Page 26: ...negative number is entered The Center Size adjustment enlarges the non printable center if a positive number is entered and reduces its size if a negative number is entered As a rule an adjustment of...

Page 27: ...second run of the print is compete you should have a test print that looks like the following 5 Along the Vertical axis of the printed CD template find the number whose lines touch For example in the...

Page 28: ...for a CD R set your page size to 4 56 x 4 56 116 x 116mm Although your image will appear square on screen the printer driver will automatically crop your image to the round shape of a CD R for printin...

Page 29: ...of the image and the processing speed of your computer processing time can take from several seconds to a few minutes 5 Once processing is complete the printer will begin to print Print time will var...

Page 30: ...ith 8Mb of RAM or higher is recommended The printer driver is accelerated for use with a PowerPC The printer is equipped with a high speed serial port This port is the means through which the printer...

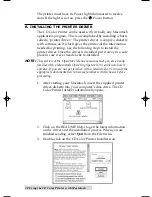
Page 31: ...nstalled put it away in a safe place in case it ever needs to be re installed NOTE This section of the Operator s Manual assumes that you are already familiar with a Macintosh Operating System OS and...

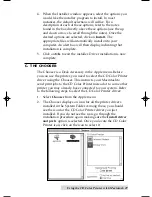
Page 32: ...n is now complete C THE CHOOSER The Chooser is a Desk Accessory in the Apple menu Before you can use the printer you need to select the CD Color Printer driver using the Chooser This instructs your Ma...

Page 33: ...ighted The Chooser remembers however which driver is the current one but does not display it when opened D SETTING UP THE PRINTER DRIVER Once the printer driver has been successfully installed you wil...

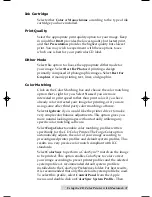
Page 34: ...corrected your image for printing or if you are using some other third party color matching software Select Algebraic if you would like the printer driver to make very simple color balance adjustment...

Page 35: ...g multiple copies of a single design or if using an auto loader If you do not select this option when printing multiple copies the printer has no way of knowing whether or not you have loaded a blank...

Page 36: ...now if any one of the Yellow Magenta or Cyan nozzles is clogged If one of these colors does not appear on the test print repeat the cleaning procedure If after several cleanings a color still does not...

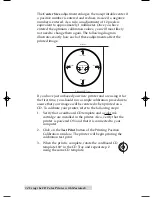
Page 37: ...run a simple calibration procedure to assure that your images will be centered when printed on a CD To calibrate your printer refer to the following steps 1 Verify that a cardboard CD template and a c...

Page 38: ...change them E PRINTING A CD R Now that you have hooked up the printer loaded the print supplies and installed the printer driver you are ready to print you first CD R label Follow these steps to print...

Page 39: ...If creating a label for a jewel case Insert set your page size to 4 63 x 5 97 118 x 152mm 3 Once you have created your image and are ready to print select Page Setup or the equivalent from the progra...

Page 40: ...driver it is most likely not installed To install the Backgrounder simply go through the printer driver installation procedure described in Section 4 B making sure that the Install Background Print U...

Page 41: ...in which they were sent to the printer Some applications however may put each page of the document into a separate spool file creating a different job in the queue for each page Print jobs are always...

Page 42: ...s this option dims Stop Recording Log Stops logging print history This option dims once print logging stops Get Info Provides additional information about the currently selected print job Click on the...

Page 43: ...cations is improved Jobs menu All commands in the Jobs menu act on the currently selected job Hold Prevents an individual job from being processed Jobs that are on hold are displayed in italic font at...

Page 44: ...e background Backgrounder stops processing until it is brought to the front When Backgrounder detects an error it beeps and visually indicates an error condition This error condition is signaled by al...

Page 45: ...media or has a print media jam If media loading is required simply load media into the CD Tray according to Section 2 C and press the CD Tray button to resume printing If print media is jammed clear t...

Page 46: ...3 1x or Windows NT simply perform the printer s self test procedure as described below 1 If printer power is ON turn it OFF now The Power light should be OFF Verify that print supplies are installed a...

Page 47: ...rip inside the printer Resume printer operation only after the printer is completely dry C CLEARING A CD MEDIA JAM If CD Media becomes jammed inside the printer first press the CD Tray button to try a...

Page 48: ...ack Monochrome K Media Printable surface CD R s cardboard CD templates jewel case booklets and inserts System Requirements Recommended 486 66 MHz or Pentium 8MB RAM 100MB free hard drive space or Maci...

Page 49: ...e printer receives data from your computer This section describes the pin assignments and signal specifications for each of these ports as well as for the printer s auxiliary interface port B CENTRONI...

Page 50: ...is less than 6 feet in length Pin assignments are as follows Pin Number Signal Name Signal Description 1 HSKo External Clock Output 2V Vout 3 6V Rout 450 2 HSKi Not Connected 3 TxD Not Connected 4 GN...

Page 51: ...gic voltage levels Pin Number Signal Description 1 Busy Output is high when the printer is busy or moving the CD Tray 2 Tray Out Output is high when the CD Tray is fully ejected 3 Tray In Output is hi...

Page 52: ...Cartridges 4 19 31 Ink Cartridge Button 2 Ink Saturation 20 32 Insert 7 Interface Port 3 46 47 Jewel Case Booklet 7 Jewel Case Insert 7 Manual Load 20 32 Media 18 30 Orientation 21 32 Parallel Port 3...

Page 53: ...FARGO Electronics Incorporated Printed in the United States of America Eden Prairie Minnesota U S A P N 510225...

Reviews: