IMPORTANT PRE-INSTALLATION CHECKS
1. Check the tray is level, on all sides (The bubble should be in the centre of the two lines on the spirit level).
2. Stand in the tray and check there is no adverse movement.
3. The walls should be tiled and grouted prior to installing the enclosure.
4. The tiles and the tray should be sealed, using bathroom sealant.
•
Spray the seal and joints with the shower head and check for leaks.
•
Check the plumbing for leaks.
•
Do not grout the tiles when the enclosure has been fitted as the grout may discolour the
aluminum profiles.
•
Make sure the tray is installed as per the manufacturers instructions.
•
When all of the above criteria is complete please proceed to the next step in these instructions.
Step 1 - Checking the tray
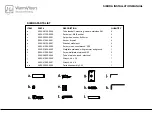
Component Check List: Supplied
Description
Quantity
Front Panel
1
Hinge Panel
1
Door
1
Wall Profiles
2
Wall Profile Trims
2
Handle Assemblies
1
Hinge Assemblies
2
Brace Bar Assembly
2
Door Bottom Seal
1
Fixing Kit - Component Check list.
40 mm Screws
8
Wall Plugs
8
16mm Pan Head Screws
6
Branding Badge
1
Profile Cover Caps
4
4mm Allen Key
1
3mm Allen Key
1
3mm Drill Bit
1
Plastic Tray Pin
2
Equipment Check List: Not Supplied
Description
Mains or Battery drill
6mm Masonry Drill Bit
Bathroom sealant gun
Bathroom sealant tube
Pozi Screw Driver
Spirit level
Tape measure
Pencil
Additional fixings if going into plaster board
10Nm Torque Wrench
FA - Freedom Arc Dec 2009:CQB
4/5/10
12:05
Page 2


