


Setting a static (fixed/manual) IP
The ezeio
™
by default expect a DHCP service to provide the correct network
settings for the device when it is connected to the network.
In some installations, it is required to supply specific network settings
manually to each device to allow it to communicate on the network.
However this change can only be made from the system settings on
ezecontrol.com
. Thus, the ezeio
™
needs to be connected to a network that
supports DHCP temporarily.
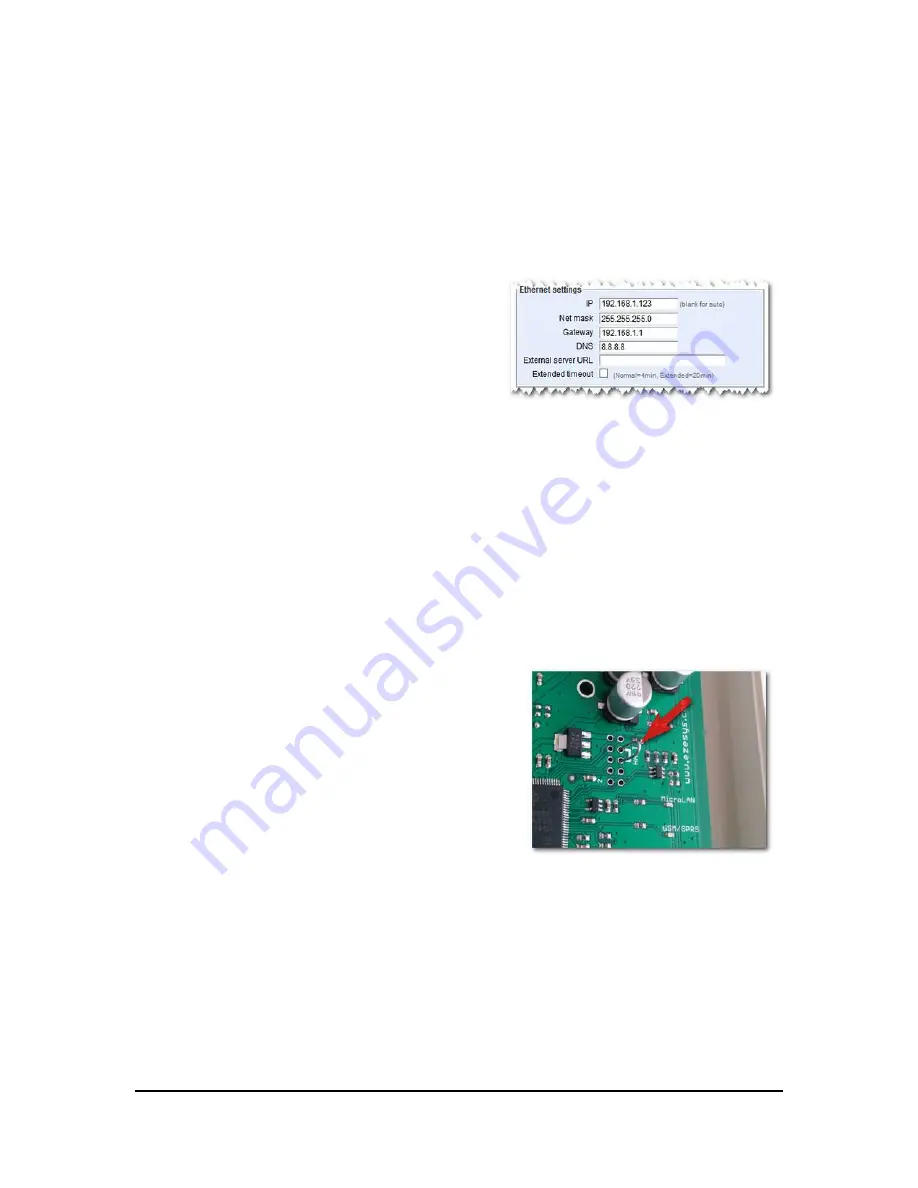
To apply manual network settings, navigate
to the Configure → System screen and enter
IP addresses in the Ethernet settings section
(see example to the right).
Please make sure all settings are correct
before applying them. Incorrect settings will
cause communication to fail. As soon as the settings are synced the ezeio
™
will loose contact with the servers via the DHCP network. It can now be
moved to the network that requires fixed IP.
Restoring DHCP functionality
To restore DHCP support, first remove the fixed IP settings on the server by
blanking out the IP field and click Save Changes. If the ezeio
™
is still
communicating via fixed IP, the settings will be automatically synced and
applied after the next reset of the ezeio
™
.
If the ezeio
™
is not communicating, the reset procedure is as follows:
1)
Remove power from the ezeio
2)
Open the enclosure and locate the holes
marked HALT (see picture to the right)
3)
Apply a jumper between the two holes and
make sure it stays in place, connecting the holes.
4)
Connect power to the ezeio. keeping the
jumper in place.
The LED's will blink very fast, and the ezeio
™
will attempt to use DHCP to connect to the servers.
Verify that the ezeio
™
connects by checking the status on
ezecontrol.com
.
When the “spinner” indicator stops and shows a green dot, the new
configuration is saved. Power down and remove the jumper.
The ezeio
™
is now back in default DHCP mode.
Page 14 of 121


