background image

16

Duty Cycle Fault – Helping to Protect EZ Way Smart Lift

®

 Actuator 

In the unlikely event the EZ Way Smart Lift

®

 has been run to the extent that it exceeds its duty cycle, the fol-

lowing message will appear; ‘ACTUATOR DUTY CYCLE FAULT…COOLING’. 
When this fault occurs the lift can only be lowered. This safety feature has been added to maximize the life of 
your unit.

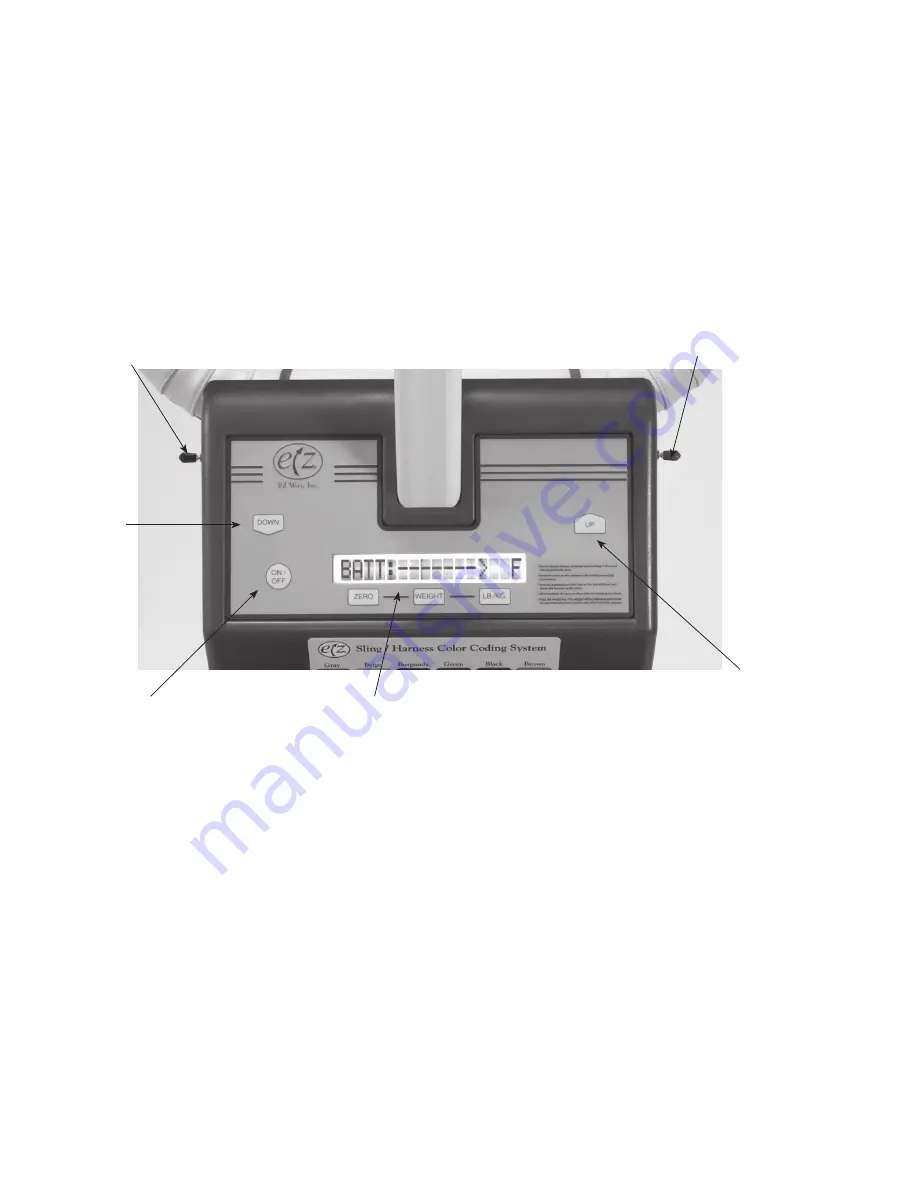
LCD display menus

EZ Way Smart Lift

®

s include a built-in menu system that provides customer feedback on various functions. The 

information below describes how to access and navigate through the Customer Settings menu.

NOTE:  In this section, the UP and DOWN operations refer specifically to usage of the front panel UP and 
DOWN buttons.
 

NOTE:  The EZ Way Smart Lift

®

 will not raise or lower while in the Customer Settings menu.

Entering the Customer Settings menu
After the unit has been turned on, press and hold the DOWN key followed by the UP key, holding both keys for 
5 seconds.
To back out of the Customer Settings menu hit the left toggle switch.

Navigating through menus
1)  Pressing the UP or DOWN front panel keys will allow users to move through the menu items (also described  
 

as ‘scrolling’ below).

2)  Pressing the Right Toggle Switch (also described as ‘enter’ below) will enter into a menu selection.
3)  Pressing the Left Toggle Switch (also described as ‘exit’ below) key will exit the menu selection.

Changing parameter values
1)  Pressing the UP or DOWN front panel keys will change various parameters found in the Customer Settings  
 menu.
2)  Pressing the Right Toggle Switch will lock the parameter into memory.
3)  Pressing the Left Toggle Switch will back out of the parameter without saving the selection.

Right Toggle

Switch

Left Toggle

Switch

Up

Button

Display

Window

On/Off

Switch

Down

Button

Summary of Contents for Smart Lift

Page 1: ...t Lift 500 600 1 000 lb Capacities Form 2 174 Rev 8 10 18 Operator s Instructions EZ Way Inc PO Box 89 Clarinda IA 51632 1 800 627 8940 www ezlifts com WARNING Cancer and Reproductive Harm www P65Warn...

Page 2: ...when lifting or lowering a patient The EZ Way Smart Lift was designed to be operated safely by one caregiver However depending on the situation facility policy and the patient s condition two caregiv...

Page 3: ...nd service will be free from defects in material and workmanship for a period of see above from the date of purchase by the original purchaser Normal wear and tear injury by natural forces user neglec...

Page 4: ...he ON OFF button The EZ Way Smart Lift will display a greeting message while several diagnostic functions are performed The EZ Way Smart Lift has a built in timer that automatically shuts off the unit...

Page 5: ...arious sizes Please contact EZ Way with any questions regarding sling dimensions and sizes or view them at www ezlifts com We have used the Medium Deluxe Sling throughout the manual because it is the...

Page 6: ...patient 1 Make sure there are no cords or other objects near the path of the lift or under or near the bed that could obstruct the wheels of the lift 2 Do not lock the wheels of the EZ Way Smart Lift...

Page 7: ...the actuator motor as a handle for moving the EZ Way Smart Lift WARNING Do not place any objects around the actuator motor or between the actuator and the lift mast Step 6 Lower patient into wheelchai...

Page 8: ...distributed on the sling NOTE Make sure all seams of the sling are smooth underneath the patient Step 2 Position EZ Way Smart Lift 1 Make sure there are no cords or other objects near the path of the...

Page 9: ...6 Lower the patient onto bed 1 Raise or lower the patient to a height necessary to clear the bed Move the patient over the bed 2 Push the DOWN button on the hand control 3 When the patient s weight is...

Page 10: ...objects or beneath the casters or legs of the lift The sling should be free from obstruction Step 4 Follow same procedures used when transferring patient and when lowering patient to bed chair or whe...

Page 11: ...than 11 0 is used rinse twice 5 Tumble dry temperature 100 F maximum High heat will weaken the fabric 6 Snap the buckle together before washing and drying This will prevent any damage to the plastic b...

Page 12: ...he Operating Instructions 3 Raise the patient Be sure no other object is touching the lift 4 Press the weight key The lift will display the weight and when the sign changes to a the weight will be loc...

Page 13: ...between hanger assembly and load cell the hanger assembly needs to be replaced 2 Check all bolts to ensure they are tight 3 Check boom to hanger assembly pivot bolt peel rubber back to assure nut is...

Page 14: ...when lowering the lift boom if an obstruction is encountered 9 Check all the wheels and brakes to make sure they are functioning properly Hair that gets picked up and wrapped in between wheels should...

Page 15: ...be accessed at any time Possible causes of actuator overload include lifting a patient that is heavier than the rated capacity of the unit if the Smart Lift is obstructed by another object during lif...

Page 16: ...ings menu Entering the Customer Settings menu After the unit has been turned on press and hold the DOWN key followed by the UP key holding both keys for 5 seconds To back out of the Customer Settings...

Page 17: ...ettings Menu as described on page 13 1 Press the right toggle switch to enter 2 Scroll using the UP and DOWN keys to Inspection Complete 3 Press the right toggle switch to enter 4 Scroll to choose Yes...

Page 18: ...ce legs of sling have been fitted underneath legs and crossed attach two loops of same color to the hangar bar hooks located nearest the feet Ensure all loops securely fastened to hooks before lifting...

Page 19: ...19...

Page 20: ...Sling Size1 Small Medium Large X Large XX Large XXX Large Color Coding2 Gray Beige Burgundy Green Black Brown Weight of Patient1 70 100 lbs 90 220 lbs 190 320 lbs 280 450 lbs 400 600 lbs 600 lbs Maxim...

Reviews: