


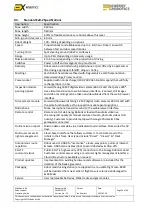

ExRobotics B.V.
Robot System
Operating Guide
Document No.:
20190122IP1
Version No.: 12
Owner:
Ian Peerless
Date:
2021-07-20
Page 15 of 30
This document is considered an uncontrolled copy when printed. Always ensure that you print and use a current version.
Copyright 2021 ExRobotics B.V.
6.2.
Line Following Navigation
A planner will:
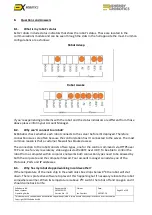
For undocking, define the exit direction of the robot when leaving the docking station. When the
robot “undocks” it drives in reverse until the middle point between the “Dock 1” and the “12:00”
tags. Then the robot will rotate and exit the docking station to start following the line in one of
three possible directions: 03:00 (robot rotates 90 degrees clockwise), 06:00 (robot rotates 180
degrees), or 09:00 (robot rotates 90 degrees counter-clockwise).
▪
From the Mission Editor screen
select action “Undocking”
▪
Select the Exit Direction (e.g. 09:00)
▪
Write a name in Select Action Name e.g. “Undock”
▪
Click “Save”
For waypoints that are used as junctions where a robot selects between alternative routes.
▪
From the Mission Editor screen select action “Junction”
▪
Select Exit Direction (e.g. 06:00).
▪
Select the waypoint number for the Junction (the number on the chili-tag).
▪
Give the action a name e.g. “Junction 1”
▪
Click “Save”
6.3.
Tag Based Inspections
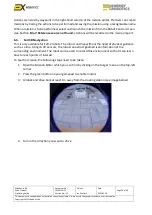
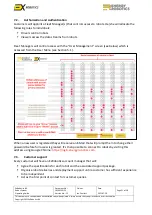
1.
Launch an autonomous mission from the Robot Control screen and stop the mission a few
meters before the waypoint at which actions are to be performed (with the orange line visible
from the floor cam).
2.
Open the Mission Editor screen.
3.
Click on “Create Mission” and give a name
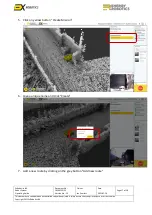
4.
Click on “Add new action” and press the play
button. The robot will drive to the tag and stop
between it and the 12:00 tags.
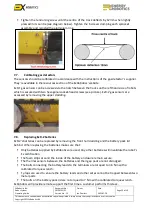
5.
Rotate the robot (and elevate the camera) using the left/right icons on the mission editor
until the sensor is pointing at the POI.
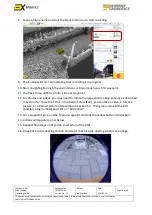
6.
Select from the drop-down menus the desired action, sensor, waypoint number and give a
recognisable name (e.g. equipment TAG number) to the action.
7.
If “Full
-
size” is not selected, a region of interest ROI needs to be selected and a photo must be
taken. For this, hover the mouse over the image and use the buttons that appear in the top-
left corner.
8.
Click on “Add Action”.
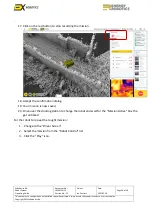
9.
Repeat steps from step 5. for all actions that might be required at that waypoint.
10.
Drive manually to the line and repeat steps from 4. for other waypoints.
11.
Finally, click on t
he yellow “Disk” icon on the bottom
-right to save the mission.
All inspection actions (e.g. Photo) can also be defined and executed at junction waypoints. For this
you just need to add the actions that you require to the waypoint number as described previously
and then add a “Junction” action to the same waypoint number.