1 Chronograph the marker using standard chronograph procedures and following
safety rules. Shooting velocity will vary based upon many factors, such as paint,
weather, and air system.
2 Velocity of the EVIL
®
Pimp Kit
™
is normally
adjusted by rotating the adjusting ring on the
regulator. The thread used in this ring is a fine
pitch, allowing for very small adjustments
to be made accurately. Generally, increasing
output pressure increases paintball velocity.
(However, excessive regulator output pressure
actually decreases velocity).
To adjust velocity, first loosen the locking screw (3/32 allen wrench) and back it off
three full turns. If the locking screw is not backed off far enough you will be unable
to turn the adjusting ring. The adjusting ring should turn easily; DO NOT FORCE IT!
NOTE: When turning the Adjusting Ring to reduce velocity, it is necessary to cycle the
marker every 1/2 turn. This is done to relieve the captive pressure in the downstream portion
of the gas system. Failure to do this will result in premature wear to the sealing seat in
the regulator.
In extreme cases the Dwell or even the Respirator Low Pressure Regulator (LPR)
can be adjusted to alter velocity.
3 Lock the velocity lock screw back in place.
4 Chronograph the marker after every velocity or pressure adjustment.
5 Chronograph the marker at regular intervals during the day, as well as any time
the air source is refilled or changed, any time the barrel, brand, type of paintballs
used, and upon request of any player or game official.
NOTE: The gauge on the front of the marker is the LPR gauge. It should not move when
adjusting your vertical regulator unless your vertical regulator was less than 150 psi. Your
LPR should be set at approximately 120-150 psi.
ALL PAINTBALL MARKERS MUST BE CHRONOGRAPHED REGULARLY. ADJUST
MARKER TO SHOOT PAINTBALLS AT A VELOCITY THAT IS LESS THAN 300
FEET PER SECOND (FPS) AND THAT DOES NOT EXCEED THE VELOCITY LIMIT
SET BY THE PAINTBALL PARK WHERE THE MARKER IS IN USE. CHRONOGRAPH
THE MARKER AT REGULAR INTERVALS DURING THE DAY, AS WELL AS ANY
TIME THE AIR SOURCE IS REFILLED OR CHANGED AND UPON REQUEST OF
ANY PLAYER OR GAME OFFICIAL.
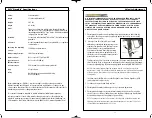
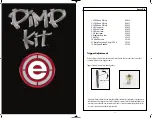
Locking
Screw
Adjusting
Ring
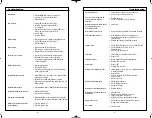
Semi-automatic
11 inches without barrel
3.45 lbs.
9.5 inches
Two piece construction with Impulse threads. Mid-grade
.689 back. EVIL
®
Pipe
™
front anodized to match can be used
interchangeably with EVIL
®
Pipe
™
backs. .689 backs available
in high polish or matte finish
For use only with standard “.68 caliber” (.68-inch diameter)
paintballs
Accepts standard connections for regulated N
2
, or regulated
compressed air
150-400 psi recommended
100-150 psi maximum
Not to exceed 175 psi from LPR
Not to exceed 1000 psi
EVIL
®
bottom line on/off assembly with rail
45 style frame
On/Off safety switch and barrel blocking
device (included)
Decrease (–)
Increase (+)
Pursuit Marketing, Inc. (PMI Inc.), reserves the right to modify or change its markers
without incurring any obligation to incorporate such modifications or changes in any
of its products that were sold prior to the modification. The information in this operator’s
manual may be updated or changed without notice.
This operator’s manual is intended to remain with the paintball marker upon any
subsequent transfer of the marker, whether through sale, resale, or furnishing in any
manner. A replacement operator’s manual may be obtained from Pursuit Marketing, Inc.,
55 Howard Ave, Des Plaines, Illinois USA; phone 800.579.1633; www.evil-paintball.com
Action:
Length:
Weight:
Height:
Barrel:
Paintballs:
Air Source:
EVIL
®
Pimp Kit
™
Operating
pressure:
LPR Operating Pressure:
Marker Pressure:
Input Pressure to
EVIL
®
Detonator
™
:
Air Source Input:
Grip:
Safety:
Velocity Adjustment
EVIL
®
Pimp Kit
™
Specifications
10
11
Summary of Contents for Pimp Kit
Page 1: ...Version 1 0...


