4
5
English
650W / 750W / 850W / 1000W GOLD
Power Supply User Manual
English
650W / 750W / 850W / 1000W GOLD
Power Supply User Manual
Q&A
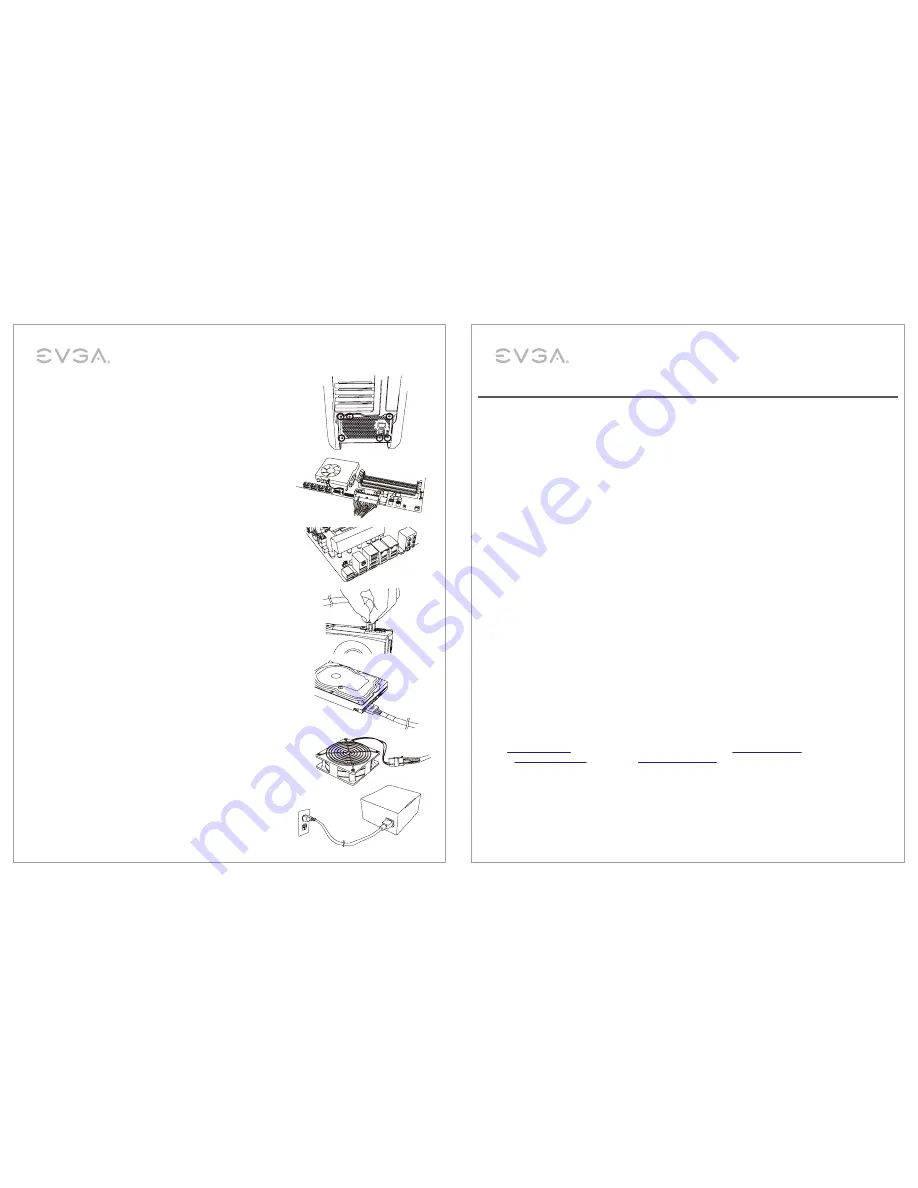
3. Use the screws provided with your case to install the power supply
into your computer.
NOTE:
It is recommended to install the power
supply with the fan facing down. However, if your case places the
power supply at the bottom of the case and there are no ventilation
holes available, it may be best to install the power supply with the
fan facing up for greater efficiency and reliability.
4. Connect the 24-Pin ATX cable to the PSU and the motherboard.
5. Connect the 4+4-Pin EPS12V cable to the motherboard.
(Optional)
– If you plan on
extreme overclocking
and your
motherboard supports additional 8-Pin or 4-Pin CPU power
connectors, connect the second 4+4-Pin EPS12V cable. This is
only
needed for heavy overclocking or for Dual CPU motherboards.
6. Connect the 6/6+2-Pin PCI-E cables to your graphics card(s).
NOTE:
Do not attempt to plug an 8-Pin PCI-E cable into a 6-Pin
connector without first detaching the two extra pins.
7. Connect SATA power cables to all data drives or optical drives
(hard drives, solid state drives, optical drives).
8. Connect the peripheral “Molex” 4-Pin connectors for fans, pumps,
legacy components and other devices/adapters.
9. Connect the AC power cord to your power supply and to the wall.
Check all connections to assure a solid connection and turn the
power switch on the power supply to the ON position.
Q: I see there are
more than four screw holes
on the back of the power supply, but the packaging only offers (4)
screws, are some missing?
A:
Nothing is missing
; you will only need to attach the EVGA power supply to the case with four screws. The
power supply offers more than (4) holes to
provide optimal compatibility
for today’s varied case designs.
Q: My EVGA Power Supply includes (2)
EPS cables
for my motherboard, do I need to connect up both?
A: Motherboards
only require (1) 4+4 or 8-Pin EPS connection
. On some models, an additional 4+4-Pin or 8-Pin
connection on the motherboard may be found for
dual CPU
configurations or for
extreme overclocking
. If your
motherboard supports dual 4+4-Pin EPS connections, please refer to your
motherboard manufacturer's manual
for details on the proper function and power of the EPS connections.
Q. What is the
ECO Thermal Control System
?
A. The ECO Thermal Control System, when enabled, allows the fan on your EVGA power supply to shut off
during low to moderate operation loads. The EVGA power supply’s fan will
automatically turn back on
when
needed, based on the temperature the power supply reaches. The fan will also increase in RPM when needed,
based on the load operation being requested from the components connected. This prevents unnecessary
rotation,
reduces ambient noise
levels and will
increase the life span
of the fan due to the fan not spinning
when not required.
Please Note: If the ECO Thermal Control is disabled the fan will always spin, even at low loads. The fan will also
increase in RPM as needed automatically, based on the power draw from connected components.
Q. What if I want to use
power adapters
for my graphics card(s)/motherboard/peripherals?
A. EVGA always recommends the use of direct power connections from the power supply to power all components.
Q. Does it matter
which end of the cable
I plug into the power supply?
A: Yes, the connections going to the power supply will not have “break downs” like the EPS (CPU) has 4+4 on one
side and full 8-Pin on the other.
Check each cable
as it is labeled appropriately to match the power supply side,
and connect only the same
‘‘matching”
cable directly to the power supply as referenced on each connector.
Q. If I have an issue or a question, can I get support?
A. ALL EVGA products are backed by top tier warranties as well as 24/7 technical support. Support can be reached
for your power supply at:
- USA:
+1-888-881-3842
option 1, option 3. or contact us via email at
.
- Europe:
+49 89 189 049 11
or by email via
eu.evga.com/support
.
Summary of Contents for 1000GQ GOLD
Page 1: ...V2_201607 E006 00 000077...


