


MR-900T User Manual
41
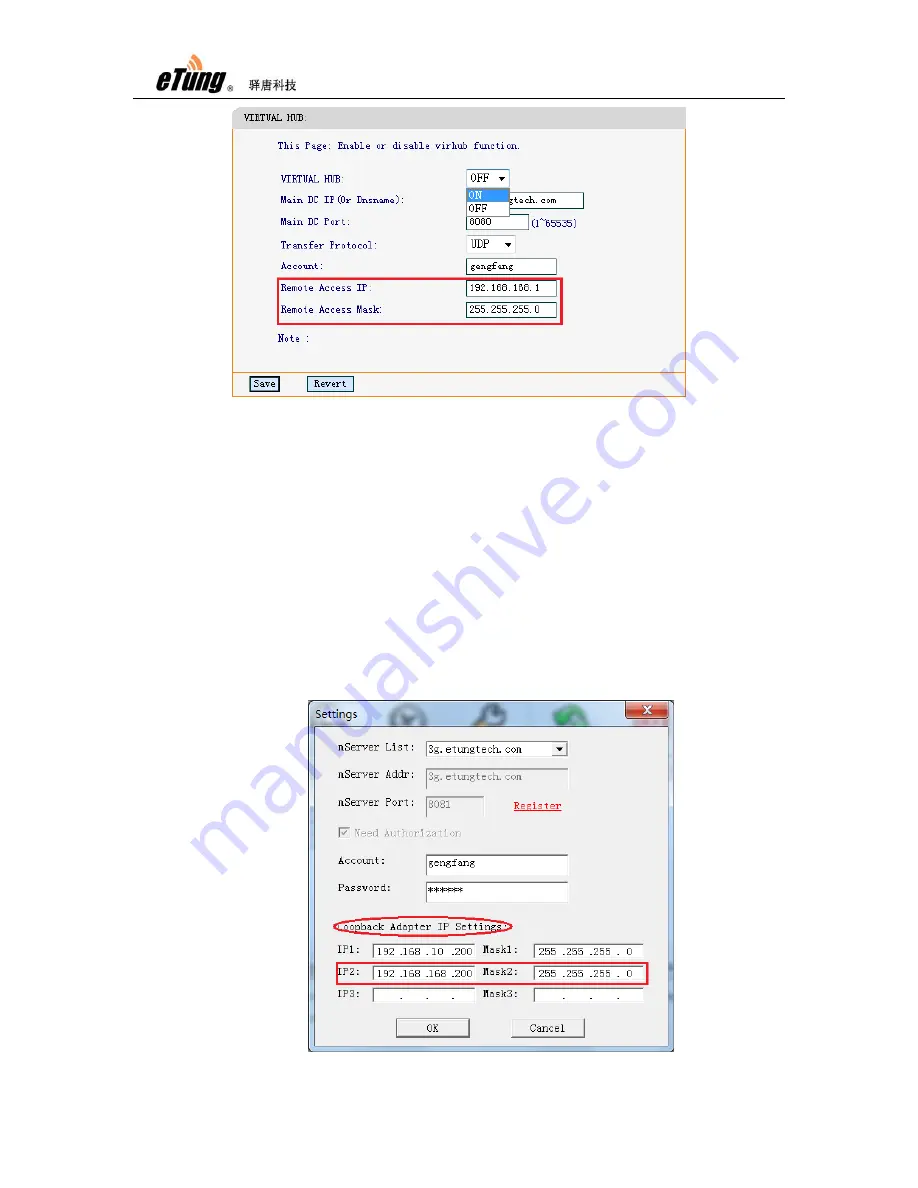
Figure Appendix 2-7: Configure the router’s remote access IP
Normally set the two parameters with default values, and they can also
be changed on demand. Press “Save” after configuration, and then
reboot the router. These two parameters can also be changed/checked
via remote AT commands, please refer “2.5 Remote Configurations”.
2)
Configure the Loopback adapter’s IP address to access the router
remotely
Run Virhub software, click button “Configure”, and on the popped up
“Settings” dialog, set the Loopback adapter’s IP address in “Loopback
Adapter IP Settings” part. IP2 is the IP address set on the Loopback
adapter to access the router remotely via Virhub, and this IP must be in
the same range as the “Remote Access IP” (192.168.168.1 by default)
set on the router in step 1), for example, 192.168.168.*.
Figure Appendix 2-8: Configure the Loopback adapter’s IP address to
Summary of Contents for MR-900T
Page 7: ...MR 900T User Manual 7 Figure 1 4 Cross cable Figure 1 5 9 pin and 9 hole direct serial line ...
Page 8: ...MR 900T User Manual 8 Figure 1 6 Power supply ...
Page 9: ...MR 900T User Manual 9 1 4 Dimension Figure 1 7 MR 900T dimension with shell ...
Page 16: ...MR 900T User Manual 16 ...
Page 32: ...MR 900T User Manual 32 ...
Page 47: ...MR 900T User Manual 47 Figure Appendix 3 6 Add Virhub PC to virtual LAN ...
Page 52: ...MR 900T User Manual 52 Figure Appendix 4 6 Map virtual serial port in Vircom ...


