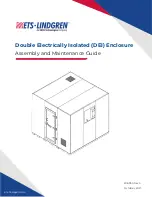
11
4.0 ASSEMBLY AND INSTALLATION
4.1 OVERVIEW OF ASSEMBLY STEPS
1. Clean the area to be used for construction of the room.
2. Mark out the space on the floor where the room will be built.
3. To prevent damage to panels, remove panels from the crates or cartons only
as they are needed.
4. Locate, position, and bolt together the floor panels as shown in
the illustrations.
5. After the main floor panels are assembled, place the interior floor panels
(with floor tile) on top of them.
6. Attach the 4 in wide aluminum strips between each of the interior panels
and secure with the wood screws.
Wall and ceiling panels should be assembled as shown in the illustrations
7. Be sure to securely bolt the wall panel seams before inserting and
tightening the 4 in bolts into the floor panels.
8. Check alignment of the panels as they go together to avoid having to
disassemble and re adjust them later.
9. To ease insertion of the ceiling panels, loosen some of the 4 in bolts to allow
for some movement of the wall panels.
10. When inserting and tightening the 4 in bolts into the ceiling panels,
maintain solid contact along all of the seams.
4.2 ASSEMBLY STEPS
STEP 1 - CLEAN AREA
Remove all debris and clean the area where the enclosure is to be installed.
STEP 2 - MARK LOCATION
Use the illustrations in this manual to determine the area required for the
enclosure. Mark the location on the floor.
Review all
steps prior to
starting to assemble the
DEI enclosure.
Before assembling any
components, follow
the safety information
in the ETS-Lindgren
Product Information
Bulletin
included with
your shipment.
To accommodate
a site with limited
access space, the
DEI enclosure can be
pre-assembled and
moved into position.
When moving a pre-
assembled enclosure,
take care to avoid
contact with all metal
objects (such as
ductwork).
Summary of Contents for ETS-Lindgren
Page 6: ...6...
Page 9: ...9 2 2 PANELS 2 3 HARDWARE...
Page 16: ...16 4 4 INTERIOR COMPONENTS 4 5 LIGHT FIXTURE MOUNTING...
Page 17: ...17 4 6 FILTER MOUNTING DETAIL 4 7 MOUNTING CONDUIT TO ANGLE BARS...
Page 18: ...18 4 8 GROUNDING...
Page 30: ......


