PAGE 11
Web UI User’s Manual
GETTING MUSIC INTO FIREBALL
Before you can enjoy the many benefits of your FireBall Music Management
system, you will want to get your music collection into the FireBall. The
process of getting music into FireBall is called “Recording” or sometimes
“Ripping”.
There are several ways to get your music into FireBall:
• Record CDs using the internal CD Drive
• Record CDs using optional external CD changers
• Record from an external source (such as a tape, LP, or other real-time
source)
• Transfer Music files from your PC using a network
You may choose to use any or all of these methods at any time. Here is a brief
description of a few of these methods, however you should refer to the FireBall
User’s Manual for more detailed information about getting music into your
FireBall.
RECORDING FROM THE INTERNAL CD
The easiest and quickest way to get music into your FireBall is to record
CDs using the built-in internal CD drive. This method requires no additional
equipment and is very fast, as the internal CD drive can rip audio at several
times the speed of normal playback. This is known as “fast-ripping”.
Follow these steps to record using the internal CD drive:
1. Select the EJECT key on the front panel of your FireBall.
2. Insert an audio CD (label side up) into the CD tray.
3. Select the EJECT key again to close the CD tray.
4. The CD cover and track names for this CD will appear on your web pad.
(If the disc is not in the FireBall’s local database, FireBall will use your
Internet connection to retrieve the disc information).
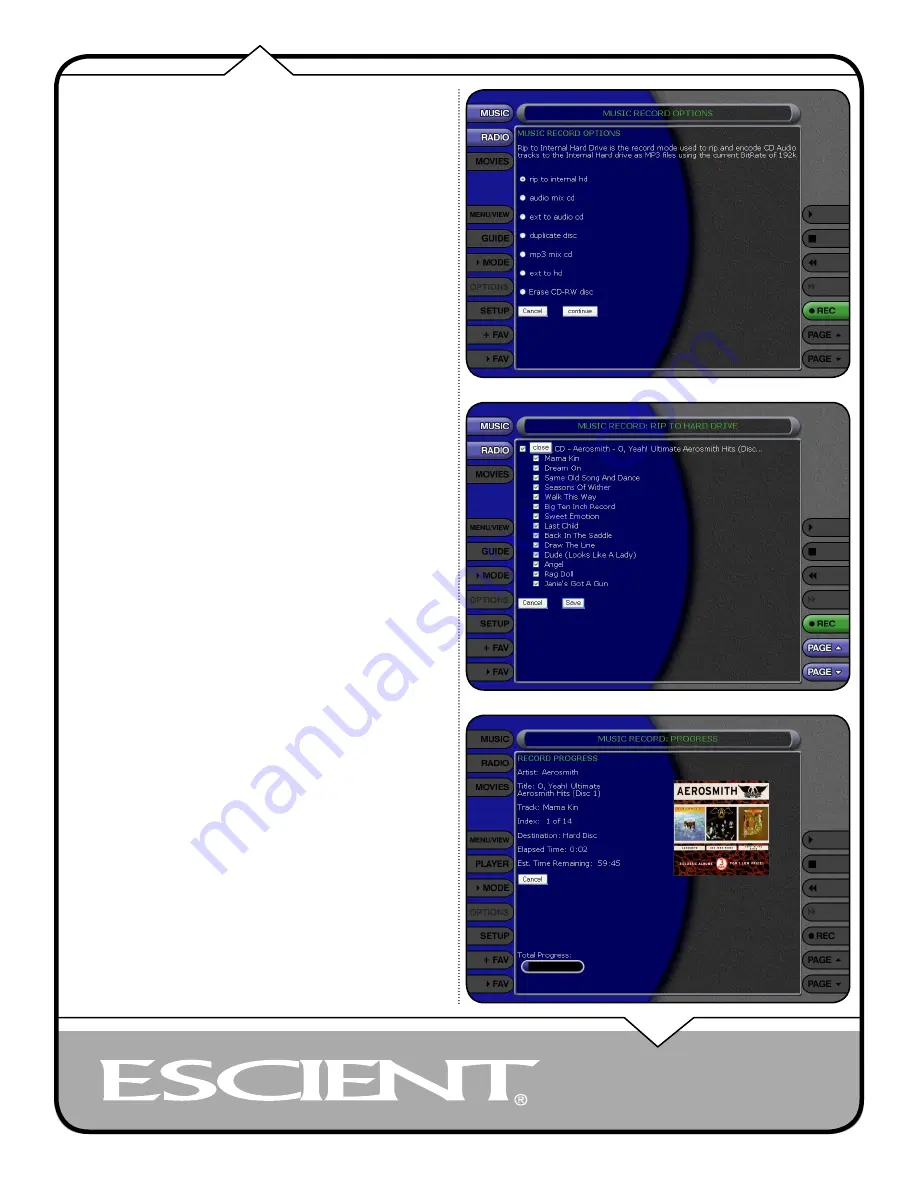
5. Select the RECORD button on the right side of the web pad’s screen to
display the Recording Options Menu.
6. Make sure that rip to internal hd is selected, then select the CONTINUE
button.
7. The Record Select Guide will be displayed showing the current CD with
checkmarks to the left of each track name.
8. Select the CONTINUE button to begin recording.
• When recording is complete, FireBall will return to the Music Guide.
• Repeat steps 1-8 for each disc in your music collection.
• Refer to the section “Setting User Preferences” for setting Recording
Preferences and Disc Insert Preferences.


