


1/2" AIR RATCHET WRENCH
OPERATION
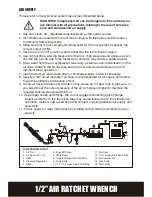
5
H
4
H
A
G
6
4. Choose the correct impact socket
(not provided) as needed and mount it onto
the anvil (H). (See Figure 4)
1. How to install/tighten threaded fasteners.
Turn the F/R knob (A) counterclockwise to “F”
position (F=Forward or Tighten). Press the
trigger (G). The tool anvil (H) runs clockwise.
(See Figure 6)
5. Connect air supply hose to the male plug.
(See Figure 5)
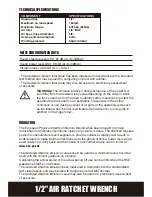
WARNING! Only use impact sockets
that have a RPM and Torque rating
equal to or greater than the tool itself.
6. Set the working pressure at 90psi/6.3bar for
best tool performance.
NOTE:
Working pressure refers to the
air line pressure set to tool when tool
is under working conditions.
Summary of Contents for ERN634ATL
Page 1: ...1 2 AIR RATCHET WRENCH ERN634ATL...
Page 16: ...1 2 AIR RATCHET WRENCH...