background image

Do not start sanding without having the 

sandpaper fitted.

Do not allow the sandpaper to wear away, this 

will damage the base-plate. The guarantee does 

not cover base-plate wear and tear.

Use coarse grit paper to sand rough surfaces, 

medium grit for smooth surfaces and fine grit 

for the final surfaces. If necessary, first make a 

test run on scrap material.

Use only good quality sandpaper.

The sandpaper controls the sanding efficiency, 

not the amount of force you apply to the 

tool. Excessive force will reduce the sanding 

efficiency and cause motor overload. Replacing 

the sandpaper regularly will maintain optimum 

sanding efficiency.

MAINTENANCE

Remove the plug from the socket before carrying 

out any adjustment, servicing or maintenance.

Your power tool requires no additional 

lubrication or maintenance. There are no user 

serviceable parts in your power tool. Never use 

water or chemical cleaners to clean your power 

tool. Wipe clean with a dry cloth. Always store 

your power tool in a dry place. Keep the motor 

ventilation slots clean. Keep all working controls 

free of dust. Occasionally you may see sparks 

through the ventilation slots. This is normal. 

If the supply cord is damaged, it must be 

replaced by the manufacturer, its service agent 

or similarly qualified persons in order to avoid a 

hazard.  

Summary of Contents for ERB108SDR

Page 1: ...300W ORBITAL SANDER ERB108SDR WARRANTY YEARS...

Page 2: ...oods Thisguaranteedoesnotaffectyourstatutoryrights ThisguaranteeisonlyvalidintheUK For further technical advice spare parts or repair service outside of guarantee please contact the customer helpline...

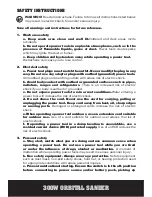
Page 3: ...or wet conditions Water entering a power tool will increase the risk of electric shock d Do not abuse the cord Never use the cord for carrying pulling or unplugging the power tool Keep cord away from...

Page 4: ...the plug from the power source and or the battery pack from the power tool before making any adjustments changing accessories or storing power tools Such preventive safety measures reduce the risk of...

Page 5: ...lead based paint due to the risk of lead poisoning test any paint work with a lead paint test kit to con rm if lead paint is present 13 Do not eat or drink in the working area of the sander 14 Do not...

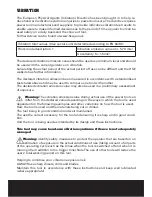
Page 6: ...lue may also be used in a preliminary assessment of exposure Warning The vibration emission value during actual use of the power tool can differ from the declared value depending on the ways in which...

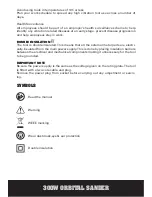
Page 7: ...The tool is double insulated This means that all the external metal parts are electri cally insulated from the main power supply This is done by placing insulation barriers between the electrical and...

Page 8: ...1 ON OFF WITCH 2 SOFT GRIP HANDLE 3 VARIABLE SPEED CONTROL 4 DUST EXTRACTION OUTLET 5 BASE PLATE 6 SANDING PAPER See Fig B 7 DUST BAG 5 1 2 3 4 7...

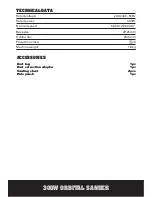
Page 9: ...ted voltage 230 240V 50Hz Rated power 300W No load speed 5 000 12 000min 1 Base size 125mm Orbital dia 2 5mm Protection class II Machine weight 1 8kg ACCESSORIES Dust bag 1pc Dust extraction adaptor 1...

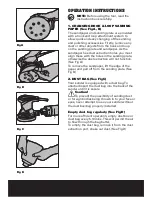
Page 10: ...will not function See Fig A To remove the sandpaper lift the edge of the paper and pull off from the sanding plate See Fig B 2 DUST BAG See FigC Your sander is equipped with a dust bag To attached ins...

Page 11: ...on Allow the sander to reach full speed before gently applying it to the work piece Always keep the sander moving in paralell or circular movements to ensure a consistent nish to the work piece Regul...

Page 12: ...oad Replacing the sandpaper regularly will maintain optimum sanding ef ciency MAINTENANCE Remove the plug from the socket before carrying out any adjustment servicing or maintenance Your power tool re...

Page 13: ...ace if it is allowed to become damp the abrasive particles will lose their adhesion to the backing paper and will not abrade 3 If the sander does not move smoothly the sanding paper may be loose damag...

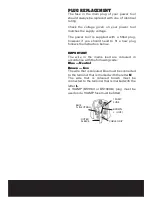
Page 14: ...ollows the instruction below IMPORTANT The wire in the mains lead are coloured in accordance with the following code Blue Neutral Brown Live The wire that is coloured blue must be connected to the ter...

Page 15: ...37 EC Low Voltage Directive 2006 95 EC Electromagnetic Compatibility Directive 2004 108 EC Restrictions of the Use of Certain Hazardous Substances in Electrical and Electronic Equipment 2002 95 EC Sta...

Page 16: ......

Reviews: