EPSON Stylus COLOR 860/1160
Revision C
Adjustment
PF Loop scale unit assembling procedure
148
3.
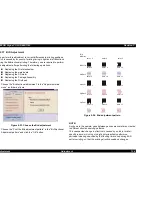
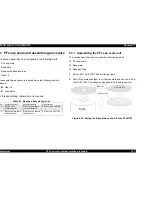
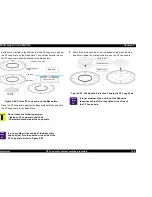
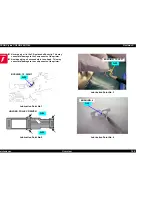
Set the small column to the shaft hole of the PF Loop scale and put
the PF Loop scale on the Base plate. The printed character side of
the PF Loop scale should be faced to the Base plate.
Figure 5-54. Put the PF Loop scale on the Base plate
4.
Press the PF Loop scale against the Base plate carefully and stick
the PF Loop scale to the Base Plate.
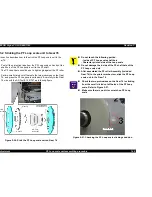
5.
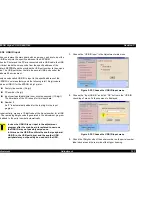
Peel off the protection tape from the adhesive tape (double side)
and stick it inside the printed circled line on the PF Loop scale.
Figure 5-55. Sticking the Protection Tape to the PF Loop Scale
C A U T I O N
Do not touch the following portion.
- Inside of PF Loop scale shaft hole
- Character printed side of the Loop scale
C H E C K
P O I N T
It is no problem if the outline of the Base plate
dose not just fit to the printed circled line of the
PF Loop scale. Refer to Figure 5-55
This setting face is NG
This setting face is
correct
Loop scale
Base plate
AS -Tool
1051765
Side view
AS-Tool 1051765
C H E C K
P O I N T
It is not problem if the out line of the Adhesive
tape dose not just fit to the printed circled line of
the PF Loop scale.
Protection tape
Adhesive tape
Adhesive tape
Summary of Contents for Stylus COLOR 1160
Page 8: ...C H A P T E R PRODUCTDESCRIPTION ...
Page 28: ...C H A P T E R OPERATINGPRINCIPLES ...
Page 53: ...C H A P T E R TROUBLESHOOTING ...
Page 74: ...C H A P T E R DISASSEMBLYANDASSEMBLY ...
Page 116: ...C H A P T E R ADJUSTMENT ...
Page 150: ...C H A P T E R MAINTENANCE ...
Page 160: ...APPENDIX C H A P T E R ...

