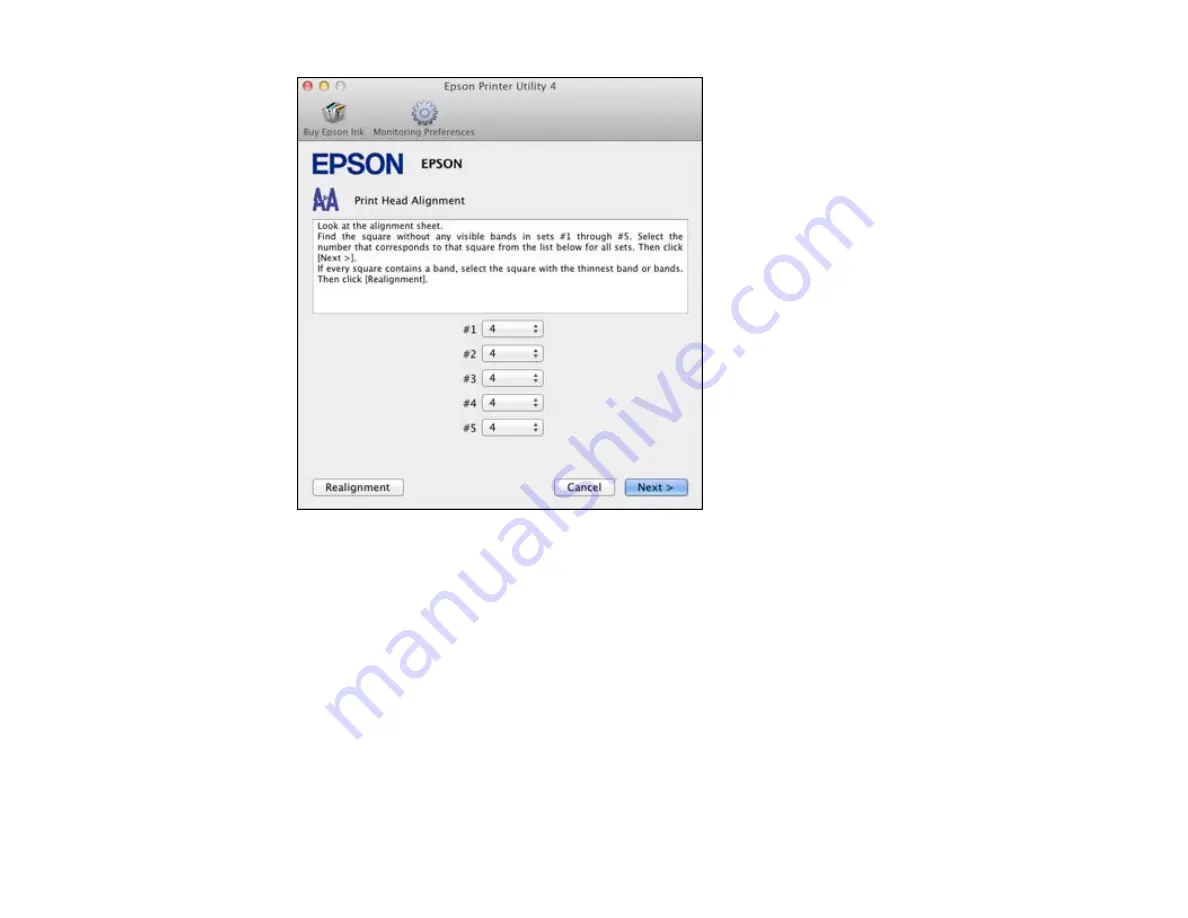
5.
Check the printed pattern and follow the instructions on the screen to choose the number
representing the best printed pattern for each set.
• After choosing each pattern number, click
Next
.
• If no patterns are aligned in one or more of the sets, choose the closest one in each set and click
Realignment
. Then print another alignment sheet and check it.
Note:
Click
Skip
(where available) if you want to skip a particular alignment sheet.
6.
When you are done, click
Finish
.
Parent topic:
187
Summary of Contents for Epson Stylus NX530
Page 1: ...EPSON Stylus NX530 User s Guide ...
Page 2: ......
Page 11: ...EPSON Stylus NX530 User s Guide Welcome to the EPSON Stylus NX530 User s Guide 11 ...
Page 24: ...4 Slide the edge guide shown below to your paper size 24 ...
Page 29: ...2 Pull out the paper cassette 3 Slide the edge guides outward 29 ...
Page 34: ...2 Pull out the paper cassette 3 Slide the edge guides outward 34 ...
Page 100: ...100 ...
Page 110: ...3 Adjust the scan area as necessary 110 ...
Page 117: ...117 ...
Page 125: ...3 Adjust the scan area as necessary 125 ...
Page 131: ...4 Select your scan settings as necessary 131 ...
Page 175: ...175 ...
Page 180: ...180 ...
Page 186: ...186 ...


