background image

61

Functions for Enhancing Projection

User’s Guide

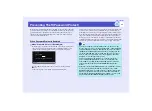
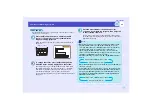
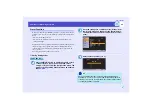
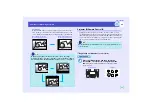
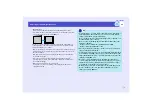
Press the [Enter] button on either the remote control 
or the projector's control panel to store the setting 
values.

When the settings have been saved, the input resolution will 
appear.

PROCEDURE

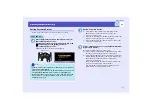
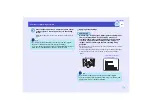
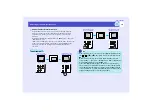
While images from analogue RGB signals are being input 
from a computer which is connected by means of a 
computer cable, press the [Preset] button on the remote 
control to apply the preset settings for the "Image" or 
"Signal" menu to the images that are currently being 
projected.

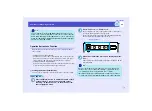
The memorised preset number changes in ascending order each time 
the button is pressed.
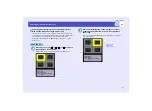
You must press the [Preset] button while the preset number and input 
resolution appear on the screen, otherwise the selection will not 
change.

4

TIP

• To clear the memorised details, select "Reset" from the "Signal" 

menu. Note that this will clear all of the preset settings.

• Preset recording is possible regardless of whether Wall Shot is ON or 

OFF. However, the Wall Shot settings are not memorised.

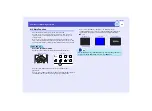
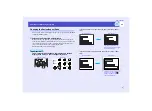
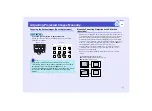
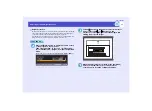
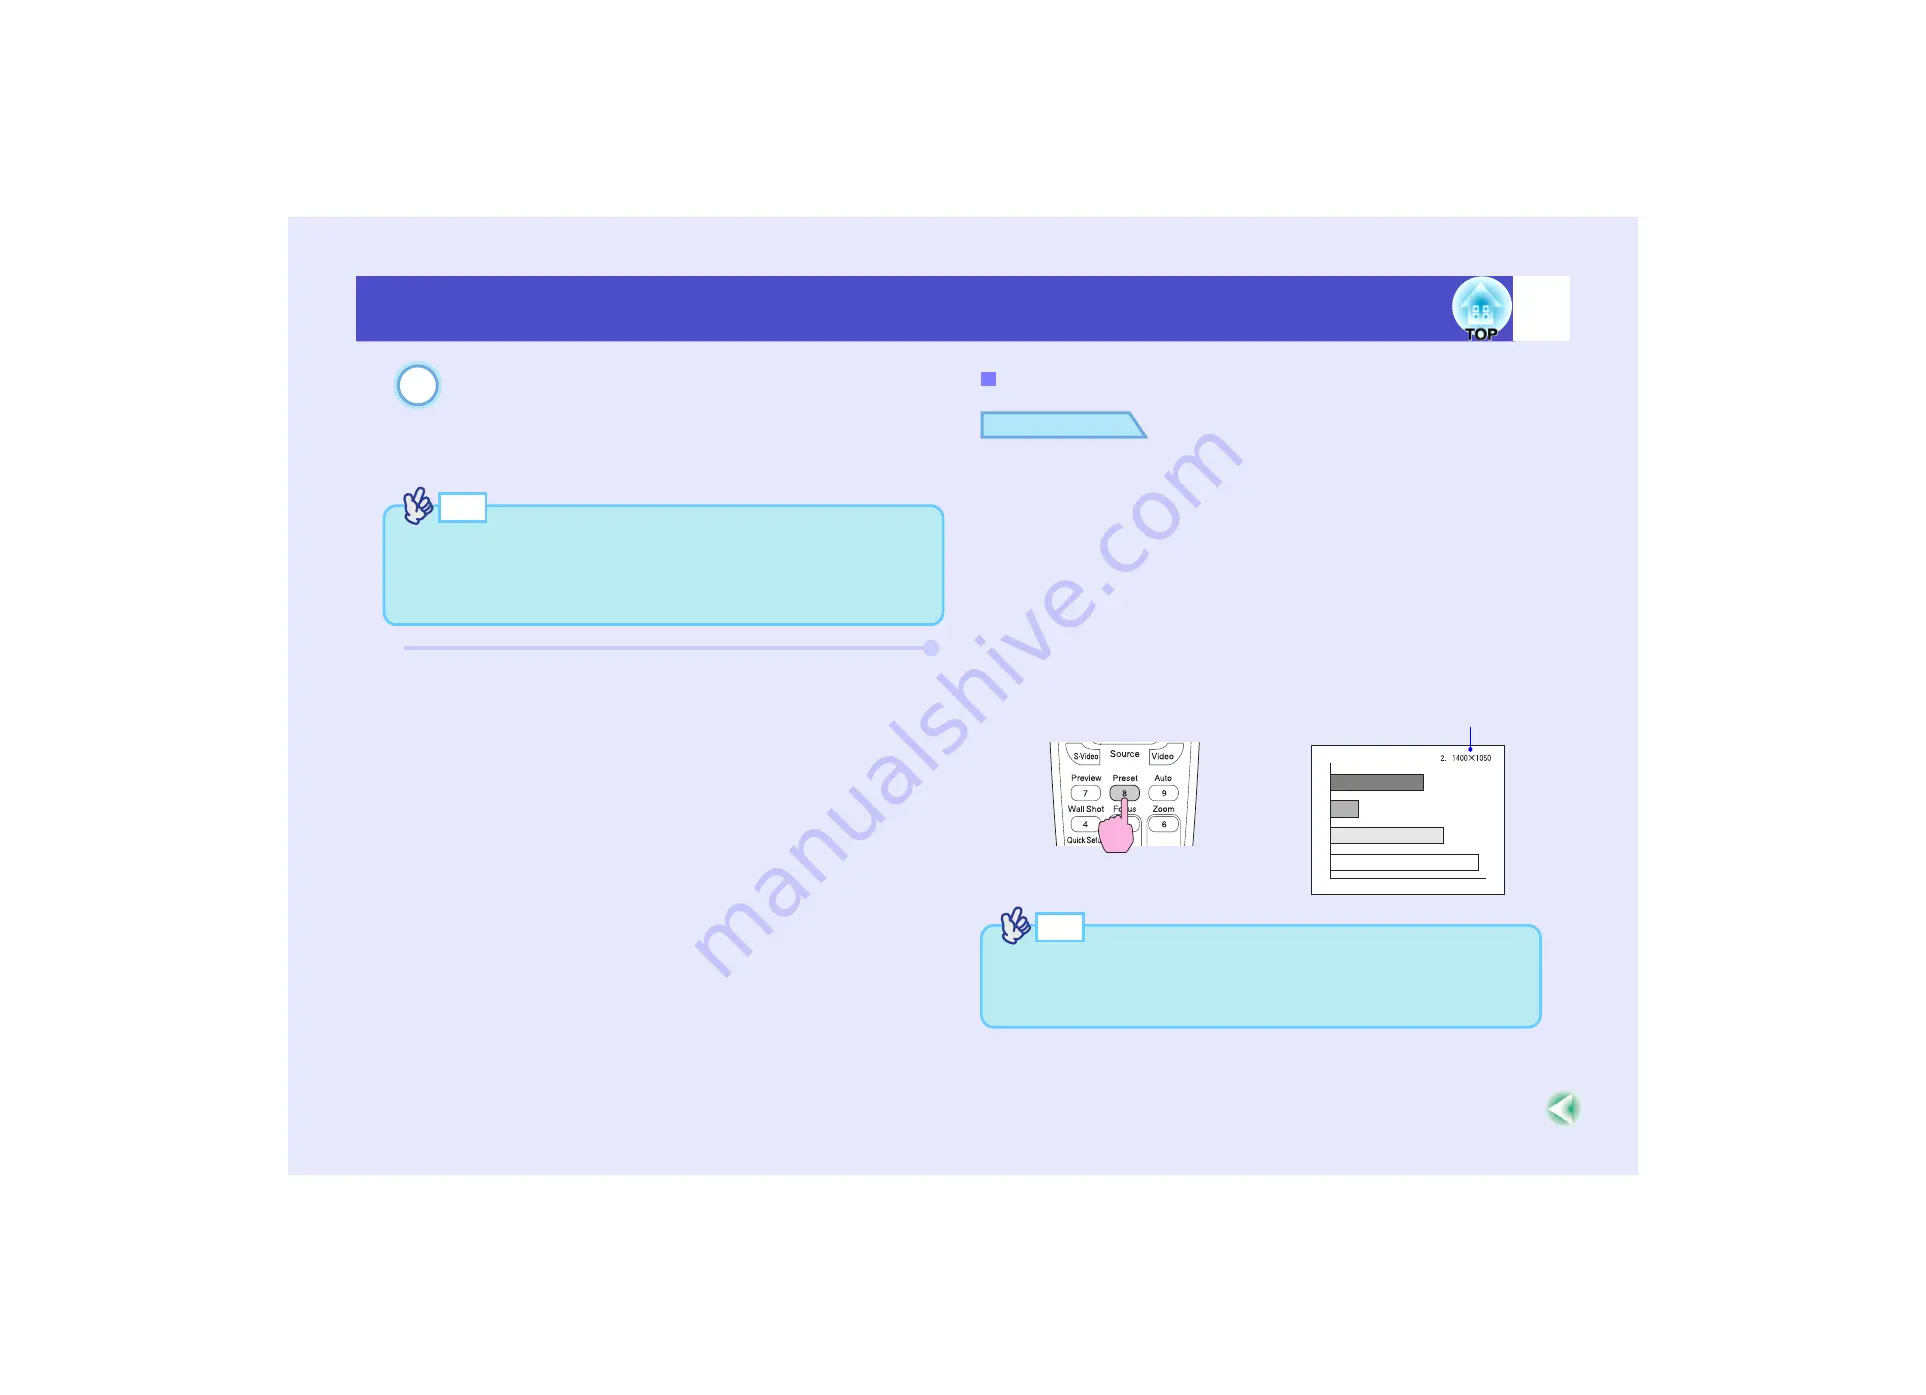
Applying Preset Settings

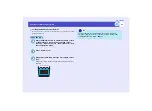
Remote control

Preset number and input 
resolution appear

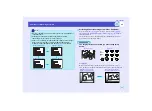
TIP

• Preset numbers that have not yet been preset will be skipped.
• If no preset settings have been made, the message "No Entry" will 

appear when you press the [Preset] button.

Summary of Contents for EMP-830

Page 1: ...User s Guide ...

Page 2: ...top of the projector s control panel Projected images can be quickly and easily adjusted to the optimum images just by pressing these buttons Quick Setup Optimising the Projection Screen at a Single Touch sp 40 The following functions are carried out all at once to optimise the projection area You can also set which functions are carried out at this time Auto focus Adjusts the focus Auto Quick Cor...

Page 3: ...l camera you can use a USB compatible hard disc and a USB compatible memory device This allows you to make a presentation in a scenario with large memory sp 30 Showing the Presentation Using the CardPlayer in the EasyMP Operation Guide You can lock the buttons on the projector s control panel and the remote control This function is useful at times such as during show events so that only projection...

Page 4: ...3 Network Cable Connections 24 Connecting to a Video Source 25 Projecting Composite Video Images 25 Projecting S Video Images 26 Projecting Component Video Images 26 Projecting RGB Video Images 27 Playing Sound from Connected Equipment 28 Playing Sound from External Speakers 29 Connecting USB Devices Digital Camera Hard Disk Drive or Memory Devices EMP 835 Only 30 Connecting USB Devices 30 Disconn...

Page 5: ...ng the Projection Quality Colour Mode Selection 77 Configuration Menus 78 List of Configuration Menu Commands 79 Using the Configuration Menus 87 Monitoring and Controlling Projectors via a Network for the EMP 830 89 Available Network Functions for the EMP 830 89 Projector Network Connecting Settings EMP 830 90 Troubleshooting Using the Help 94 Problem Solving 96 Reading the Indicators 96 When the...

Page 6: ...ing to a Computer 19 Eligible Computers 19 Connecting to a Computer 20 If the Monitor Port is a Mini D Sub 15 pin Port Example 20 Using the Remote Control to Operate the Mouse Pointer Wireless Mouse Function 21 Connecting an External Monitor 23 Network Cable Connections 24 Connecting to a Video Source 25 Projecting Composite Video Images 25 Projecting S Video Images 26 Projecting Component Video I...

Page 7: ...to extend and retract the front foot Control panel sp 9 Remote control light receiving area sensor sp 12 This receives remote control signals and also detects the state of the projection area for Auto Quick Corner and Wall Shot operations Air exhaust vent Do not place objects that may become warped or otherwise affected by heat near the air exhaust vent and do not bring your face or hands near the...

Page 8: ...asp the stopper and pull it to remove the lens cover Front adjustable foot Foot adjust lever Remote control light receiving area sp 12 Receives signals from the remote control Power inlet sp 33 Connect the power cable here Securitylock sp 130 Rear adjustable foot sp 39 Extend and retract to adjust the projection angle when the projector is placed on a surface such as a shelf Rear adjustable foot s...

Page 9: ...94 Enter button sp 22 p 87 p 94 Menu button sp 87 Pointer button sp 58 illumination button Volume buttons sp 46 Esc button sp 22 p 88 p 94 Help button sp 94 Numeric keypad sp 48 p 65 ID button sp 65 Num button sp 48 Remote port sp 128 Preview button sp 52 Preset button sp 60 Auto button sp 74 Wall Shot button sp 53 Source buttons sp 37 PinP button sp 57 A V Mute button sp 55 Resize button sp 62 Fr...

Page 10: ...e Shift button you can adjust the trackingg of computer analogue images When pressed while a configuration menu or help menu is being displayed these buttons function as and left and right buttons for selecting items in the menu Menu button sp 87 Shift button sp 64 p 75 p 76 This button has no function by itself but is used when adjusting the sync and tracking and when using the resize function Re...

Page 11: ...B video images from a video equipment to an external monitor Doesn t support video images and EasyMP EMP 835 only Control RS 232C port sp 132 Connects the projector to a computer using an RS 232C cable This port is for control use and should not be used by the customer USB TypeA port EMP 835 only sp 30 Connects a digital camera or USB support hard disc memory to project their image movie files or ...

Page 12: ... of the arrow Insert the batteries Replace the battery cover Slide the battery cover in until the tab clicks into place Caution Be sure to read the Safety Instructions World Wide Warranty Terms before handling the batteries 1 Rib 2 Check the positions of the and marks inside the battery holder to ensure that the batteries are inserted the correct way Caution 3 TIP If delays in the responsiveness o...

Page 13: ...e remote control buttons 1 2 Remote control light receiving areas Operating range horizontal Approx 30 Remote control light emitting area Approx 30 Approx 30 Operating distance approx 10 m 30 ft Approx 30 Operating angle vertical Operating distance approx 10 m 30 ft Approx 15 Approx 15 Approx 15 Approx 15 Operating distance approx 10 m 30 ft When suspended from the ceiling Operating distance appro...

Page 14: ...p mode The purpose of this is to prevent the batteries from being consumed due to something being placed on top of the remote control When the button is released normal remote control operation will resume If it is within a total of about 10 m 30 ft in the distance from the remote control to the screen and from the screen to the projector the remote control may work by pointing it towards the scre...

Page 15: ...ount is required when installing the projector on the ceiling s p 128 Caution Before setting up the projector be sure to first read the separate Safety Instructions World Wide Warranty Terms Do not set this projector up on its side to carry out projection otherwise malfunctions may occur Front projection Rear projection using a translucent screen Front ceiling projection Rear ceiling projection us...

Page 16: ...f lens to bottom edge of screen Shortest Wide Longest Tele 30 61 46 24 0 18 1 86 142 2 8 4 7 4 1 6 40 81 61 31 9 24 0 117 192 3 8 6 3 6 2 2 50 100 76 39 4 30 0 147 241 4 8 7 9 7 2 7 60 120 90 47 2 35 4 178 290 5 8 9 5 8 3 3 80 160 120 63 0 47 2 239 389 7 8 12 8 11 4 4 100 200 150 78 7 59 1 300 487 9 8 16 0 14 5 5 150 300 230 118 1 90 6 452 734 14 8 24 1 21 8 2 200 410 300 161 4 118 1 604 980 19 8 ...

Page 17: ... to the documentation included with the card Installation PROCEDURE Insert the PC card into the card slot so that it is facing upwards Insert firmly into the slot until it is secure TIP The following PC cards can be inserted into the projector s card slot Wireless LAN card only compatible with the included accessory Memory card s Specifications p 136 Caution Insert the PC card facing the right way...

Page 18: ...s lamp of the projector s card slot is flashing green or while projecting a scenario Doing so may damage the memory card itself or data in the card The PC card gets hot during and immediately after projector use Handle the card carefully when removing it from the card slot Please handle the card carefully to avoid personal injury or burns When you wish to remove a memory card while using CardPlaye...

Page 19: ...heck the network communication status by observing the status of the wireless LAN access lamps as described below Card Slot Access Lamp Status Lit Off Status Access status Green Data is being read from the memory card Off The memory card is in standby state Red An error occurred while data was being read from the memory card Wireless LAN Card Access Lamp Status Lit flashing Lamp Status Communicati...

Page 20: ...y of the computer must be listed in the List of Supported Monitor Displays sp 135 Some computers allow you to change the output resolution so if necessary change the resolution to one that matches a setting in the List of Supported Monitor Displays Refer to the documentation provided with the computer Caution When connecting the projector to a computer be sure to check the following Turn the power...

Page 21: ...determine what type of cable should be used Select the port and cable in accordance with the computer being used Use the accessory computer cable to make the connections If the Monitor Port is a Mini D Sub 15 pin Port Example Computer cable accessory To monitor port To Computer1 Component port blue or Computer2 Component port blue ...

Page 22: ...ouse USB cable accessory USB cable accessory To USB TypeB port To USB port TIP If your projector is EMP 835 the USB TypeA port on the back of the projector does not function as a USB hub The USB cable can only be connected to computers with a standard USB interface If using a computer which is running Windows the computer must have had a full version of Windows 98 2000 Me XP Home Edition XP Profes...

Page 23: ...the same way by pressing the Esc button for approximately 1 5 seconds This operation allows right click dragging and dropping TIP If the mouse button settings have been reversed at the computer the operation of the remote control buttons will also be reversed The wireless mouse function of the remote control cannot be used while a warning message is being displayed or while the following functions...

Page 24: ...l monitor using the cable that is provided with the monitor Cable provided with monitor To Monitor Out port black Monitor port TIP Composite video S Video and EasyMP EMP 835 only images cannot be output to an external monitor The setting gauge for keystone correction and the configuration menus and help menus are not output to the external monitor Component video images can be output to an externa...

Page 25: ...Connect using a commercially available 100baseTX or 10baseT network cable Network cable commercially available To Network port To network port Caution To prevent the possibility of incorrect operation you should use a category 5 shielded cable ...

Page 26: ...vice is on at the time of connection damage may result Check the shapes of the cable connectors and the device ports before making the connections If you try to force a connector to fit a device port with a different shape or number of terminals damage to the connector or port may result Do not bind the power cable and the connecting cable together If the power cable and the connecting cable are b...

Page 27: ...jecting Component Video Images Use the optional component videog cable to make the connections s Optional Accessories and Consumables p 128 S Video cable commercially available To S Video port To S Video output port Component video cable optional To component video output port To Computer1 Component port blue or Computer2 Component port blue ...

Page 28: ...e is a video source other than a computer that outputs RGB signals Use the accessory computer cable to make the connections If the RGB Output Port is a Mini D Sub 15 pin Port Example To RGB output port Computer cable accessory To Computer1 Component port blue or Computer2 Component port blue ...

Page 29: ... the audio cable type you use When component video images are projected the connected port is automatically recognized regardless of which Audio port is being used and the sound is then output from the projector s built in speaker To audio output ports To Audio port RCA audio cable commercially available red white To audio output port Audio cable commercially available If the image signals are bei...

Page 30: ... Out port in order to enjoy a fuller quality of sound Use a commercially available audio cable with pin jack stereo mini jack 3 5 mm plugs or similar Use an audio cable with a plugs that match the ports for the external audio equipment To external audio equipment To Audio Out port Audio cable commercially available TIP When a stereo mini jack audio cable is inserted into the Audio Out port the sou...

Page 31: ...ect USB devices using a digital camera as an example Connect a digital camera to the projector using a USB cable provided with or specified for use with your digital camera TIP Use a USB cable less than 3m in length If the cable exceeds 3m CardPlayer may not function correctly Check that there is no wireless LAN card or memory card in the projector s card slot before connecting any USB device To U...

Page 32: ...n Using the CardPlayer in the EasyMP Operation Guide Disconnect the USB cable or USB storage device from the projector s USB Type A port 1 Caution Be sure to shut down CardPlayer first before disconnecting a USB cable or a USB storage device from the projector If you do not shut down CardPlayer before disconnecting the USB device CardPlayer may no longer operate correctly 2 Caution When a USB comp...

Page 33: ...ction Area Foot Adjustment 38 Adjusting the Horizontal Position of the Projection Area 39 Adjusting the Size of the Projection Area Zoom Adjustment 40 One touch Adjustment of the Projection Area Quick Setup 40 Turning the Projector Off 44 Adjusting the Volume 46 Preventing Theft Password Protect 47 When Password Protect is Enabled 47 When Power ON Protect is Enabled ON 47 If the Timer Setting is f...

Page 34: ...he lens cover forward to remove it Connect the accessory power cable to the projector Check that the power connector is facing the same way as the power inlet on the projector and then insert the power cable connector securely into the projector Connect the other end of the power cable to an earthed electrical outlet Caution Be sure to read the Safety Instructions World Wide Warranty Terms before ...

Page 35: ...projector s control panel to turn the power on for the projector A beep will sound and the Power indicator will change to flashing green 1 2 3 Remote control Flashing green Caution Do not disconnect the power cable or turn off a circuit breaker to turn the power off directly while the Power indicator is still flashing green otherwise it will shorten the lamp s operating life In addition the Power ...

Page 36: ...esired image is projected 4 TIP If Password Protect has been enabled the password entry screen will be displayed when the power is turned on Type in the password sp 48 Press Esc button on the remote control to stop the Auto Focus You can use the Startup Options configuration menu to set functions that are to run when the projector is turned on You can change this so that Quick Setup is run instead...

Page 37: ...No Signal message does not disappear check the connections again If an image signal that is not supported is detected a message will be displayed and source searching will stop If a laptop computer or a computer with an LCD screen has been connected to the projector by a computer cable and the images are not be projected straight away after starting projection check that the computer has been set ...

Page 38: ...omputer1 or 2 Input in the configuration menu will be displayed inside brackets Source Button to press On screen display Remote control Projector EasyMP 1 EasyMP The source changes in the following order each time Computer Component is pressed 2 EasyMP Computer1 Component Comp1 Computer1 Auto Computer1 RGB 3 Computer1 Component Video Computer2 Component Comp2 Computer2 Auto Computer2 RGB 3 Compute...

Page 39: ...any more than 12 upwards or 4 downwards from the horizontal If the projector is tilted to much it may fall down or tip over and injury may result TIP If the projector is tilted vertically the automatic vertical keystone correction will operate to automatically correct distortion of the projected images Auto V Keystone is carried out approximately one second after projection starts A vertical keyst...

Page 40: ...right of the projection area distortion of the images can be corrected by the horizontal correction function or the Quick Corner correction Foot adjust lever Front TIP If the projector is tilted vertically or horizontally turn the bases of the rear adjustable feet to make fine adjustments to the height of the projector If the projector is tilted horizontally the Auto V Keystone correction may not ...

Page 41: ... adjustments simply by pressing the Quick Setup button so that optimum images can be obtained Focus adjustment for projected images Auto Focus Keystone correction for projected images Auto Quick Corner This automatically corrects horizontal distortion of the projection area that occurs when the projector is tilted and projects the image at an aspect ratio of 4 3 If using a screen horizontal to ver...

Page 42: ... this is normal TIP You can use the Quick Setup Options in the configuration menu to set which functions are carried out when the Quick Setup button is pressed Default setting Auto Focus and Auto Quick Corner are carried out Wall Shot is not carried out s Setting Quick Setup Quick Setup Options p 81 Wall Shot can also be carried out separately by pressing the Wall Shot button on either the remote ...

Page 43: ... adjust so that the top edge of the screen is inside the projection area If the top edge of the screen is outside the projection area correction will not be carried out correctly Auto Quick Corner can provide effective correction when the borders of the projection surface stand out clearly such as a white screen with black borders If the borders of the projection area do not stand out clearly corr...

Page 44: ...rk correctly In such cases adjust the focus manually s Adjusting Projected Images Manually p 68 Auto Focus and Auto Quick Corner use sensors in order to work These sensors may not work correctly depending on factors such as the condition of the projection surface and the effects of external light If this happens make the adjustments manually s Adjusting Projected Images Manually p 68 ...

Page 45: ...ctor s control panel once more The lamp will switch off The Power indicator will change to lit orange 1 2 Remote control Caution If the message The projector is overheating Clean or replace the air filter and lower the room temperature appears on the screen press the Enter button on either the remote control or the projector s control panel to turn the power off and then clean the air filters sp 1...

Page 46: ...tart operating correctly 4 TIP If you leave the R C switch on the remote control at ON it will consume battery power When not using the remote control set the R C switch to OFF 5 Lens cover Caution Note the following points if using the direct power off feature If you disconnect the power cable or turn off a circuit breaker while using a configuration menu the settings may not be stored correctly ...

Page 47: ...to adjust the volume For adjustment using the configuration menus s Setting Audio Volume p 83 Press the Volume button on either the remote control or the projector s control panel Press the button to turn up the volume and press the button to turn down the volume The volume gauge appears on the screen when the volume is being adjusted Remote control TIP If the value displayed in the gauge on the s...

Page 48: ... is set to ON and you are using a circuit breaker or similar to centrally control the power the password entry screen will be displayed the first time the projector is turned on after the power supply is restored When Power ON Protect is Enabled ON TIP If an incorrect password is entered three times in succession the message The projector s operation will be locked will be displayed for approximat...

Page 49: ...ssage will be displayed and the settings cannot be changed To change any of the settings first set User s Logo Protect to OFF sp 50 Capturing a user s logo Changing the Extended Display Display Background menu setting or A V Mute setting to Black or Blue from Logo or to Logo from Black or Blue Changing the Extended Display Startup Screen menu setting ON or OFF Entering a Password with the Remote C...

Page 50: ...ify the time interval for password prompt If you don t use this setting proceed to step 4 1 Select Timer and then press the Enter button on either the remote control or the projector s control panel 2 After enabling numeric keypad of the remote control enter desired hours within the range of 0 to 9999 and press the Enter button on either the remote control or the projector s control panel Press th...

Page 51: ... password is 0000 and you can change it to the required password If you select No the display will return to the screen in step 1 3 Enables numeric keypad of the remote control and enter a 4 digit password The password entered will be displayed as Once four digits have been entered the confirmation screen will be displayed 4 Re enter the password to confirm The message The new password is stored w...

Page 52: ...nction 66 Locking the Control Panel Buttons 66 Locking the Remote Control Buttons 67 Adjusting Projected Images Manually 68 Focusing the Screen Images Focus Adjustment 68 Manually Correcting Projection Area Distortion Keystone 68 Vertical and Horizontal Correction 70 Height Correction 71 Correcting Keystone Distortion so that the Projection Area Fits the Screen Exactly Quick Corner 72 Adjusting Co...

Page 53: ... signal being input or which have a signal being input that is not supported will be solid blue Once you select an input source by pressing any of the Search buttons on the remote control the preview function is terminated and the selected image is projected Tilt the button to select the images to be projected Move the red box until the desired image is selected 1 Computer Analog RGB Video S Video...

Page 54: ...e Wall Shot function can be used to obtain clear images when they might otherwise appear faded 3 Video S Video Computer Computer Easy MP S Video TIP You can hear the sound for the images in the active window while the preview window is being displayed Images other than the image in the active window will be projected as still images If you press the Preview button while E Zoom function is active o...

Page 55: ...ess the Wall Shot button while Wall Shot ON is being displayed on the screen so that Wall Shot OFF is selected 1 Remote control 2 3 TIP When the projector s power is turned off images will be projected next time with the status set to Wall Shot OFF However the correction values that were obtained by the previous measurement operation will be stored even when the power is turned off If projecting i...

Page 56: ...as activated PROCEDURE Press the A V Mute button The images and sound will then be momentarily turned off Press the A V Mute button once more to continue normal projection You can also continue normal projection by pressing the Esc button on either the remote control or the projector s control panel You can use Extended Display A V Mute in the configuration menu to select one of the following thre...

Page 57: ...te control or the projector s control panel E Zoom Function You can use this function to enlarge portions of graphs and tables that you want to see more closely The E Zoom function is controlled using the remote control PROCEDURE Press the E Zoom button A cursor cross indicating the centre point for the area to be enlarged will appear on the screen Move the cross to the area of the image that is t...

Page 58: ...lected using Setting PinP Options Subscreen Image in the configuration menu sp 83 The PinP function is controlled using the remote control PROCEDURE Connect the equipment for projecting to the main screen and the sub screen and then use Setting PinP Options Subscreen Image in the configuration menu to make the sub screen settings then press the PinP button on the remote control The sub screen will...

Page 59: ...The pointer icon can be used to indicate parts of an image that is being projected to clarify which part is being described or to draw attention to it PROCEDURE Press the Pointer button The pointer will be displayed in the centre of the screen 2 3 TIP The position of the sub screen is memorised so that the sub screen will appear in the last position which was set next time the PinP function is use...

Page 60: ...59 Functions for Enhancing Projection User s Guide Tilt the button to move the pointer Press the Pointer button again to cancel the pointer The pointer will then disappear 2 Pointer ...

Page 61: ... control Up to five groups of the settings can be stored PROCEDURE Press the Menu button on either the remote control or the projector s control panel and then select Image or Signal from the configuration menu The mode for storing setting details will then be enabled sp 79 p 80 Once the settings are complete select Preset from the Signal menu and then press the Enter button on either the remote c...

Page 62: ...memorised preset number changes in ascending order each time the button is pressed You must press the Preset button while the preset number and input resolution appear on the screen otherwise the selection will not change 4 TIP To clear the memorised details select Reset from the Signal menu Note that this will clear all of the preset settings Preset recording is possible regardless of whether Wal...

Page 63: ...nal input signal The default setting is the resized display PROCEDURE The display switches between real display and resized display each time you press the Resize button If the input resolution is lower than the panel resolution 1024 768 If the input resolution is higher than the panel resolution 1024 768 Selecting the Computer Display Method Remote control Projector Resized display Real display T...

Page 64: ...d horizontally and appear vertically elongated TIP The type of display for projected images can be saved separately for each input source If the input resolution is the same as the panel resolution 1024 768 dots the image size will not change In the case of SXGA 5 4 input signals the image position changes as shown below each time you press the Resize button while holding down the Shift button on ...

Page 65: ... 0 all projectors can be operated by the remote control regardless of the projector ID numbers PROCEDURE Press the Menu button and then select the Extended Projector ID configuration menu s Using the Configuration Menus for details on this operation p 87 When images in squeeze mode are projected at 4 3 When images in squeeze mode are projected at 16 9 TIP When projecting images with an aspect rati...

Page 66: ...lose the configuration menu When registration is complete only signals from remote controls with the same ID number or an ID number of 0 can be received PROCEDURE Press the ID button The ID button will light Press a button from 0 to 9 to specify an ID number The light for the ID button will turn off and the registration will be complete If a number other than 0 is registered the remote control wil...

Page 67: ...Full Lock or Partial Lock If set to Full Lock none of the buttons on the control panel except the Power button can be operated If set to Partial Lock all buttons other than the Quick Setup buttons will be disabled and cannot be used When the confirmation message is displayed select Yes The control panel buttons will be locked in accordance with the selected setting Locking the Control Panel Button...

Page 68: ...nel and then select Setting Operation Lock Remote Control from the configuration menu Set to Partial Lock When the confirmation message is displayed select Yes The buttons shown in the box in the illustration below will be disabled Locking the Remote Control Buttons 1 2 3 Remote control TIP To cancel the remote control button lock function change the Setting Operation Lock Remote Control setting i...

Page 69: ...on Auto Quick Corner is carried out when the Quick Setup button is pressed s One touch Adjustment of the Projection Area Quick Setup p 40 If you would like to make fine adjustments to the results of automatic vertical keystone correction or Auto Quick Corner you can carry out keystone correction manually This projector is equipped with the following two keystone correction functions Vertical and h...

Page 70: ...eystone correction can be carried out up to a maximum of approximately 45 Horizontal keystone correction can be carried out up to a maximum of approximately 25 Do not set up the projector at an upward angle of more than 12 or a downward angle of more than 4 However the corresponding angle will be smaller under any of the following conditions If the projector is tilted both vertically and horizonta...

Page 71: ...on Projector Projector If the top of the image is elongated If the bottom of the image is elongated Projector Projector If the left edge of the image is elongated If the right edge of the image is elongated TIP If the Quick Corner correction screen is displayed when pressing the or the Quick Corner is currently selected s p 72 When carrying out vertical correction and horizontal correction select ...

Page 72: ...ed out PROCEDURE Press the Menu button on either the remote control or the projector s control panel Then select Setting Keystone H V Keystone Horz Vert Height Height from the configuration menu For details refer to Using the Configuration Menus sp 87 Tilt the button on the remote control to the left or right or press the or buttons on the projector s control panel to correct the height while view...

Page 73: ...s Setting Keystone Quick Corner p 82 PROCEDURE Press any one of the or buttons on the projector s control panel The Quick Corner correction screen will be displayed Press the Enter button on the projector s control panel and then select the corner to be corrected on the screen You can also press the Enter button on the remote control to select the corner Correcting Keystone Distortion so that the ...

Page 74: ...ntrol or the projector s control panel for one second while the Quick Corner correction screen is displayed the correction results will be restored to their default values If the message Cannot move anymore appears on the screen while using the Quick Corner function it means that the limit for correction has been reached Check the following two points Is the projection distance appropriate for the...

Page 75: ...o adjust the images Automatic setup involves adjustment of the following three items Trackingg Position and Syncg If the Contrast configuration menu has been set to Manual it will change to Auto Automatic Setup Remote control Projector TIP If you press the Auto button on the remote control or the Enter button on the projector s control panel while the E Zoom function or Freeze function is active t...

Page 76: ...configuration menus This procedure explains how to use the projector s control panel to adjust the tracking For adjustment using the configuration menus s Signal Tracking p 80 While holding down the Shift button on the projector s control panel press or button until the vertical stripes disappear from the projected images Adjusting the Tracking Projector Projector Decrease the tracking value each ...

Page 77: ...e Shift button on the projector s control panel press or button until the flickering fuzziness or interference disappears from the projected image Adjusting the Sync Projector Projector Decrease the tracking value each time pressing the button Increase the tracking value each time pressing the button TIP If you adjust the sync without adjusting the tracking first it will not be possible to get the...

Page 78: ...ration menus s Image Color Mode p 79 The colour mode changes as follows each time the Color Mode button is pressed The current setting is displayed on the screen each time the mode is changed The default setting for the colour mode is as follows When computer images are being input Presentation When other types of images are being projected Dynamic Mode Application Dynamic Images are modulated and...

Page 79: ...u that is divided into sub menus which are further divided into other sub menus Refer to Using the Configuration Menus sp 87 for details on using the menus Caution If you use Direct Power Off while a configuration menu is being displayed the settings from that configuration menu may not be saved Close the configuration menu before using Direct Power Off Main menu Sub menu Image ...

Page 80: ...e is 3 you can make the following selections Automatically adjusts contrast to the optimum setting Contrast can be adjusted manually Adjusts the depth of image colours Adjusts the tint of projected images Adjusts the sharpness of projected images Color Adjustment Reset Abs Color Temp Red Green Blue Yes No 7500K 2 Adjusts the absolute color temperatureg and the intensity of red green blue component...

Page 81: ...per projection you may need to input the resolution manually Adjusts images when vertical striped patterns appear sp 75 Depends on image signal Position Preset 1 1 2 3 4 5 Progressive 2 Computer1 Input 3 Selects the image signals from equipment that is connected to the Computer1 Component or Computer2 Component port With the Auto function image signals are recognized automatically If the colours d...

Page 82: ...ions specified in Quick Setup Options when the projector is turned on The focus is adjusted automatically Automatic setup is not carried out OFF ON ON OFF OFF Auto Focus Quick Setup Default setting values Reset With the Auto function image signals are recognized automatically If interference appears in the projected images or no images appear when you select Auto select the appropriate signal manu...

Page 83: ...buttons sp 66 Control Panel Remote Control Partial Lock OFF OFF Default setting values Lets you adjust the four corners of the projection area so that it fits the screen exactly sp 72 Quick Corner Auto V Keystone Keystone Corrects keystone distortion in the projection area sp 68 Auto V Keystone can only be set when Projection is set to Front H V Keystone Selects whether vertical keystone correctio...

Page 84: ...er when the button on the remote control is tilted Brightness Control 200 100 Pointer2 Pointer3 Pointer1 Low High Medium Speed Pointer Speed High Speed Low Speed Default setting values Sets the properties to be applied when using the PinP function sp 57 Selects whether sound is to be output for the main screen or for the sub screen Audio Selects the image signal to be projected in the sub screen f...

Page 85: ... times such as when no image signals are being input Sets the screen status when the A V Mute button is pressed sp 55 Sets whether the startup screen is displayed ON or not displayed OFF when the projector is turned on If you change the setting the new setting will be enabled after the power is turned off and then back on Change the user s logo that is displayed as a background and displayed durin...

Page 86: ...Português English Sets whether the RS 232C or USB port is to be used for communicating with a computer If you change the setting the new setting will be enabled after the power is turned off Sets the language to be used for menu and message displays If using the EMP 835 this setting is also applied to EasyMP Standby Mode Network ON Network OFF USB RS 232C Default setting values Varies depending on...

Page 87: ... signal format Shows the image signal settings for the input source Shows the input resolution Shows the refresh rate Shows the synchronisation polarity and synchronisation attributes Reset Resets all configuration menu settings and the lamp operating time Returns all configuration menu settings to their default settings The Computer1 Input Computer2 Input User s Logo Language Projector ID and Lam...

Page 88: ... a menu item The sub menu will change depending on the command selected in the main menu Confirm the selection Press the Enter button on either the remote control or the projector s control panel to confirm the item selection The cursor will be displayed in the sub menu and settings can then be made Select a sub menu item If using the remote control tilt the button up or down to select a sub menu ...

Page 89: ...s control panel to accept the selection Close the menu Press the Menu button on either the remote control or the projector s control panel TIP The items appearing in the Signal menu and the Info menu will vary depending on the type of input source being projected 5 Example 1 Example 2 TIP Sub menu items which cause another sub menu to be displayed when they are selected have after them If you sele...

Page 90: ...carrying out operations such as turning the power for the projectors on and off It allows multiple projectors on a network to be monitored and controlled by a single operator sEMP Monitor Operation Guide EMP NetworkManager This program lets you make network settings for projectors from configuration menus using a remote control However you can use the keyboard of the computer for direct address en...

Page 91: ...NetworkManager Operation Guide Monitoring and control using EMP Monitor sEMP Monitor Operation Guide Projector Network Connecting Settings EMP 830 In order to connect a projector to a network you will need to complete various configuration menu settings such as setting an IP addressg for the projector The following settings can be carried out using the accessory remote control PROCEDURE Press the ...

Page 92: ... used 0 x x x to 254 255 255 255 255 255 255 255 where x is a number between 0 255 Gatewayg address Settings can be entered when DHCP is set to OFF Enter the gateway address that has been assigned to the projector You can enter numbers from 0 to 255 in each field of the IP address However the following gateway addresses cannot be used 0 0 0 0 127 x x x 224 0 0 0 to 255 255 255 255 where x is a num...

Page 93: ...ressed for approximately 10 seconds while in numeric keypad mode or if you press the Num button once more the Num button will switch off and numeric keypad mode will be cancelled 3 To enter two or more numbers tilt the button of the remote control to the right The first number will be confirmed and the cursor will move to the position for entering the second number 4 Once all numbers have been ent...

Page 94: ...4 Problem Solving 96 Reading the Indicators 96 When the Power Indicator is Lit Flashing Red 96 When the Lamp Temp Indicator is Lit Flashing Orange 98 When the Indicators Provide No Help 99 Problems Relating to Images 101 Other Problems 105 Problems Relating to Monitoring and Controlling Projectors Using a Network 107 ...

Page 95: ...on The help screen will be displayed Select a menu item If using the remote control tilt the button up or down to select a menu item If using the projector s control panel press the or button to select a menu item Confirm the selection Press the Enter button on either the remote control or the projector s control panel to confirm a selection 1 Remote control Projector 2 3 TIP To return to a previo...

Page 96: ... User s Guide Repeat steps 2 and 3 to proceed through the menu to more detailed items Press the Help button to clear the help screen 4 TIP If the Help function does not provide a solution to the problem refer to Problem Solving sp 96 ...

Page 97: ...d in the International Warranty Conditions section of the Safety Instructions World Wide Warranty Terms booklet Indicates the projection lamp status Indicates the operating status of the projector Orange In the start up process The Power bottons on the remote control and the projector s control panel are disabled during this period If Standby Mode in the configuration menu is set to Network ON the...

Page 98: ...p cover are securely installed If the lamp or lamp cover is not securely installed the lamp will not switch on Internal temperature error overheating The lamp will turn off automatically and projection will stop Wait for about 5 minutes without operating the projector After about 5 minutes have elapsed unplug the power cable and then check the following two points Check that the air filters and ai...

Page 99: ...th a new one sp 121 If you continue to use the lamp after it has passed the replacement period the possibility that the lamp may break will increase Replace the lamp with a new one as soon as possible The indicator status will vary depending on the projector status at the time Warning Orange Red Orange TIP If the projector is not operating properly even though the indicators are all showing normal...

Page 100: ...istortion appear in images sp 103 Problems such as interference distortion or black white checked patterns appear Image is truncated large or small sp 104 Only part of the image is displayed Image colours are not right sp 104 The whole image appears purplish or greenish images are black white colours appear dull etc Computer monitors and LCD screens have different colour reproduction performance s...

Page 101: ...109 Connection cannot be established in access point mode or wired LAN connection mode sp 111 Connection cannot be made in ad hoc mode sp 111 Network Screen images are not displayed or the display is slow sp 111 The PowerPoint slideshow does not work when using the Network Screen sp 112 Keynote slideshows cannot be played back with Network Screen sp 112 Network Screen cannot be used sp 112 When ru...

Page 102: ...k Some input images such as screen savers may be completely black Are the image signal format settings correct If a composite videog or S Videog source is connected to the projector use the Video Signal menu command to select the signal format s Signal Video Signal p 81 Check Remedy Is Sleep Mode set to ON When the Sleep Mode menu command has been set to ON the lamp turns off automatically if no o...

Page 103: ...o switch images sp 37 Is the power for the computer or video source turned on Turn the power on for the devices sp 19 p 27 Are the image signals being output to the projector If the image signals are only being output to the computer s LCD monitor or to the accessory monitor you need to change the output to an external destination as well as the computer s own monitor For some computer models when...

Page 104: ...n the lens turn the power off and wait for the condensation to disappear Check Remedy Are the image signal format settings correct If a composite videog or S Videog source is connected to the projector use the Video Signal menu command to select the signal format s Signal Video Signal p 81 Are the cables connected correctly Check that all of the cables required for projection are securely connecte...

Page 105: ...roperties of the computer s Control Panel the projector will only project about half of the image on the computer screen To display the whole of the image on the computer screen turn off the dual display setting sComputer video driver documentation Has the Resolution command been set correctly Set the Resolution menu command to match the computer s Signal Resolution p 80 sComputer documentation Ch...

Page 106: ...rectly Use the Contrast menu command to adjust the contrast s Image Contrast p 79 Is the lamp due for replacement When the lamp is nearly due for replacement the images will become darker and the colour quality will become poorer When this happens the lamp should be replaced with a new one sp 121 Other Problems Check Remedy Is the audio source connected correctly Check that the cable is connected ...

Page 107: ...tor up in a location where strong light will not shine onto the remote control light receiving area Are the batteries dead or have the batteries been inserted correctly Insert new batteries while making sure that they face correctly sp 11 Does the remote control s ID number match the projector s ID number If the remote control s ID number is set to a number other than 0 the ID number must match th...

Page 108: ...t Check the network settings for the projector If using the EMP 835 s Connecting in Access Point Mode or Wired LAN Mode in the EasyMP Network Setup Guide If using the EMP 830 sp 90 Has Standby Mode been set to Network ON If using the mail notification function while the projector is in standby mode change the Standby Mode menu setting to Network ON s Extended Standby Mode p 85 Has a critical probl...

Page 109: ...e install it If using the EMP 835 s If You would like to Uninstall the EasyMP Software and Installing EasyMP Software in the EasyMP Network Setup Guide If using the EMP 830 s Installation and Uninstallation in the EMP NetworkManager Operation Guide Have all projectors that are to be monitored and controlled been registered in the projector list Register the projector in the projector list sEMP Mon...

Page 110: ...ct the Exit button from the displayed menu and then press the Enter button on the remote control Connect from the desired computer after terminating the connection s Disconnecting from a Network Connection in the EasyMP Network Setup Guide Check Remedy Is the network cable connected correctly Check that the network cable is connected correctly If it is not connected or is connected incorrectly rec...

Page 111: ...pter to be used by EMP NS Connection must be selected otherwise it will not be possible to connect Start EMP NS Connection and select the network adapter from the Extension Switch LAN Windows or Extension Network Set Macintosh menu If making a wireless LAN connection are there any settings within the power saving features of your computer which disable the wireless LAN Please enable the wireless L...

Page 112: ...ssions on the access point Have the IP address subnet mask and gateway address for the access point and the projector been set correctly If not using DHCP make all of the settings manually s Connecting in Access Point Mode or Wired LAN Mode in the EasyMP Network Setup Guide Have the same subnet masks been set for the access point and the projector Select Use IP connect mode in EMP NS Connection an...

Page 113: ...ovie is being played back or change the resolution and colour settings of the display after starting the movie the movie will freeze In such cases do something to activate the window such as moving it or minimizing and restoring it Check Remedy Are you trying to start Network Screen when PowerPoint is running Close the PowerPoint application before connecting with Network Screen If you connect whe...

Page 114: ...Microsoft Office JPEG converter installation refer to the documentation for the Microsoft Office Check Remedy Failed to connect to a projector Try to reconnect If connection is still not possible check the network settings at the computer and at the projector For details on EasyMP network settings sEasyMP Network Setup Guide Network settings are being made automatically If the computer has been se...

Page 115: ...etwork settings at the projector For details on network settings sEasyMP Network Setup Guide If you click the No button the connection will remain closed and the message window will close One of the projectors cannot be connected with the keyword entered The wrong keyword was entered when trying to connect to a projector with a projector keyword Check EasyMP standby screen for the correct projecto...

Page 116: ...ng in the Wired LAN Basic or the Wireless LAN Basic configuration menu and specify that IP address when connecting in IP connection mode s If No Connected Projectors Appear in the EasyMP Operation Guide If connection is still not possible check the network settings at the computer and the EasyMP network settings at the projector For details on network setting s Connecting in Access Point Mode or W...

Page 117: ...eMaker2 the file was moved to another folder After the last time the scenario file was saved by EMP SlideMaker2 the folder name was changed The desired scenario file has been deleted Open the desired scenario file by selecting File Open or search for the file using the Windows Search for Files or Folders function or other methods Disk full while accessing is the path name including the scenario fi...

Page 118: ... IP Address setting in the Wired LAN Basic or the Wireless LAN Basic configuration menu and specify that IP address when connecting in IP connection mode s Registration Using IP Address Manual Registration in the EMP Monitor Operation Guide If connection is still not possible check the network settings at the computer and the EasyMP network settings at the projector For details on network settings...

Page 119: ...eplacing the Lamp 121 Resetting the Lamp Operating Time 123 Replacing the Air Filters 124 Saving a User s Logo 125 Optional Accessories and Consumables 128 Optional Accessories 128 Consumables 128 Glossary 129 List of ESC VP21 Commands 132 Command List 132 Communication Protocol 132 Cable Layouts 132 Serial Connection 132 USB Connection 133 USB Connection Setup 133 PJLink EMP 835 only 134 List of ...

Page 120: ...ation and shortening of the optical engine s service life It is recommended that you clean these parts at lest once every three months Clean them more often than this if using the projector in particularly dusty environments Air outlets at side and base Turn the projector upside down and use a vacuum cleaner to clean the air intake vents Cleaning the Projector Case Cleaning the Lens Caution Be sur...

Page 121: ...lamp use in order to maintain the initial brightness and quality of the projected images s Brightness Control p 83 When used continuously at high brightness about 1900 hours When used continuously at low brightness about 2900 hours If you continue to use the lamp after this period the possibility of the lamp breaking becomes greater When the lamp replacement message appears replace the lamp with a...

Page 122: ...cing the Lamp When replacing the lamp because it has stopped illuminating there is a possibility that the lamp may be broken If replacing the lamp of a projector which has been installed on the ceiling you should always assume that the lamp is broken and you should stand to the side of the lamp cover not underneath it Remove the lamp cover gently Small pieces of glass may fall out when the lamp co...

Page 123: ...the projector l Take out the old lamp Hold the lamp by its knob as shown below and pull out the lamp If the lamp is broken contact your local dealer for further advice If replacing the lamp by yourself be careful to avoid pieces of broken glass Install the new lamp Hold the lamp so that it faces the correct way to fit into the projector and then insert the lamp until it clicks into place and tight...

Page 124: ...layed Select Lamp Hours Reset from the Reset menu and then press the Enter button on either the remote control or the projector s control panel Resetting the Lamp Operating Time 6 Caution Install the lamp securely If the lamp cover is removed the lamp turns of automatically as a safety precaution Moreover the lamp will not turn on if the lamp or the lamp cover is not installed correctly This produ...

Page 125: ...ector is installed on a ceiling PROCEDURE Turn the projector s power off then disconnect the power cable Remove the air filters Press the tabs to release the lock and lift the air filters to remove them The projector has two air filters Install the new air filters Insert the one tab of the air filter into the projector and press the other tab until it clicks in the place Replacing the Air Filters ...

Page 126: ...the projector s control panel Caution If you use Direct Power Off while a user s logo is being saved the user s logo may not be saved correctly If this happens repeat the user s logo saving procedure from the start TIP When a user s logo is recorded the previous user s logo will be erased You cannot save a new user s logo if User s Logo Protect in the Password Protect settings has been set to ON S...

Page 127: ...t the button on the remote control or press the and buttons on the projector s control panel to select the part of the image to use as the user s logo and then press the Enter button on either the remote control or the projector s control panel 3 TIP If Yes is accepted since the image will be projected at their original image signal resolution images with the different resolution from the projecto...

Page 128: ...tion screen and then press the Enter button on either the remote control or the projector s control panel The image will then be saved Once the image has been saved the message Completed will be displayed 5 6 7 Saving the user s logo may take a few moments about 15 seconds Do not use the projector or any other sources which are connected to the projector while the user s logo is being saved If thi...

Page 129: ... the same computer cable as the projector s accessory computer cable VGA HD15 PC cable ELPKC09 3 m 9 8 ft for mini D Sub 15 pin mini D Sub 15 pin VGA HD15 PC cable ELPKC10 20 m 65 6 ft for mini D Sub 15 pin mini D Sub 15 pin Use these extension cables if the accessory computer cable is too short Component video cable ELPKC19 3 m 9 8 ft for mini D Sub 15 pin male 3RCA male Use when a device that ou...

Page 130: ...deo brightness signals and colour signals separated in order to provide better image quality In high definition TV HDTV it refers to images which consist of three independent signals Y luminance signal and Pb and Pr colour difference signals Composite video Video signals which have the video brightness signals and colour signals mixed together The type of signals commonly used by household video e...

Page 131: ...h as wireless LAN cards It specifies the protocols for communication between the driver and the operating system and application program and for communication between the driver and the network card Progressive A method of image scanning whereby the image data from a single image is scanned sequentially from top to bottom to create a single image RADIUS server RADIUS is an abbreviation for Remote ...

Page 132: ... method used for WPAg The encryption key is renewed after a certain period of time to make it harder to break the encryption code Tracking The signals output from computers have a specific frequency If the projector frequency does not match this frequency the resulting images will not be of a good quality The process of matching the frequency of these signals the number of crests in the signal is ...

Page 133: ...d Power ON OFF ON PWR ON OFF PWR OFF Signal Selection Computer1 Component SOURCE 10 Computer2 Component SOURCE 20 Video SOURCE 41 S Video SOURCE 42 EasyMP EMP 835 only SOURCE 50 A V Mute ON OFF ON MUTE ON OFF MUTE OFF A V Mute Selection Black MSEL 00 Blue MSEL 01 User s Logo MSEL 02 Standard baud rate 9600 bps Data length 8 bits Parity None Stop bit 1 bit Flow control None Connector shape D Sub 9 ...

Page 134: ...river from the EPSON website to your computer The URL is as follows http esupport epson europe com downloads en Install the downloaded USB driver on your computer Read the instructions displayed on the download screen Change the COM Port setting in the Extended menu to USB Turn the projector off Turn the projector s power back on Once the projector s power has turned back on communication via a US...

Page 135: ... it has been verified to comply with the standard through PJLink standard compatibility inspections Non compatible commands Input names defined by PJLink and corresponding projector connectors Manufacturer name displayed for Manufacture name information query SEIKO EPSON CORPORATION Model name displayed for Product name information query EMP 835 Function PJLink command Muting settings Image muting...

Page 136: ...768 1024 768 SXGAg 70 75 85 100 1152 864 2 1024 768 SXGA 60 75 85 1280 960 2 1024 768 1280 1024 2 960 768 SXGA 60 75 85 1400 1050 2 1024 768 UXGAg 60 65 70 75 80 85 1600 1200 2 1024 768 MAC13 640 480 1024 768 MAC16 832 624 1024 768 MAC19 1024 768 1024 768 MAC21 1152 870 2 1016 768 SDTVg 525i 480i 525p 480p 625i 576i 625p 576p 1024 768 4 3 aspect ratiog 1024 576 16 9 aspect ratio HDTVg 750p 720p 10...

Page 137: ... Electric power consumption Power Consumption Operating 300W Standby Network OFF 1W 100 120V area 1 4W 200 240V area Network ON 38W Power Consumption Operating 300W Standby 1W 100 120V area 1 4W 200 240V area Operating temperature 5 35 C No condensation Storage temperature 10 60 C No condensation Operating Altitude 0 2280 m 0 7500 ft Weight Approx 4 7 kg Connectors Computer1 Component 1 Mini D Sub...

Page 138: ...3 3 Australia New Zealand AS NZS CISPR 22 2002 Class B Angle of tilt If you set the projector outside the range of 4 to 12º from horizontal it could damage the projector and cause an accident Control RS 232C 1 D Sub 9 pin male Remote 1 Stereo mini jack Monitor Out 1 Mini D sub 15 pin female Black Audio Out 1 Stereo mini jack Network RJ45 1 Card Slot PCMCIA TypeII slot 1 Supported Memory Cards by P...

Page 139: ...138 User s Guide Appearance Distance from centre of lens to suspension bracket fixing point Centre of lens 125 5 112 367 57 9 6 10 4 M4 10 57 72 9 187 1 62 23 136 18 70 Units mm 283 ...

Page 140: ... in accordance with the instructions may cause harmful interference to radio or television reception However there is no guarantee that interference will not occur in a particular installation If this equipment does cause interference to radio and television reception which can be determined by turning the equipment off and on the user is encouraged to try to correct the interference by one or mor...

Page 141: ...use of any options or any consumable products other than those designated as Original EPSON Products or EPSON Approved Products by SEIKO EPSON CORPORATION General Notice EPSON is a registered trademark of SEIKO EPSON CORPORATION EasyMP is a trademark of SEIKO EPSON CORPORATION Macintosh Mac and iMac are registered trademarks of Apple Computer Inc IBM is a registered trademark of International Busi...

Reviews: