Introduction
13
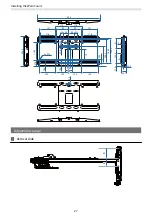
Figures of Installation Dimensions
You need the following space to install the projector and the touch unit.
Leaving a gap of approximately 100 mm from the ceiling to the top of the wall plate makes it easier to install and
remove the projector.
When using the Touch Unit, install the projector so that there is a gap between the projected image and the edges
of the screen as shown in the following image.
100mm
5.7 - 50mm
(
20 - 50mm (16:6, 21:9))
20mm
100mm
100mm
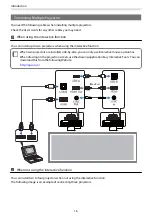
When projecting a screen with multiple projectors, use the Edge Blending function to create a seamless image. When
projecting a screen with an aspect ratio of 3:1, set the
Blend Range
for
Edge Blending
to
600
.
Summary of Contents for ELPHD02
Page 1: ...Installation Guide ...
Page 18: ...Introduction 17 Max 5m Max 5m ...
Page 29: ...Installing the Wall mount 28 Horizontal slide 45 45 Forward backward slide 0 383 ...
Page 77: ...Installing the Control Pad 76 For Canadian Users ...
Page 79: ...Installing the Control Pad 78 ...
Page 96: ...Installing the Touch Unit 95 Wavelength 932 to 952 nm ...
Page 99: ...Installing the Touch Unit 98 Adjustment range 79 5 140 5 15 76 ...
Page 138: ...Setting the Projector 137 c Select EDID from the Signal I O menu d Select 3240x1080 60Hz ...

