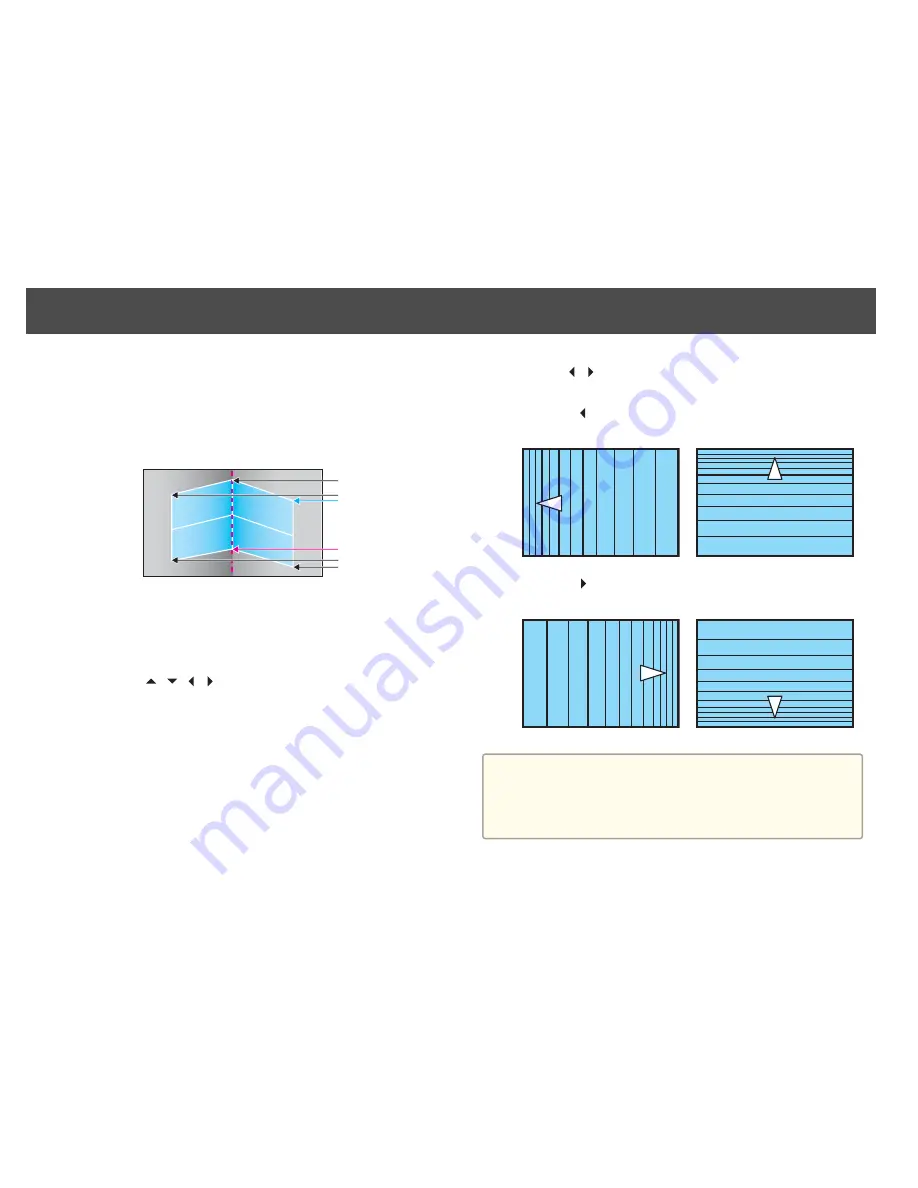
Adjustment tips
When selecting
Horizontal Corner
:
Adjust the upper area based on the lowest point (indicated by a blue
arrow).
Adjust the lower area based on the highest point (indicated by a red
arrow).
When selecting
Vertical Corner
:
Adjust the left and right based on the point nearest to the vertical
line in the center of the screen.
g
Use the [
][
][
][
] buttons to adjust the shape.
If the message "Cannot adjust any further." is displayed while
adjusting, you cannot adjust the shape any further in the direction
indicated by the gray triangle.
h
Repeat procedures 6 and 7 as needed to adjust any remaining
parts.
If the image expands and contracts, go to the next step and adjust
the linearity.
i
Press the [Esc] button, and then select
Linearity
.
j
Use the [
][
] buttons to adjust the linearity.
Adjust so that the gaps between the lines are equal.
When the [ ] is pressed
When selecting
Horizontal Corner
When selecting
Vertical Corner
When the [ ] is pressed
When selecting
Horizontal Corner
When selecting
Vertical Corner
a
You can fine tune the results of Corner Wall using Point Correction.
Change
Geometric Correction
to
Point Correction
, and then make
adjustments after selecting
Keep the current geometric correction
settings
.
s
"Point Correction"
p.59
Projecting Images
58
Summary of Contents for EB-G6800
Page 1: ...Installation Guide ...
Page 5: ...Main Guide ...


