6.
On the
2. Save
tab, you can make settings for saving the scan results.
❏
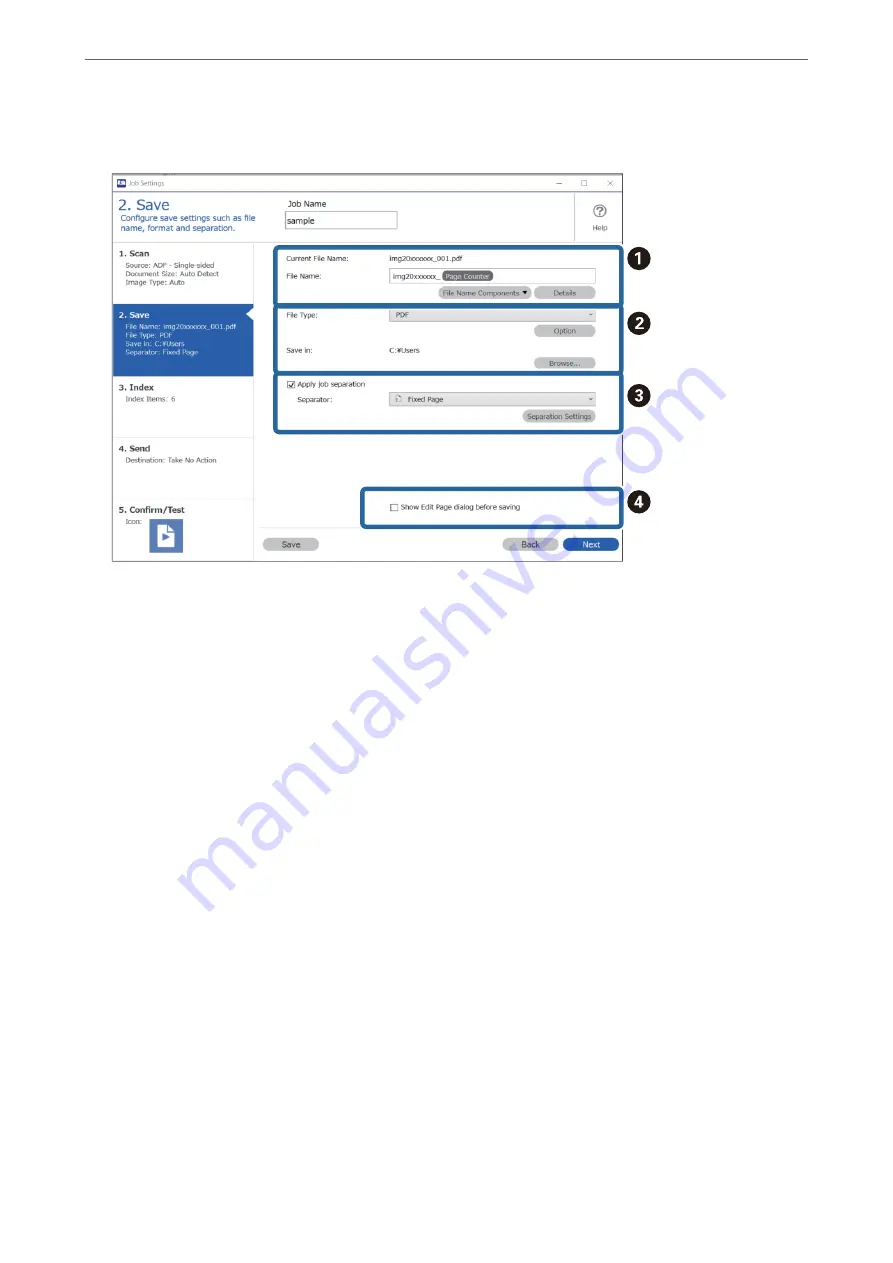
A
Set the name of the file.
When you select a component you want to use for the file name from
File Name Components
, it is added
to the file name. You can also enter a name directly in
File Name
.
If you want to add barcodes, OCR, and forms, you need to make settings in advance. Click
Detailed
Settings
.
You can also change the Time Stamp and Page Counter format from
Detailed Settings
.
❏
B
Set the file save format and location.
Option
may be enabled depending on the File Type; click to make detailed settings.
❏
C
When you want to separate jobs, select this to choose the separation method, and then select
Separation
Settings
to make detailed settings.
❏
D
Change the settings as necessary.
When you select
Show Edit Page dialog before saving
, you can make edits on the
Edit Scanned Results
screen after scanning.
When you have finished making save settings, click
Next
or the
3. Index
tab.
>
>
Creating and Registering a Job (Windows)
85
Summary of Contents for DS-530 II
Page 10: ...Important Instructions Safety Instructions 11 Restrictions on Copying 12 ...
Page 61: ...Basic Scanning Scanning Using a Scanner Button 62 Scanning from a Computer 62 ...
Page 135: ...Using the Flatbed Scanner Dock About the Flatbed Scanner Dock 136 ...
Page 184: ...Where to Get Help Technical Support Web Site 185 Contacting Epson Support 185 ...


