


7.
Select the
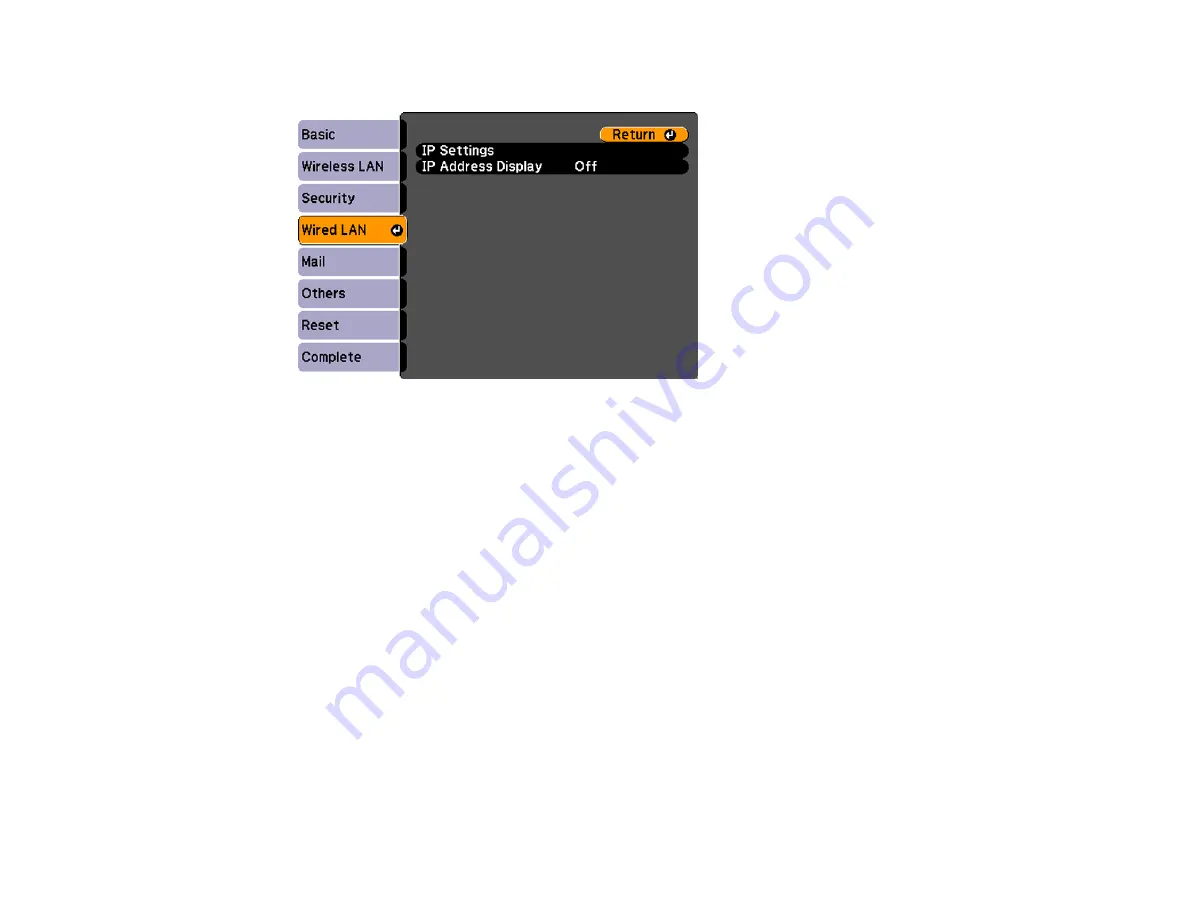
Wired LAN
menu and press
Enter
.
8.
If necessary, select
IP Settings
and press
Enter
.
9.
Select your IP Settings as necessary:
• If your network assigns addresses automatically, turn on the
DHCP
setting.
• If you must set addresses manually, turn off
DHCP
and enter the projector's
IP Address
,
Subnet
Mask
, and
Gateway Address
as needed.
Note:
To highlight the numbers you want from the displayed keyboard, press the arrow buttons on
the remote control. To select a highlighted number, press
Enter
.
10. To prevent display of the IP address on the standby screen, turn off
IP Address Display
.
11. When you finish selecting settings, select
Complete
and follow the on-screen instructions to save
your settings and exit the menus.
Parent topic:
Wireless Network Projection
You can send images to your projector through a wireless network. To do this, you must install the
optional Epson 802.11b/g/n wireless LAN module, and then set up your projector and computer for
wireless projection.
48
Summary of Contents for BrightLink 421i
Page 1: ...BrightLink 436Wi 421i User s Guide ...
Page 2: ......
Page 10: ......
Page 11: ...BrightLink 436Wi 421i User s Guide Welcome to the BrightLink 436Wi 421i User s Guide 11 ...
Page 25: ...Projector Parts Remote Control 25 ...
Page 28: ...Rear Front ceiling Rear ceiling 28 ...
Page 67: ...Parent topic Crestron RoomView Support 67 ...
Page 110: ...2 Select the Easy Interactive Function setting and press Enter 110 ...
Page 121: ...121 ...
Page 143: ...Switch to annotation mode Switch to whiteboard annotation mode 143 ...


