


You see a prompt asking if you want to select this image area.
6.
Select
Yes
and press
Enter
. (If you want to change the selected area, select
No
, press
Enter
, and
repeat the last step.)
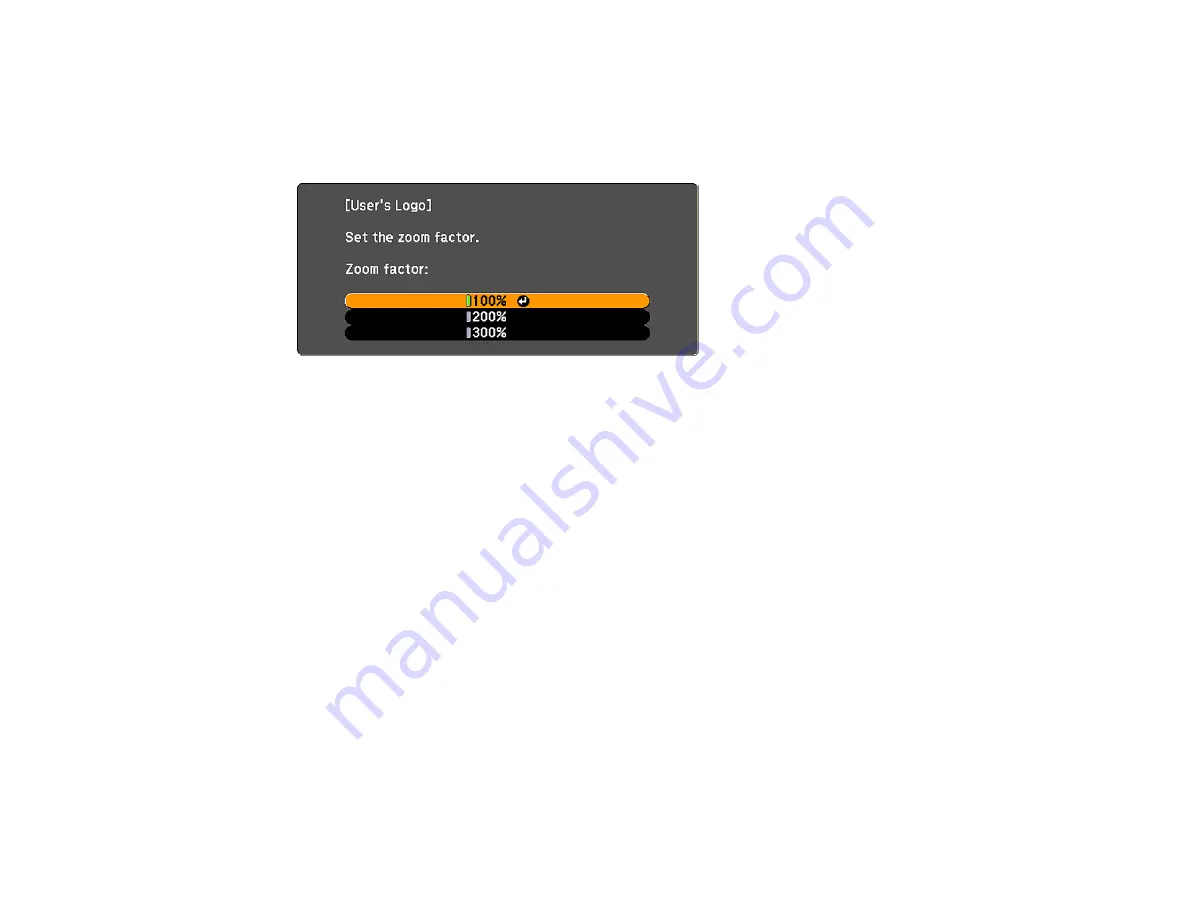
You see the User's Logo zoom factor menu.
7.
Select a zoom percentage and press
Enter
.
You see a prompt asking if you want to save the image as the User's Logo.
8.
Select
Yes
and press
Enter
.
Note:
It takes a few moments for the projector to save the image; do not use the projector, its remote
control, or any connected equipment until it is finished.
You see a completion message.
9.
Press
Esc
to exit the message screen.
10. Select the
Extended
menu and press
Enter
.
11. Select
Display
and press
Enter
.
12. Select when you want to display the User's Logo screen:
• To display it whenever there is no input signal, select
Display Background
and set it to
Logo
.
• To display it whenever you turn the projector on, select
Startup Screen
and set it to
On
.
• To display it whenever you press the
A/V Mute
button, select
A/V Mute
and set it to
Logo
.
To prevent anyone from changing the User's Logo settings without first entering a password, set a
password and enable User's Logo security.
Parent topic:
103
Summary of Contents for BrightLink 421i
Page 1: ...BrightLink 436Wi 421i User s Guide ...
Page 2: ......
Page 10: ......
Page 11: ...BrightLink 436Wi 421i User s Guide Welcome to the BrightLink 436Wi 421i User s Guide 11 ...
Page 25: ...Projector Parts Remote Control 25 ...
Page 28: ...Rear Front ceiling Rear ceiling 28 ...
Page 67: ...Parent topic Crestron RoomView Support 67 ...
Page 110: ...2 Select the Easy Interactive Function setting and press Enter 110 ...
Page 121: ...121 ...
Page 143: ...Switch to annotation mode Switch to whiteboard annotation mode 143 ...


