Paper Is Smeared or Scuffed
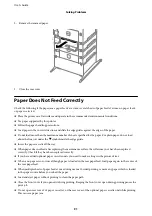
Check the following if the paper is smeared or scuffed when printing.
❏
Clean the paper path.
❏
Load paper in the correct direction.
❏
When performing manual 2-sided printing, make sure that the ink is completely dry before reloading the paper.
❏
Enable the reduce smear setting for thick paper. If you enable this feature, print quality may decline or the
printing may slow down. Therefore, this feature should normally be disabled.
❏
Control panel
Select
Menu
>
Maintenance
from the home screen, and then enable
Thick Paper
.
❏
Windows
Click
Extended Settings
on the printer driver's
Maintenance
tab, and then select
Thick Paper and
Envelopes
.
❏
Mac OS X
Select
System Preferences
from the
menu >
Printers & Scanners
(or
Print & Scan
,
Print & Fax
), and
then select the printer. Click
Options & Supplies
>
Options
(or
Driver
). Select
On
as the
Thick paper and
envelopes
setting.
❏
For Windows, if the paper is still smeared after selecting the
Thick Paper and Envelopes
setting, select
Short
Grain Paper
in the
Extended Settings
window of the printer driver.
❏
When printing high-density data such as images or graphs using automatic 2-sided printing, lower the print
density setting and choose a longer drying time.
❏
Windows
Click
Print Density
on the printer driver's
Main
tab, and then adjust the
Increase Ink Drying Time
slider.
❏
Mac OS X
Click the arrow next to
Adjustments
in the printer driver's
Two-sided Printing Settings
menu, and then
adjust the
Increased Ink Drying Time
slider.
Related Information
&
“Cleaning the Paper Path” on page 75
&
“Loading Paper in the Paper Cassette” on page 28
&
“Loading Paper in the Rear Paper Feed” on page 30
&
“Loading Paper in the Front Paper Feed Slot” on page 32
&
“Print Quality Is Poor” on page 93
Printed Characters Are Incorrect or Garbled
❏
Connect the interface cable securely to the printer and the computer.
❏
Cancel any paused print jobs.
❏
Do not put the computer manually into the
Hibernate
mode or the
Sleep
mode while printing. Pages of garbled
text may be printed next time you start the computer.
Related Information
&
“Canceling Printing” on page 54
User's Guide
Solving Problems
95


