


Quick
Start
Guide
www.ensembledesigns.com
Page 3
RS-232 and 100 Mb Ethernet Interface Adaptor Cable
Typically, you will need to make two Ethernet connections; one to the Avenue frame, the
other to the 9430 module’s “Y” adaptor cable. This cable, included with each 9430 module,
has separate legs for the 9-pin D-Sub RS-232 and RJ-45 Ethernet connectors. The cable
connects to the HD-15 connector specific to the slot where the 9430 is installed.
The Ethernet port should be connected with CAT5 or CAT6 cabling to a network Ethernet
router or switch to make it accessible to computers on the network. This port can also be
directly connected to a computer or to a Router Control Panel (5830). The Ethernet port will
auto-sense cable direction, so a cross-over cable is not needed.
“Y” adaptor cable for connecting the 9430
to RS-232 and 100 Mb Ethernet interfaces
Step 2: Assigning the Router a New IP Address and
Subnet Mask
When you initially power up the 9430 as received from the factory, it will take the self-
assigned static IP address of 192.168.1.100. You must modify the 9430’s IP address and
subnet mask to be compatible with your network’s environment.
These are general instructions. We recommend that you consult your IT staff if you are
uncertain about any of these network configuration settings.
Note:
For customers who have neither Avenue PC nor Avenue Touch Screen,
please refer to our website to download the “Model 9430 Installation,
Configuration and Operations Guide.” See Chapter 4, in the section
called “Method Two: For Customers Not Using Avenue Touch Screen
or Avenue PC.”
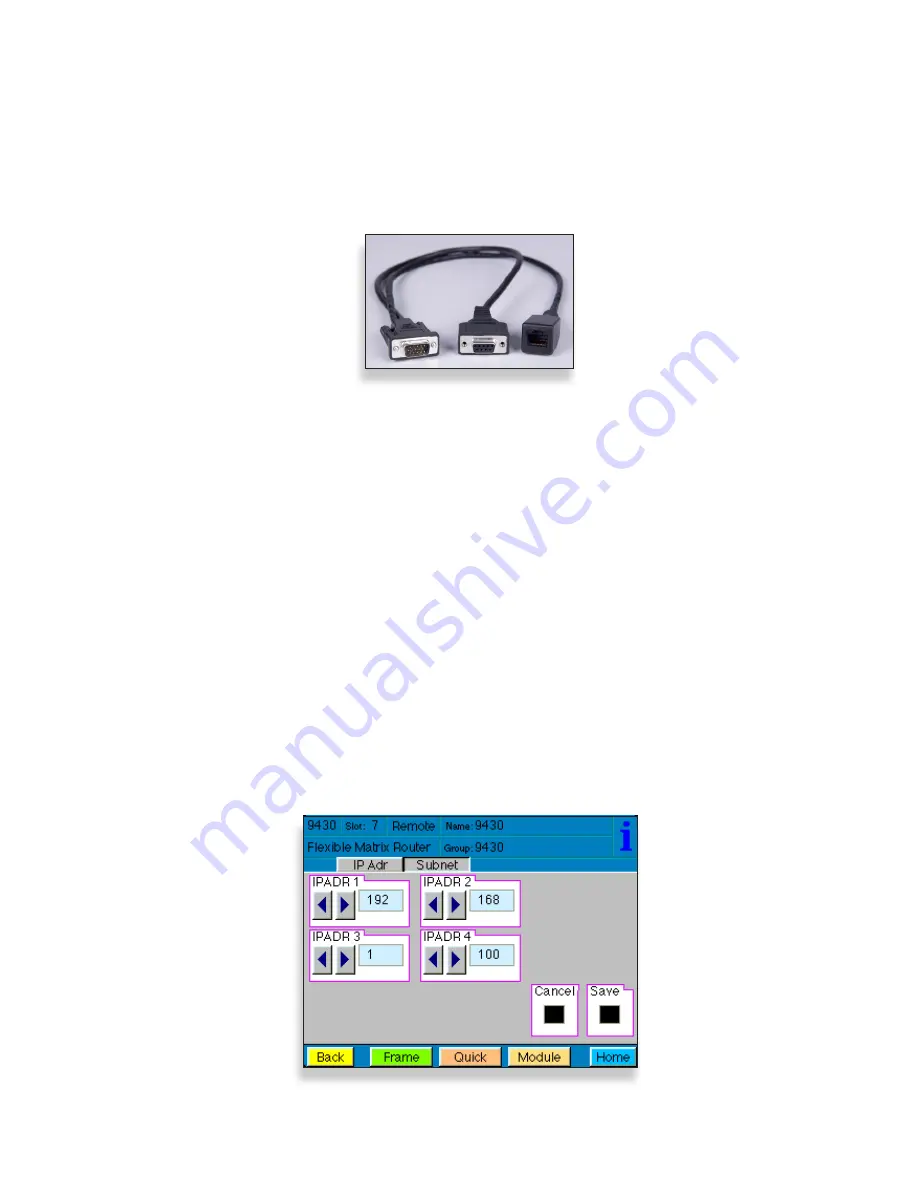
The Touch Screen interface showing the IP address of the Router
as received from the factory
To Set the IP Address
1. From the Avenue frame, select the 9430 module from the Touch Screen. The 9430
menus display.