


Spider® AT
User's Guide
P a g e 24
Revision: Draft
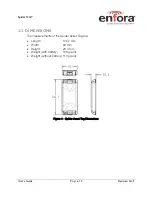
Figure 9 Spider AT Screw Hole
4.4
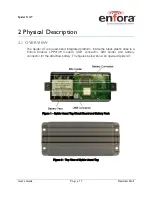
MOUNTING THE DEVICE
Place a Lock-Washer on one of the Screws, as shown in Figure 4. Now place a
Flat-Washer on the Screw, as shown in Figure 10 Spider AT and Mounting
Hardware. Repeat this process with the remaining three Screws.
Figure 10 Spider AT and Mounting Hardware
Insure the Device is turned on (Flashing light indicates that the Device is turned on).
Align the Device with the pre-drilled screw holes. Insert one of the screws
(assembled above) through one of the screw holes in the Device. Partially tighten
the Screw into the mounting surface. Repeat this process until all four screws are
started into the mounting surface. Now tighten the four screws until they are snug.


