Chapter 3 Web Page Of RDU-SIC G2 31
RDU-SIC G2 Card User Manual
Table 3-1 User security level
Security level
User group
User authority
Level A
Browser
All users can browse equipment information
Level B
Operator
The operators can send control command to intelligent equipment
Level C
Engineer
The engineers can get the following access: Send control command to intelligent
equipment; Browse, control and modify parameters; Download files; Modify user
information of their own
Level D
Administrator
The administrator can get full access: Send control command to intelligent
equipment; Brows, control and modify parameters; Upload and download files;
Modify, add and delete user information; AC teamwork parameter setting;
System upgrade
On the page shown in Figure 3-50, choose the current user, you can perform
SMS/Phone Test
and
Email Test
.
Before using the test function, users need to configure the SMS/Email server of current user, refer to
Alarm Notification
in
3.4.3 Alarm Management
for details.
SMS/Phone Test
Type the phone number in the
Phone
field, and click the
SMS/Phone Test
button to test that the telephone number of
current user can be gotten through. If users receive the test SMS and telephone, the test is successful; if not, the test
fails, please check that the telephone number is correct and the SMS Modem is properly connected.
Email Alarm Notify Test
Type the email address in the
field, and click the
Email Test
button to test that the email address of current user
is correct. If users receive the test email, the test is successful; if not, the test fails, please check that the information
above is correctly typed.
Note
When adding and modifying user, you must type the phone number or the email address, or the setting cannot be completed.
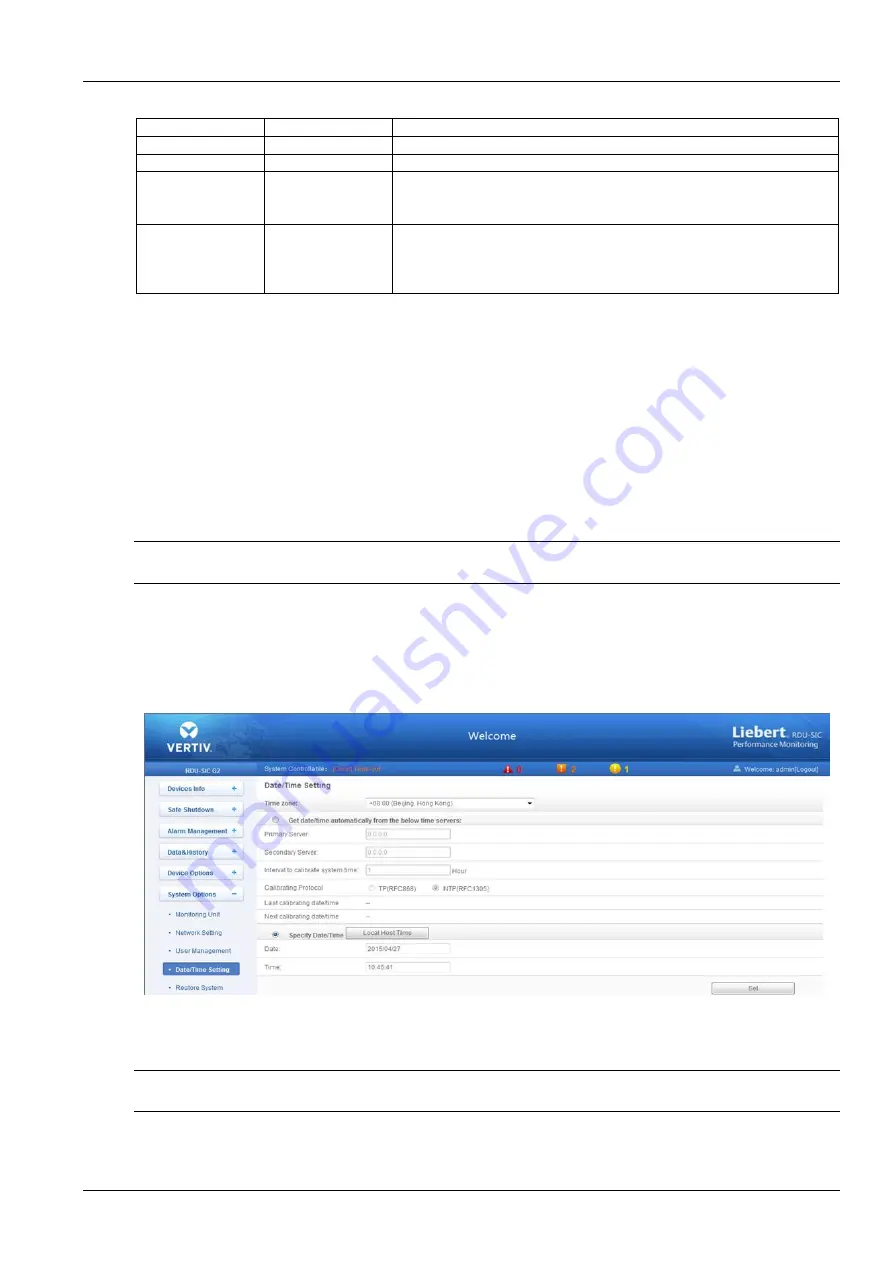
Date/Time Setting
Clicking the
Date/Time Setting
under the
System Options
menu can synchronize the time. On the page shown in
Figure 3-52, RDU-SIC G2 can get time from the time servers automatically. Type IP address in the
Primary Server
textbox and
Secondary Server
textbox in sequence, type a figure in
Interval to calibrate system time
textbox, select
the
Time zone
and
Calibrating Protocol
, and then click the
Set
button to make the setting effective.
Figure 3-52 Date/time setting
The RDU-SIC G2 can also get the local time. Choose
Specify Date/Time
, click the
Local Host Time
button to get the
local time, and then click the
Set
button to make the new time effective.
Note
Time calibration adopts
Specify Date/Time
by default.
Restore System
Click the
Restore
System
under the
System Options
menu, the page shown in Figure 3-53 pops up.
Summary of Contents for Liebert Vertiv RDU-SIC G2
Page 2: ......


