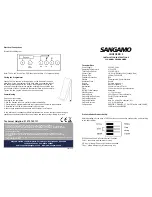
background image

2

InsTallaTIOn

New Construction Rough-In

•  Fasten electrical connection box (ECB) as required 

per local electrical code on side of stud.

•  Drill one 1-inch hole in base plate for single-cable 

installation and two 1-inch holes for two-cable 

installation.

• Thread pull-cord (not provided) through hole(s) 

in base plate and in corresponding holes in ECB. 

Secure the pull cords in the ECB. 


Tie floor ends of pull-cord and fasten to floor.

• Install the guard plate (not provided) over the 

hole for the cold leads and sensor wire before 

drywalling.

• Install guard plate as shown in Figure 1.

Thermostat Installation

• Ensure the supply branch circuit has been 

disconnected / de-energized.

• Pull sensor wire into ECB and secure to the floor. 

See Figure 2. The sensor must not cross or overlap 

any other cable on the floor AND must be 

embedded in the cementituous based mortar in 

the same manner as the heating cables.

• The floor temperature sensor wire can be 

extended to a maximum of 50 feet with UL or CSA 

recognized wire 22 AWG rated for 300 V.

• Prepare the thermostat for installation:

1. Remove the thermostat and screws from 

packaging.

2. Loosen the screw on the bottom of the Front Panel 

and lift the Front Panel as shown in Figure 3. 

3. Trim excess length of supply branch circuit, 

cold lead and temperature sensor cables, as 

necessary, leaving about 6” projecting from 

the ECB, see Figure 4. Most heating cables are 

provided with identification labels attached to the 

end of the cold leads – ensure that these labels 

remain on the cold lead inside the ECB.

a. Button explanation 

Figure 1

Guardplate

lcD Display

GFcI Test

Floor Temperature

Back

save

Up

Down

settings

next

On/Off  

GFcI Reset

4. Prepare each heating cable/cold lead for 

connection/splicing and connection per Figure 5 

or Figure 6, as applicable. 

5. Prepare the sensor wire per Figure 5 or Figure 6, as 

applicable. Use screwdriver for connection to the 

sensor wire connections (black and white wires) to 

corresponding BLK and WHT terminals.

6. Neatly fold all wiring into ECB and fasten 

thermostat with #6-32 screws provided. Do not 

apply excessive force to the thermostat. Apply 

firm but continuous force until the screws can be 

fully seated.

7. Align the thermostat power base, then finish 

tightening the two screws.

8. Hook the Front Panel unit to the top of the Power 

Base unit, swing down and press the Front Panel 

into the Power Base unit slightly, tighten the screw 

at the bottom of the unit.

A. Button Explanation

lcD Display

 – Large scale readout with blue color 

backlight which indicates the operational status of 

the thermostat.

On/Off Button 

– Allows easy selection of switching 

On or Off the thermostat.

Floor Temperature

 – Pressing this button once enters 

the thermostat’s floor temperature adjusting mode.

save Button 

– Pressing this button once saves all the 

changes that have been accepted.

settings

 – Pressing this button once enters the 

programming or editing the Time, Day, °F or °C, 

backlight and Floor Types (Tile or Wood) settings of 

the thermostat.

next Button - 

For the clock setting only. Pressing this 

button once will move the clock setting to the next 

setting.

Summary of Contents for FG

Page 1: ...EC as well as local electrical and building codes regulations and inspection procedures Electrical inspection of the installation may be required before during and after installation Check with your local electrical inspection department before beginning installation This device is a Class A Ground Fault Circuit Interrupter as required by some electrical codes for floor warming installations 2016 ...

Page 2: ...d of the cold leads ensure that these labels remain on the cold lead inside the ECB A Button Explanation Figure 1 Guardplate LCD Display GFCI Test Floor Temperature Back Save Up Down Settings Next On Off GFCI Reset 4 Prepare each heating cable cold lead for connection splicing and connection per Figure 5 or Figure 6 as applicable 5 Prepare the sensor wire per Figure 5 or Figure 6 as applicable Use...

Page 3: ... time in minutes for the LCD backlight turns on for 2 minutes only Tile or Wood Mode The selection of the Tile Wood mode is to limit the maximum floor temperature depending on the surface type The maximum floor temperature for tile is set to 40 C 104 F The maximum floor temperature for wood is set to 30 C 86 F When all five sSSSS segments flash slowly this indicates that the floor heating is in 3 ...

Page 4: ...e Save button once to accept the Backlight Setting and exit to save the setting 6 After accepting the Backlight setting the Tile or Wood icon flashes Press the Up or Down button to selelct the type of floor Press the Save button once to accept and exit to save the setting 7 The display returns to normal E Ground Fault Interrupter GFCI The thermostat has an integral Ground Fault Interrupter GFCI wi...

Page 5: ...reater than 10 minutes will require the clock be reset see Section D For extended power interruptions the display will remain blank G Sensor Icon If the thermostat detects a fault with the Floor Sensor the Sensor icon will flash on the LCD 800 Sensor AM We Sensor Icon Figure 13 1888 5 2 Day 7 Day Set Temp Wake Leave Return Sleep Actual Floor Temp Backlight 1888 Auto Off Hold Sensor AM Min PM Mo Tu...

Page 6: ...in US 800 537 4732 or in Canada 800 794 3766 Alternatively you may contact EasyHeat at the mailing address listed in the Installation and Operating Instructions and or Owner s Manual or in USA 2 Connecticut South Drive East Granby CT 06026 and in Canada 99 Union Street Elmira ON N3B 3L7 You can also contact us through EasyHeat s local dealer In order for a warranty claim to be processed a copy of ...

Page 7: ...électriques et des bâtiments locaux Une inspection des circuits électriques peut être exigée avant pendant et après l installation Prendre soin de consulter le service local des inspections électriques de sa région avant d entreprendre l installation Ce dispositif est un disjoncteur de fuite à la terre de Classe A tel que requis par certains codes de l électricité pour les installations de planche...

Page 8: ...outons Figure 1 Plaque de protection Affichage ACL Test GFCI Température du plancher Précédent Enregistrer Haut Bas Réglages Suivant Activer Désactiver Réinitialisation GFCI d alimentation des conducteurs froids et du fil du capteur de température au besoin en laissant des longueurs d environ 15 cm 6 pouces à l extérieur du boîtier voir la figure 4 La plupart des câbles chauffants sont fournis ave...

Page 9: ...liquides ACL Off Indique que le thermostat est en mode Off et qu aucune autre modification aux réglages n est autorisée tant que le bouton On Off n est pas mis en mode On Capteur Clignote lorsque le capteur du plancher présente un dysfonctionnement Température sélectionnée Indique la température de plancher sélectionnée Température de plancher réelle Les mesures de température de plancher peuvent ...

Page 10: ...inutes y compris les indications AM PM Appuyer sur le bouton Next une fois pour accepter le réglage de l heure Remarque À tout moment vous pouvez appuyer sur le bouton Save pour enregistrer les modifications quitter le mode de réglage de l heure et revenir à l état précédent 3 Après avoir accepté le réglage de l heure le symbole Jour clignote Voir la figure 10 Appuyer sur le bouton Haut ou Bas pou...

Page 11: ...CL est vide les circuits GFCI ne fonctionnent pas correctement Si une pression sur le bouton GFCI RESET ne corrige pas l erreur le thermostat a atteint la fin de sa durée de vie et doit être remplacé par un nouveau Si le GFCI se déclenche et ne peut être réinitialisé mettre le bouton On Off sur Off le câble chauffant pourrait présenter un dysfonctionnement Il ne faut en AUCUNE circonstance contour...

Page 12: ...ILES Aucune autre garantie expresse ne s applique La présente garantie limitée est la garantie unique et exclusive fournie aux acheteurs d origine d un Produit grand public d EasyHeat La présente garantie limitée est exclusive et ne formule aucune autre garantie quant à la description ou à la qualité du Produit grand public d EasyHeat Aucune affirmation de fait ni aucune promesse faite par EasyHea...

Page 13: ...as normas y los procedimientos de inspección eléctricos y edilicios locales Es posible que se requiera una inspección eléctrica antes durante y después de la instalación Consulte con el departamento de inspección eléctrica local antes de comenzar la instalación Este dispositivo es un interruptor de circuito de falla conectado a tierra Clase A según lo requerido por algunos códigos eléctricos para ...

Page 14: ...por atràs con el destornillador Consulte la figura 3 3 Corte el exceso de longitud de los cables del circuito derivación de fuente derivaciòn de fuente cable toma corriente y sensor de temperatura como sea necesario dejando 6 15 cm de proyección desde la caja de conexiones eléctricas ECB Consulte figura La mayorìa de los cables de calefacciòn estàn dotados de etiquetas de identificaciòn adjuntas a...

Page 15: ... de GFCI Botón Arriba Abajo se usa durante la programación para aumentar o disminuir los valores si se mantiene presionado durante 2 segundos los valores cambiarán rápidamente B Explicación del LCD Off Apagado indica que el termostato está en modo Off Apagado y que no se permiten más cambios a menos que se ponga la perilla On Off Encendido Apagado en modo On Encendido Sensor destella cuando el sen...

Page 16: ...tar el ajuste de Time Hora destellará el símbolo Day Día Vea la figura 10 Presione el botón Arriba o Abajo para ajustar el día Presione el botón Next Siguiente para aceptar el ajuste del día 4 Después de aceptar el ajuste de Day Día las unidades de temperatura F o C destellarán Vea la figura 11 Presione el botón Arriba o Abajo para seleccionar Fahrenheit o Celsius Presione el botón Next Siguiente ...

Page 17: ... el botón GFCI Reset Restablecimiento de GFCI no se restablece el fallo el termostato ha alcanzado el valor EOL Final de vida útil y debe ser cambiado por un termostato nuevo Si el interruptor GFCI se activa y no puede restablecerse gire la perilla de encendido apagado a la posición de apagado posiblemente existe un fallo en el cable calefactor Bajo NINGUNA circunstancia se debe puentear el termos...

Page 18: ...de instalación y operación y o el manual del propietario En los Estados Unidos 2 Connecticut South Drive East Granby CT 06026 y en Canadá 99 Union Street Elmira ON N3B 3L7 También puede contactarse con nosotros a través del distribuidor local de EasyHeat Para que pueda procesarse un reclamo de garantía debe proporcionarse a EasyHeat una copia del recibo de venta original EasyHeat determinará a su ...

Page 19: ...19 ...

Page 20: ...logos are registered in the U S Patent and Trademark Office EasyHeat Inc is a wholly owned subsidiary of Appleton Grp LLC All other product or service names are the property of their registered owners 2016 Appleton Grp LLC All rights reserved The Emerson logo is a trademark and a service mark of Emerson Electric Co 2016 Emerson Electric Co 2016 EASYHEAT Inc www warmtiles com 14179 001 Rev 0 ...

Reviews: