


79
10 Remote Surveillance
10.1 IE Remote Surveillance by NAT
10.1.1 NAT Settings
1. The DVR shall be powered on and connected to the network.
2. Go to Main Menu
Setup
Network. You can obtain the IP address, Subnet Mask and Gateway automatically. You can also manually input them
ccording to the actual network situation. And the IP address shall be in the same network segment as the network which is used.
3. Set the preferred or alternative DNS Server (Please refer to 4.6.1 Network for details).
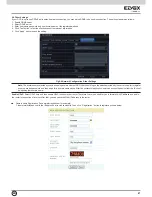
4. Go to Main Menu
Setup
Network
NAT tab.
5. Enable NAT and input the NAT Server (The default NAT Server is www.autonat.com).
6. Click “Apply” to save the parameters (Please refer to 4.6.5 NAT for details).
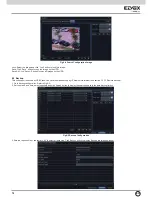
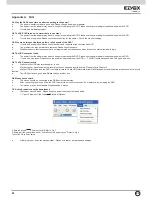
10.1.2 NAT Access
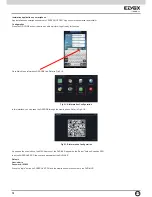
After finishing the NAT settings, you can enter the NAT Server on the PC (Input
http://www.autonat.com
to go to the IE client). If you are the first time to
access the NAT, the network will download the ActiveX automatically.
Note:
If you cannot download and install ActiveX, please refer to FAQ Q7.
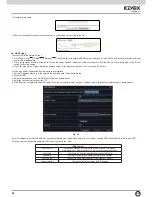
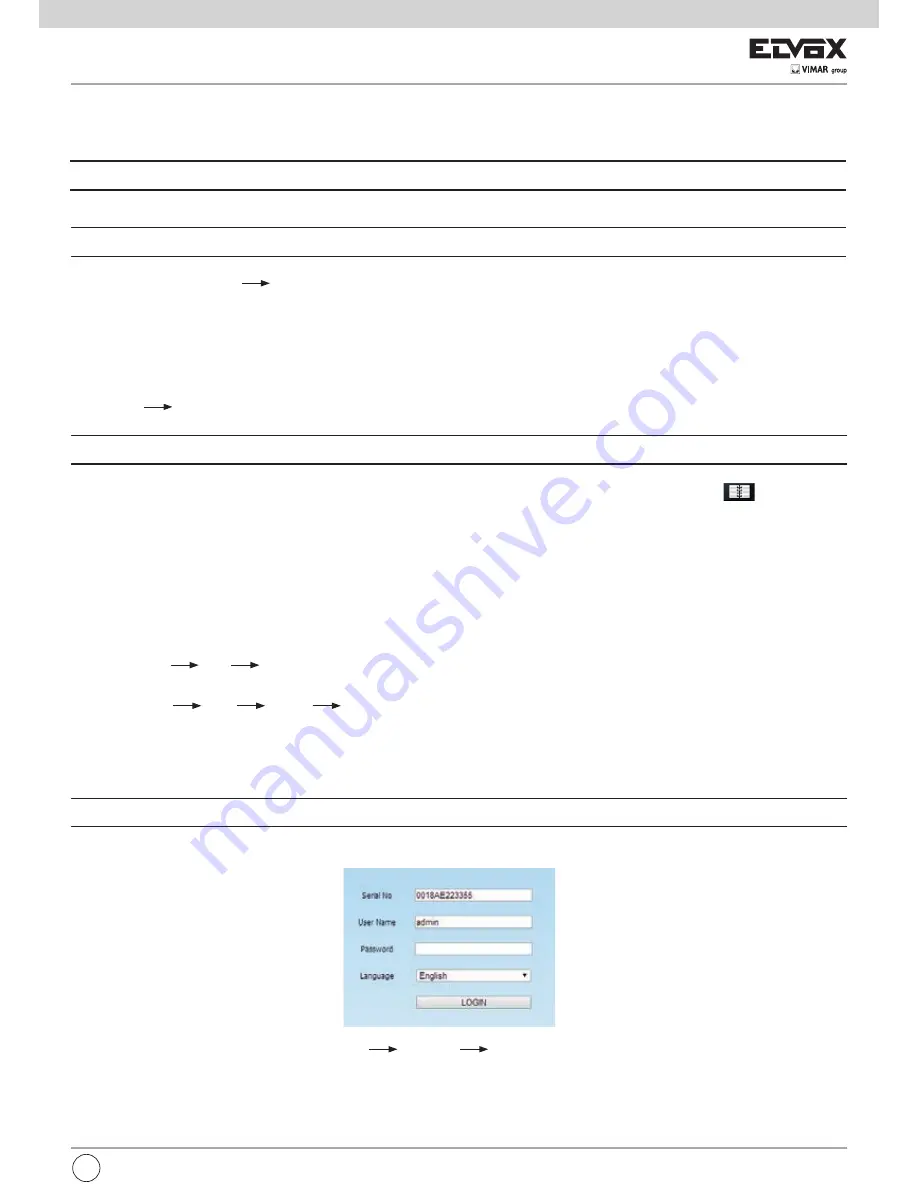
After installing ActiveX successfully, it will pop up the login box:
Serial No: The MAC address of the DVR (Go to Main Menu
Information
Network to check the MAC address of the DVR).
User Name: The login username of DVR. The default username is
admin
.
Password: The login password of DVR. The default password is
123456
.
EN
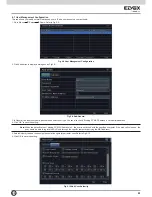
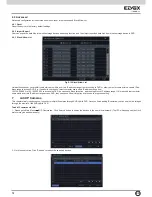
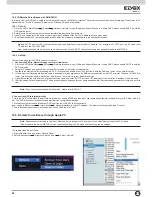
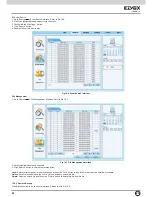
9.2 Disk Management
To format the disk
1. Go to disk management interface
Note: please format the hard disk before record.
2. Click Refresh button to refresh the disk information in the list box.
3. Select a hard disk and click Format button to start format.
Note: All recorded files in the hard disk will be lost after formatting.
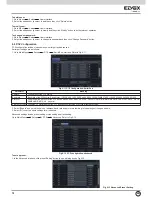
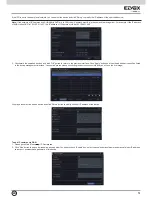
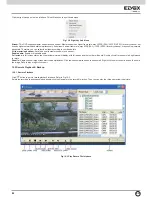
To check other information of disk
After you go to Disk Management
Advanced tab, you can check model, S/N, firmware, health status of the disk in this interface. You also can monitor
the temperature, internal circuit, dielectric material of the disk, analysis the potential problems of the disk and warn so as to protect its data.
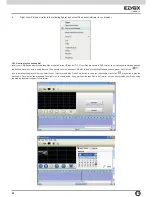
9.3 Upgrade
At present, it only supports USB update. Get the software from your vendor when there is a new software version.
The upgrade steps are as follows:
1. Copy the upgrade software which gets from vendor into the USB storage device.
2. Connect the USB flash drive to the USB port.
3. Enter Menu
Upgrade tab. You will see the upgrade software name displaying in the upgrade list box.
4. Select that software and then click Upgrade button. The system will be upgraded automatically.
Note:
Please wait for a while when the system reboots. Any power interruption is not allowed during upgrading.
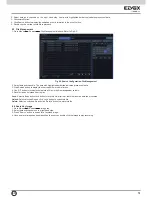
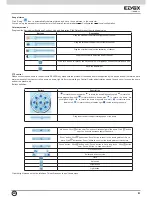
9.4 Logoff
A log off dialogue box will pop up by clicking Log off icon. Then click OK button to confirm to log off. If you want to log in again, click
icon to enter user
name and password to re-login.
Summary of Contents for 46540.H16
Page 95: ...93 ...


