RR-10 wireless signal repeater. User manual
14
1.
2.
a.
b.
3.
4.
5.
6.
7.
8.
9.
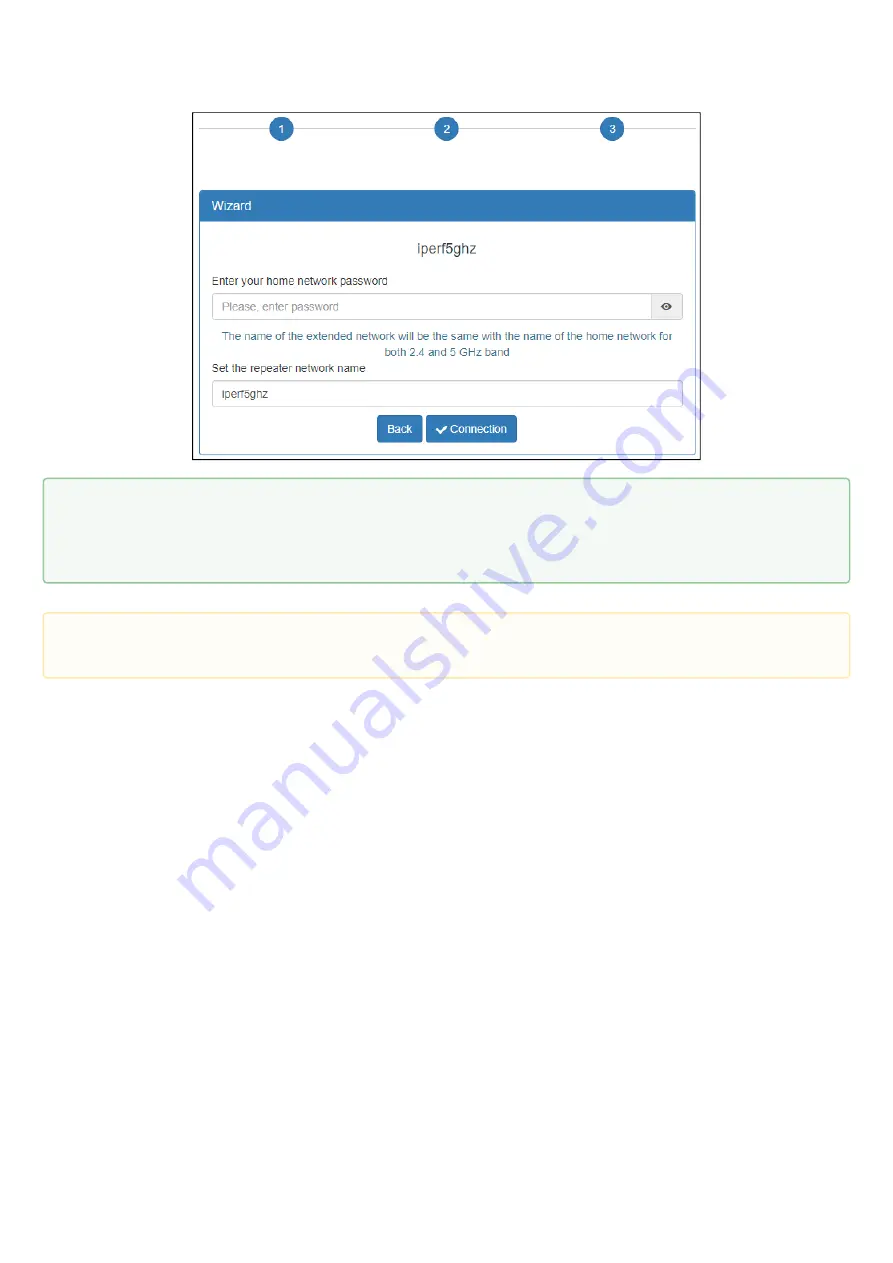
7. Specify a password for your Wi-Fi network, as well as the name of the repeater network, then click
«Connect». When repeater is connected to the Internet, the indicator will light green.
2.3.3 Method 3. Via web interface in access point mode
Connect RR-10 to 220V power network through the power adapter near the Wi-Fi router (or access point)
you want to connect to. Wait until LED start flashing red.
Connect to the repeater using smartphone or PC through Wi-Fi or Ethernet cable.
Through Wi-Fi: connect PC or smartphone to a Wi-Fi network of the repeater — RR-WiFi-XXXX
(where XXXX is the last 4 characters of RR-10 MAC address, the MAC address is written on the
label on the device case).
Through Ethernet cable (only for PC): connect LAN port of the repeater to LAN port of your PC
using Ethernet cable.
Open a web browser and type the address of the device to URL bar —
.
Enter username and password to the authorization window. Default username and password are
admin
and
password
Click «Log in».
Go to the page «Wi-Fi» - «Extended Network». Set the required network name (SSID), security mode,
password, channel and channel width for an extended 5 GHz and 2.4 GHz network. Click «Apply».
In case of connection via Wi-Fi, reconnect to the repeater using the extended Wi-Fi network parameters
configured in point 4. In case of connection via Ethernet cable, you should skip this point.
Update the device web interface page in the browser. The «Wi-Fi» - «Extended Network» page with
updated parameters will be loaded.
Go to the «Network» page. In the network settings, set «Attain IP Address Automatically». Click «Apply».
Connect the LAN port of the repeater via an Ethernet cable to the LAN port of your router. When repeater
is connected to the Internet, the indicator will light green.
By default, the repeater copies the name and Wi-Fi settings of the network to which it will be
connected in both ranges: 5 GHz and 2.4 GHz. If necessary, you can change the name of the network
in the last step of the wizard, as well as change the name and settings is available later through the
web interface on the page «Extended Network» in the «Wi-Fi» tab.
EasyMesh network configuration via web interface is not available in firmware version 1.2.0. It is
necessary to use the method of connection via WPS.


