7.
Put nuts on bottom bolts and lightly tighten.
8.
Do the same with the other side frame assembly.
9.
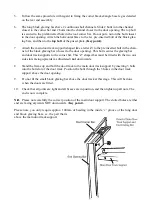
Make sure that the block glazing bars reach both the built in base cill and the eaves in each
case. Tighten all nuts.
(Key point).
10. If you intend to fit any Elite accessories (louvres, shelf, staging) they will be packed with ½
head bolts to enable them to be retro fitted. You do not need to pre insert any bolts for these
accessories.
11. If you are fitting your greenhouse onto hard standing (flags, concrete etc.), then insert bolts
into the bolt channel of the built in base (generally 1 every 2’). These will be used to anchor
the greenhouse to the floor during general assembly. For fitting on hard or soft standing, slide
1 extra bolt into the bolt channel of both ends of the built in base. These will be used to secure
the corner bracket/base leg.
If your greenhouse is over 12’5” in length, you will need to attach the side base sections together to
form the length of your greenhouse. You will notice that you have 4 side base pieces, 2 of which
will be un-fabricated at 1 end. These 2 sections are handed sections and must be fitted to the correct
side assembly.
The un-fabricated end of the base will be joined to the unhanded base section as shown below. It is
essential that the un-fabricated end is towards the middle of the greenhouse side assembly and not at
one of the ends.
To attach the 2 base pieces together you must attach 2 base legs back to back, bolt them together
and attach the vacant end of each base leg to the bolt channel of the base section as shown. Your
gutter section will be in one piece and will not need to be joined (except where greenhouse is over
20’5”).
Summary of Contents for 7'5" WIDE TITAN
Page 1: ......
Page 2: ......
Page 3: ......
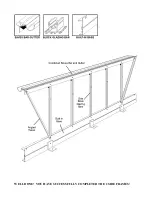
Page 9: ...WELL DONE YOU HAVE SUCCESSFULLY COMPLETED THE 2 SIDE FRAMES ...
Page 11: ...REAR END ASSEMBLY ...
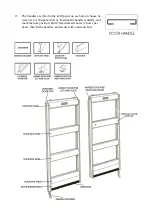
Page 16: ...DOOR END ASSEMBLY ...
Page 32: ...ELITE 1806 ...


