POS-3000
© Elcom, s. r. o.
21
ECR description
Use only paper tapes that have no glued ends. If such tape would have been used and not time-
ly replaced for a new one, it could damage the printer or shorten its lifespan. The guarantee
does not cover this particular case.
Proper ECR function demands that the print
is sufficiently intense. If any problems arise,
please contact your authorised dealer of POS-
3000 cash registers.
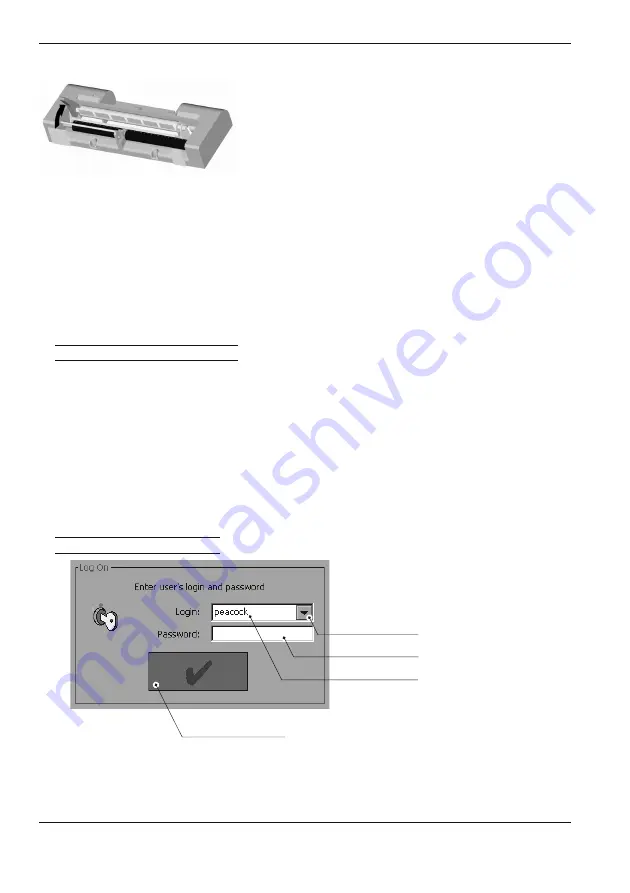
Insert the paper tape reels into the reel beds so
that they unroll from the bottom (see fig. ).
Trim the tape ends using scissors. Tape ends
must not contain any dirt or glue residue.
First, lift the printing head by lifting its position lever upwards. Feed both of the tapes, receipt
and journal, as shown in the figure. Lower the printing head and press the receipt tape feed
button on the front ECR cover until the tape’s end doesn’t emerge. Then, press the journal
tape feed button until the journal tape has unwound sufficiently to fasten it into the winding
reel and wind the reel several times over to fit the journal tape properly. Place the winding reel
into designated holders and turn it lightly to stretch the tape.
Lead the receipt tape into the receipt tape slit in the printer cover and close the printer cover.
Tear off surplus tape and you can begin registration.
Usage and storage of paper tapes
It is necessary to use 2.1” (54 mm) paper tapes in the POS-3000 cash register.
Following storage recommendations hold for commonly used paper tapes:
• do not expose to sunlight,
• do not expose to temperatures above 104 F (40 °C),
• avoid contact with softened PVC, mollificatiors, organic solvents, glue, and water.
The paper tape properties have to provide the printed data security while the storage condi-
tions are met. It is necessary to use only paper tapes that guarantee to provide sufficient data
security. Thermal paper tapes manufactured by Jujo Thermal Ltd. are recommended. If low
quality paper tapes are used or the storage conditions were not met, the Elcom company can-
not guarantee for the printing intensity and data security.
Logging into the ECR system
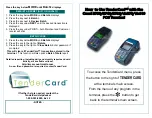
If compulsory cashier log in is set, the Login dialogue will appear after the ECR is turned on
that requires you to log in using your login name and password. Pick the login name from
the pull-down menu and enter your password (sequence of numbers). The password is not
displayed as typed for security reasons. The cashier data (login, password etc.) have to be pro-
grammed in advance in the programming mode.
<< Figure 2.26
Printer head.
1VMMEPXONFOV
QVMMFS
5FYUSPXGPS
QBTTXPSEJOQVU
$IPTFOMPHJO
OBNF
0,CVUUPO
< Figure
2.27
Log on dialogue.
Summary of Contents for POS-3000
Page 1: ...POS User manual application version 1 85 manual version 2 0 16...
Page 6: ...POS 3000 Elcom s r o...
Page 10: ...POS 3000 Elcom s r o...
Page 44: ...POS 3000 Elcom s r o...
Page 62: ...POS 3000 Elcom s r o 62 Training mode Figure 6 4 The testing window of the training mode...
Page 64: ...POS 3000 Elcom s r o...


