82
Chapter 5 Network Capture
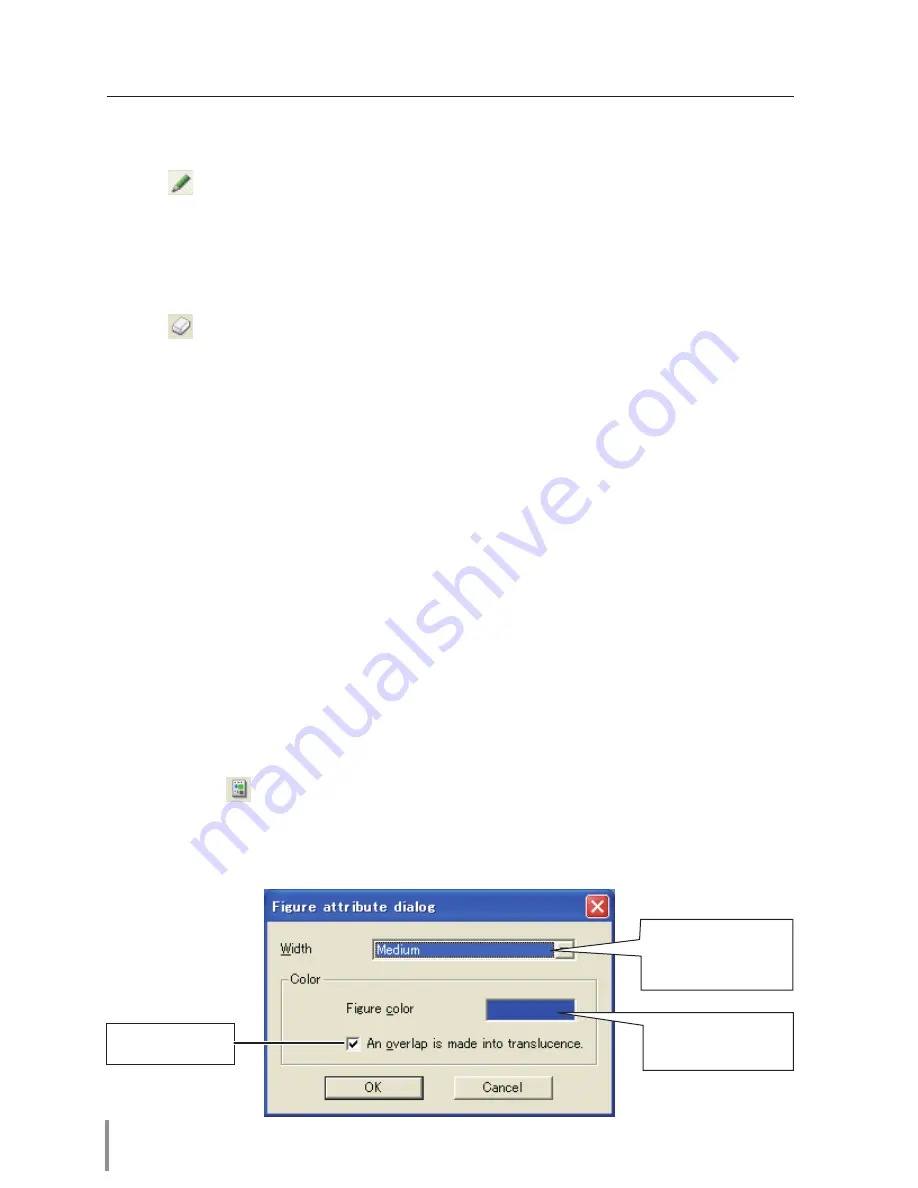
Setting of the drawing tool attribute
When clicking "
:Attribute" button on the standard tool bar, the following window will
appear. This window appears only if the pencil or eraser tool is selected.
Select a color on the
color pallet appeared
by clicking here.
Line width
Large: 8 dots
Medium: 4 dots
Small: 2 dots
Sets translucent
color
Edit capture image
Drawing figures
1
Click "
:Pencil" button on the form tool bar.
2
Select its attribute (shape, width, color and translucence) from the form and attribute
tool bar.
3
Drag a mouse pointer on the screen image to draw the figure.
Erase drawn object
1
Click "
:Eraser" button on the form tool bar.
2
Select its attribute (shape, width) from the form and attribute tool bar.
3
Drag a mouse pointer on the screen image to erase the figure.
Hints of the drawing
✐
Straight line tool ............ To draw the vertical line or horizontal line, drag a mouse pointer with shift
key pressed.
✐
Square tool ........................ To draw the quadrate rectangle, drag a mouse pointer with shift key
pressed.
✐
Oval tool ............................. To draw the perfect circle, drag a mouse pointer with shift key pressed.
✐
To cancel the drawing, select command "Edit"-"Undo" from the menu.
✐
To erase all the drawing at once, select command "Edit"-"Delete all" from the menu.
✐
The popup menu appeared by right clicking of the mouse is also available to select the tool and
change the attribute.
Summary of Contents for PjNET-50
Page 6: ...6...
Page 14: ...14 Chapter 1 Preparation...
Page 28: ...28 Chapter 2 Installation...
Page 68: ...68 Chapter 4 Controlling the Projector...
Page 104: ...104 Chapter 6 Network Viewer...


