24
USER MANUAL
MAGIC 500 PLUS ULTRASOUND UNIT
T +49 7461 96 580 0 | F + 49 7461 96 580 90 | [email protected] | www.eickemeyer.com
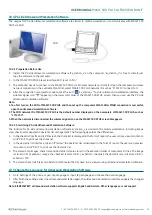
6.9.6 Batch Images Transfer to Workstation
1. In B, B / B, B / M, M mode, freeze the image, press
key to transfer all the stored images to the ultrasound workstation.
2. Press
key to quit frozen status.
3. Press
key to return to real-time mode.
Explanation:
1. In the transmission process, the lower right corner of the screen shows the number of frames being transmitted, long press
key to terminate the transmission at any time.
2. When transferring batch images, the system time displayed in the upper right corner of the main unit is at rest; when the
transmission ends, the system time automatically returns to normal. All batch images transmission takes a long time,
please be patient!
3. The specifi c functions of ultrasound workstation, see Chapter Ten “Ultrasound Workstation Software Instructions”.
6.10 Cine loop
In real-time mode, the system is always saving the scanned image. The playback images are for a period time images before
freeze.
Freeze the image, continuously press
key three times to enter the automatic playback status; Press
key to enter pause
status when playing back; Press direction keys
to view images frame by frame in pause status. Continuously press
key three times again to return to automatic playback status. In the process of saving and playback, the lower right corner of
the screen shows the relevant saved and played frames.
Press
key to return to frozen status.
Press
key unfreeze and quit playback status.
Note: If the images appear abnormal, there was not enough storage time and the images have not been fully stored.
6.11 Text Input
Operation steps:
1. In real-time B, B / B, B / M, M mode, freeze image, the cursor is located on the “Comment”.
2. Press
key, the cursor is located behind “ID”, at the same time characters input menu will be shown at the bottom of
the screen:
Caps 0 1 2 3 4 A B C D E F G H I J K L M
Shift 5 6 7 8 9 N O P Q R S T U V W X Y Z
Press direction keys to move the cursor to point to Caps, and then press
key to achieve capital and small letter
conversion. If the cursor points to Shift, press
key to achieve the conversion between letters and punctuation.
3. Press direction keys to choose “numbers” or “characters” and press
key to confi rm.
4. After putting in the ID, press
key, the screen below shows “Pregnancy, Unpregnancy, Suspected, Disease” four kinds of
results; at the same time the date and time of inspection automatically shown behind the result.
5. Press direction keys
to select the result, press
key to confi rm and exit.
6. If you need to note something in the image area, in the comment status, press
key to exit characters input menu, the
cursor is located behind ID, press direction keys to move the cursor to image area, continuously press
key twice, and
then input the content according to Step 3.
7. If you need to modify the content, press direction keys
to select “Clear”, at last press
key to clear all noted marks
and retype.
8. Press
key to quit.


