Quick Start Guide
– 2 –
Mount the Switch
Connect Power
Verify Switch Power
Perform Initial System Boot
Warning:
For a safe and reliable installation, use only the
accessories and screws provided with the device. Use of other
accessories and screws could result in damage to the unit. Any
damages incurred by using unapproved accessories are not
covered by the warranty.
Avertissement:
Pour une installation sûre et fiable, utilisez
uniquement les accessoires et les vis fournies avec l’appareil.
L’utilisation d’autres accessoires et vis pourrait endommager
l’appareil. Les dommages causés par l’utilisation d’accessoires
non approuvés ne sont pas couverts par la garantie.
Caution:
The device includes plug-in power supply (PSU) and
fan tray modules that are installed into its chassis. Make sure all
installed modules have a matching airflow direction (front-to-
back or back-to-front).
Attention:
Le appareil comprend des modules
d’alimentation et de modules de ventilation installés dans son
châssis. Assurez-vous que tous les modules installés ont une
direction d’air adaptée (avant-arrière ou arrière-arrière).
Note:
The device has the Open Network Install Environment
(ONIE) software installer preloaded on the switch, but no switch
software image. Information about compatible switch software
can be found at
www.edge-core.com
.
1
1. Attach the Brackets
Use the included screws to attach the front- and rear-post brackets.
2. Mount the Switch
Mount the switch in the rack and secure it with rack screws.
3. Lock the Rear-Post Brackets
Use the included screws to lock the position of the rear-post brackets.
Note:
For switches with ONIE software pre-loaded, refer to the
network operating system (NOS) installer and NOS
documentation for details on software options and set up for
ONIE.
Note:
For information on initial switch configuration, refer to
the Pica8 website for all system configuration documents.
http://www.pica8.com/support/documentation
Optional Slide-Rail Installation
An optional slide-rail kit is available for rack installation. Follow the
installation procedure provided with the kit.
2
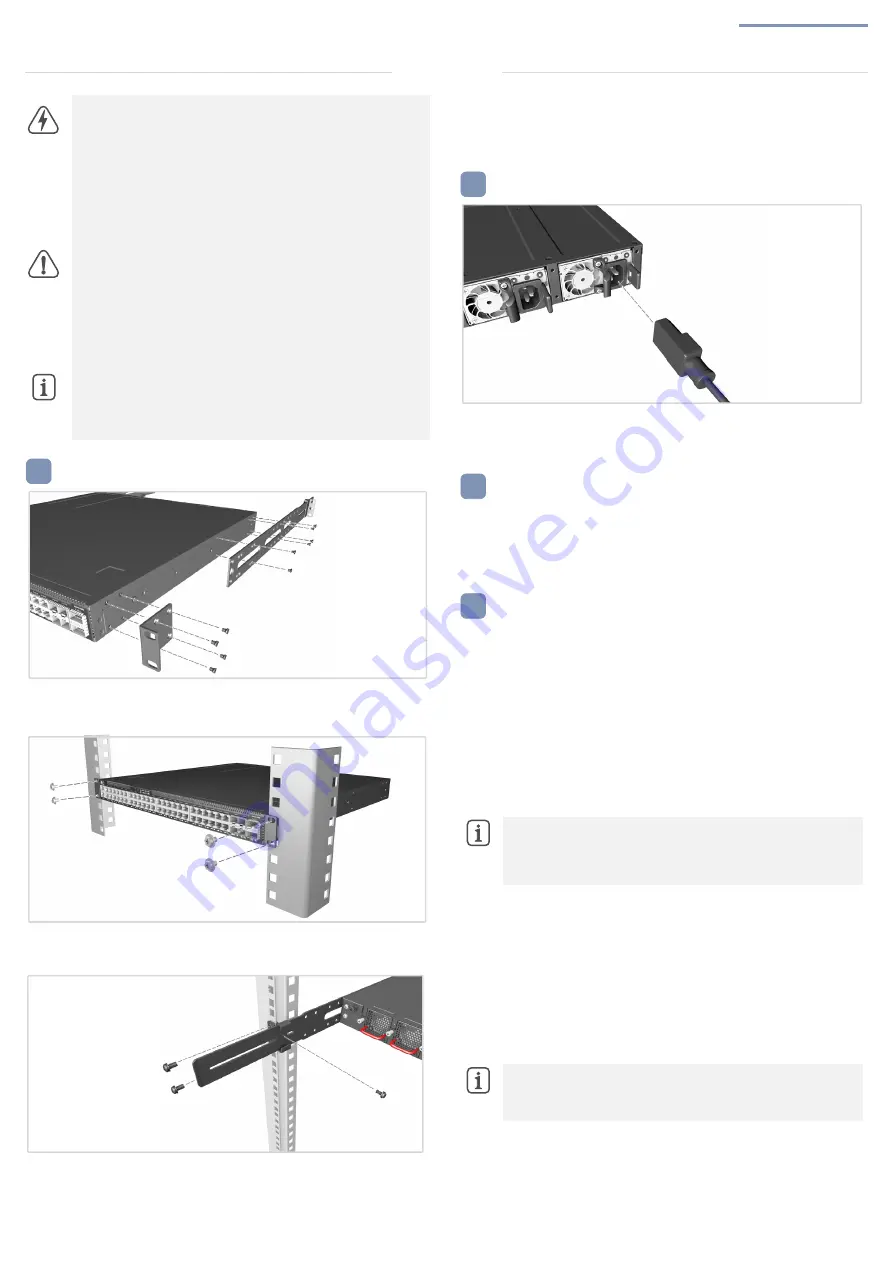
AC Power
Install two AC PSUs and connect them to an AC power source.
3
Check the PSU LEDs
The PSU1/PSU2 LEDs should be on green when operating normally.
4
1. ONIE Installer Software
If the network operating system (NOS) installer is located on a network
server, first connect the RJ-45 Management (Mgmt) port to the network
using 100-ohm Category 5, 5e or better twisted-pair cable. (Not
required if the NOS installer is located on attached storage.)
2. Boot the Switch
Wait for the ONIE software to locate and execute the NOS installer,
and then wait for the installer to load the NOS software image.
Subsequent switch boots will bypass ONIE and directly run the NOS
software.
1. Edgecore PicOS software option
To make basic switch configuration changes, connect a PC to
the switch's RJ-45 console port using the included console cable.
2. Configure PC’s serial port
115200 bps, 8 characters, no parity, one stop bit, 8 data bits, and no
flow control. Log in to the command-line interface (CLI) using the
default settings: User “admin” with password “pica8”. After the first
login, users are forced to change the password.
Installation