SYSTEM OPERATION INSTRUCTIONS
The reverse osmosis membrane contains a preservative solution to prevent microbiological
growth. If ingested, may cause irritation of the gastro-intestinal tract, colic, diarrhea, or other
similar symptoms.
Therefore, discard all the product water for at least thirty minutes of initial operation or after
storage before drinking or use in food preparations!
Do not operate the system using contaminated feed water sources (oil, chlorine or other
chemicals).
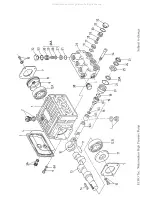
Have you filled the high-pressure pump with the proper amount of oil (SAE90 gearbox oil)?
1)
Open the seacock and the seawater shut off valve on the pre-filter assembly.
2)
Open the pressure control valve on the flow control panel all the way, counter-clock wise.
3)
Set the flush/service valve at the pre-filter assembly to the “CLOSED” position (center).
4)
Set the diverter valve on the flow control panel to the sample “TEST” position.
5)
For the initial start up and after filter changes, set the selector switch on the electrical
control panel to the “FEED” position (feed pump only) and purge the system until all
entrapped air has escaped.
6)
In the “AUTO” position, press the “START” button until the pressure on the low
pressure gauge “OUT” has build up. If the high pressure pump motor stops, purge the
system again and start the system in the “AUTO” position as before.
7)
Close the pressure control valve slowly clockwise and increase the operating pressure
until the specified fresh water output for your model is achieved not exceeding 800PSI.
Caution: Never allow any leaks in your hose or pipe connections. Reseal with Teflon tape
or change O rings as required.
8)
Check the quality of the product water with the TDS meter. If the water is pure (under
500ppm TDS), switch the diverter valve on the control panel to the storage tank position.
SYSTEM SHUT DOWN PROCEDURE
1)
Switch the diverter valve to the “TEST” position.
2)
Open the pressure control valve all the way counter clockwise.
3)
Switch the selector switch off.
4)
Fresh water flush the system (see next page).
5)
Close the seawater shut off valve on the pre-filter assembly and the seacock.
All manuals and user guides at all-guides.com
all-guides.com


