background image


14 

Note:  

The camera will start to count down after you press the shutter button for 2, 5 or 10 seconds 
until it captures and saves the photo.  


The corresponding self-timer icon will display at the bottom left corner of the LCD screen. 


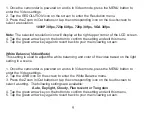
Face Detection (Camera Mode) 

This setting allows the camera to detect faces in a scene for optimal capture settings. 


1. Once the camcorder is powered on and is in Camera mode, press the MENU button to 
enter the Camera settings. 
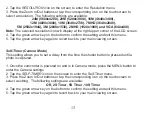
2. Tap the 

FACE DETECT

 icon on the screen to enter the Face Detect menu. 

3. Press the Zoom In/Out buttons or tap the corresponding icon on the touchscreen to 
select ON or OFF.


4. Tap the green arrow key on the bottom to confirm the setting and exit this menu. 
5. Tap the green arrow key again to revert back to your main viewing screen. 
 

Note: 

 The face detection icon will display on the top center of the LCD screen. 


Summary of Contents for BELL+HOWELL FUN FLIX DV20HDZ

Page 1: ......

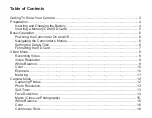
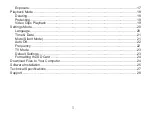
Page 2: ...amcorder On and Off 6 Navigating the Camcorder s Menus 6 Setting the Date Time 6 Formatting the SD Card 7 Video Mode 8 Recording Video 8 Video Resolution 8 White Balance 9 Color 10 Exposure 10 Metering 11 Camera Mode 12 Capturing Photos 12 Photo Resolution 13 Self Timer 13 Face Detection 14 Macro Close up Photography 15 White Balance 15 Color 16 Continuous Shot 16 ...

Page 3: ...o Clips Playback 19 Settings Mode 20 Language 20 Time Date 21 Mute Silent Mode 21 Auto Off 22 Frequency 22 TV Mode 23 Default Settings 23 Formatting the SD Card 24 Download Files to Your Computer 24 Software Installation 25 Technical Specifications 27 Support 28 ...

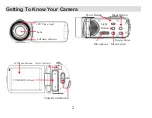
Page 4: ...g To Know Your Camera LED Video Light TV HDMI USB Jack Video Record Button Lens Self timer Indicator Status Indicator LCD Touchscreen Power Button Light Button Mode Button Microphone Menu button Display Button ...

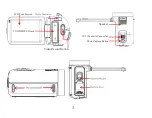
Page 5: ...3 TV HDMI USB Jack Speaker Video Record Button W T Zoom Out Zoom In Photo Capture Button Status Indicator LCD Touchscreen ...

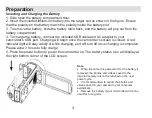
Page 6: ...rt Charging will begin once the camcorder s screen is closed A red indicator light will stay solidly lit while charging and will turn off once charging is completed Please allow 3 hours to fully charge 5 Press the power button to power the camcorder on The battery status icon will display at the right bottom corner of the LCD screen Note x When the camera is powered off or the battery is removed t...

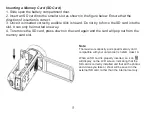
Page 7: ...the slot It can only be inserted one way 4 To remove the SD card press down on the card again and the card will pop out from the memory card slot Note The maximum capacity and speed memory card compatible with your camcorder is 32GB class 10 When an SD card is properly inserted an icon will display on the LCD screen indicating that the SD card is correctly installed and that all the photos and vid...

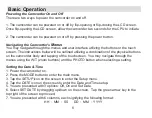
Page 8: ...ll be outlined utilizing a combination of the physical buttons on the camcorder body and tapping of the touchscreen You may navigate through the menus using the W T zoom buttons and the PHOTO button when selecting a setting Setting the Date Time 1 Power the camcorder on 2 Press the MODE button to enter the main menu 3 Tap the SETUP icon on the screen to enter the Setup menu 4 Tap the DATE icon on ...

Page 9: ...e SD Card for first time use Please note that all data stored on the SD Card will be deleted including protected files Be sure to download or transfer any files you want to retain to your computer before the SD Card is formatted 1 Power the camcorder on 2 Press the MODE button to enter the main menu 3 Tap the FORMAT icon In the SETUP on the screen to enter the Format menu 4 Tap YES to format 5 Onc...

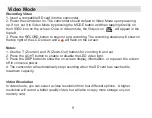
Page 10: ...show on the top right of the LCD screen and a will flash on the screen Notes 1 Use the T Zoom In and W Zoom Out buttons for zooming in and out 2 Press the LIGHT button to enable or disable the LED video light 3 Press the DISP button to show the on screen display information or to power the screen off to conserve power 4 The camcorder will automatically stop recording when the SD card has reached i...

Page 11: ...reen arrow key again to revert back to your main viewing screen White Balance Video Mode This setting is used to adjust the white balancing and color of the video based on the light setting in a scene 1 Once the camcorder is powered on and is in Video mode press the MENU button to enter the Video settings 2 Tap the AWB icon on the screen to enter the White Balance menu 3 Press the Zoom In Out butt...

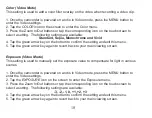
Page 12: ...the setting and exit this menu 5 Tap the green arrow key again to revert back to your main viewing screen Exposure Video Mode This setting is used to manually set the exposure value to compensate for light in various scenes 1 Once the camcorder is powered on and is in Video mode press the MENU button to enter the Video settings 2 Tap the EXPOSURE icon on the screen to enter the Exposure menu 3 Pre...

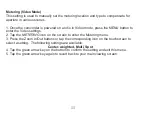
Page 13: ... to enter the Video settings 2 Tap the METERING icon on the screen to enter the Metering menu 3 Press the Zoom In Out buttons or tap the corresponding icon on the touchscreen to select a setting The following settings are available Center weighted Multi Spot 4 Tap the green arrow key on the bottom to confirm the setting and exit this menu 5 Tap the green arrow key again to revert back to your main...

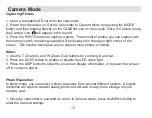
Page 14: ...ight corner of the screen This number decreases as you capture more photos or videos Notes 1 Use the T Zoom In and W Zoom Out buttons for zooming in and out 2 Press the LIGHT button to enable or disable the LED video light 3 Press the DISP button to show the on screen display information or to power the screen off to conserve power Photo Resolution In photo mode you can select a photo resolution f...

Page 15: ...this menu 5 Tap the green arrow key again to revert back to your main viewing screen Self Timer Camera Mode This setting allows you to set a delay from the time the shutter button is pressed until a photo is captured 1 Once the camcorder is powered on and is in Camera mode press the MENU button to enter the Camera settings 2 Tap the SELF TIMER icon on the screen to enter the Self Timer menu 3 Pres...

Page 16: ...apture settings 1 Once the camcorder is powered on and is in Camera mode press the MENU button to enter the Camera settings 2 Tap the FACE DETECT icon on the screen to enter the Face Detect menu 3 Press the Zoom In Out buttons or tap the corresponding icon on the touchscreen to select ON or OFF 4 Tap the green arrow key on the bottom to confirm the setting and exit this menu 5 Tap the green arrow ...

Page 17: ...row key again to revert back to your main viewing screen Note It is recommended to turn off the macro function in video mode It will affect the focus of the shooting and will cause unintended blurriness White Balance Camera Mode This setting is used to adjust the white balancing and color of the video based on the light setting in a scene 1 Once the camcorder is powered on and is in Camera mode pr...

Page 18: ...onding icon on the touchscreen to select a setting The following settings are available Standard Sepia Monochrome and Vivid 4 Tap the green arrow key on the bottom to confirm the setting and exit this menu 5 Tap the green arrow key again to revert back to your main viewing screen Continuous Shot Camera Mode This setting allows for burst or continuous shooting once you press the shutter button 1 On...

Page 19: ...value to compensate for light in various scenes 1 Once the camcorder is powered on and is in Camera mode press the MENU button to enter the Camera settings 2 Tap the EXPOSURE icon on the screen to enter the Exposure menu 3 Press the Zoom In Out buttons or tap the corresponding icon on the touchscreen to select a setting The following settings are available 3 2 1 0 1 2 3 4 Tap the green arrow key o...

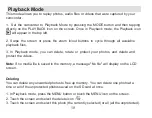
Page 20: ...lable playback files 3 In Playback mode you can delete rotate or protect your photos and delete and protect the videos Note If no media file is saved in the memory a message No file will display on the LCD screen Deleting You can delete any unwanted photos to free up memory You can delete one photo at a time or all of the unprotected photos saved on the SD card at once 1 In Playback mode press the...

Page 21: ...ettings Lock Current Unlock Current Lock All or Unlock All 4 Tap the green arrow key on the bottom to confirm the setting Note If Lock Current is selected the lock icon will display on the LCD screen above the currently selected photo Select unlock current to unprotect this file as described in Step 3 Video Clips Playback 1 Enter Playback mode by pressing the MODE button and then tapping directly ...

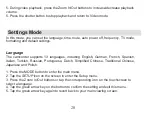
Page 22: ...ts 13 languages including English German French Spanish Italian Turkish Russian Portuguese Dutch Simplified Chinese Traditional Chinese Japanese and Polish 1 Press the MODE button to enter the main menu 2 Tap the SETUP icon on the screen to enter the Setup menu 3 Press the Zoom In Out buttons or tap the corresponding icon on the touchscreen to select a language 4 Tap the green arrow key on the bot...

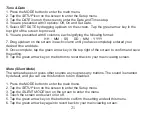
Page 23: ...r desired time and date 8 Once complete tap the green arrow key in the top right of the screen to confirm and save the setting 9 Tap the green arrow key on the bottom to revert back to your main viewing screen Mute Silent Mode The camera beeps or gives other sounds as you press any buttons The sound is enabled by default and you can use this function to turn disable it 1 Press the MODE button to e...

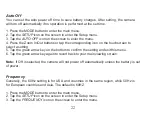
Page 24: ... touchscreen to select a setting 5 Tap the green arrow key on the bottom to confirm the setting and exit this menu 6 Tap the green arrow key again to revert back to your main viewing screen Note If Off is selected the camera will not power off automatically unless the battery is out of power Frequency Generally the 60Hz setting is for USA and countries in the same region while 50Hz is for European...

Page 25: ...r the Setup menu 3 Tap the TV MODE icon on the screen to enter the menu 4 Touch the screen and select PAL or NTSC mode based on the setting of your TV 5 Connect the camera to the TV using the supplied HDM Cable 6 Tap the green arrow key on the bottom to confirm the setting and exit this menu 7 Tap the green arrow key again to revert back to your main viewing screen Note When the camera is connecte...

Page 26: ...on the SD Card will be deleted including protected files Be sure to download or transfer any files you want to retain to your computer before the SD Card is formatted 1 Press the MODE button to enter the main menu 2 Tap the FORMAT icon on the screen to enter the Format menu 3 Tap YES to format 4 Once formatting is completed you will be returned back to the setup menu 5 Tap the green arrow key on t...

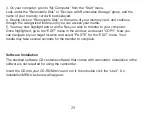
Page 27: ...t and or all the files you wish to transfer to your computer Once highlighted go to the EDIT menu in the window and select COPY Now you can navigate to your target location and select PASTE for the EDIT menu Your media may take several seconds for the transfer to complete Software Installation The bundled software CD contains software that comes with camcorder Installation of the software is not r...

Page 28: ...Photo Manager Installs software for editing photos Notes 1 To use MAGIX Video easy SE or MAGIX Photo Manager with no time limit you will have to register the software first 2 Please do install the Quick Timer Player during the installation of MAGIX Video easy SE 3 MAGIX Video easy SE and MAGIX Photo Manager work in Windows XP Windows Vista Windows 7 and Windows 8 ...

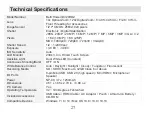
Page 29: ...SO Sensitivity Auto LCD Monitor 230k 3 0 in HVGA Touch Screen Assistive Light Dual White LED Constant Continuous Shooting Burst OFF ON White Balance Control Auto Daylight Sunlight Cloudy Tungsten Fluorescent Recording Media SD SDHC Maximum 32GB Class 6 or Above I O Ports 8 pin Mini USB USB 2 0 high speed Mini HDMI Microphone Speaker Power NP 40 3 7v 1250mAh Dimensions 4 51 x 1 65 x 2 70 in 4 88 oz...

Page 30: ...8 If you re having difficulties with your camera or would like further assistance please call our toll free technical support hotline at 800 441 1100 Please be sure to have your camera handy when calling ...

Reviews: