To order parts and supplies: 800.343.9353 >> eastwood.com
21
LOADING FILAMENT
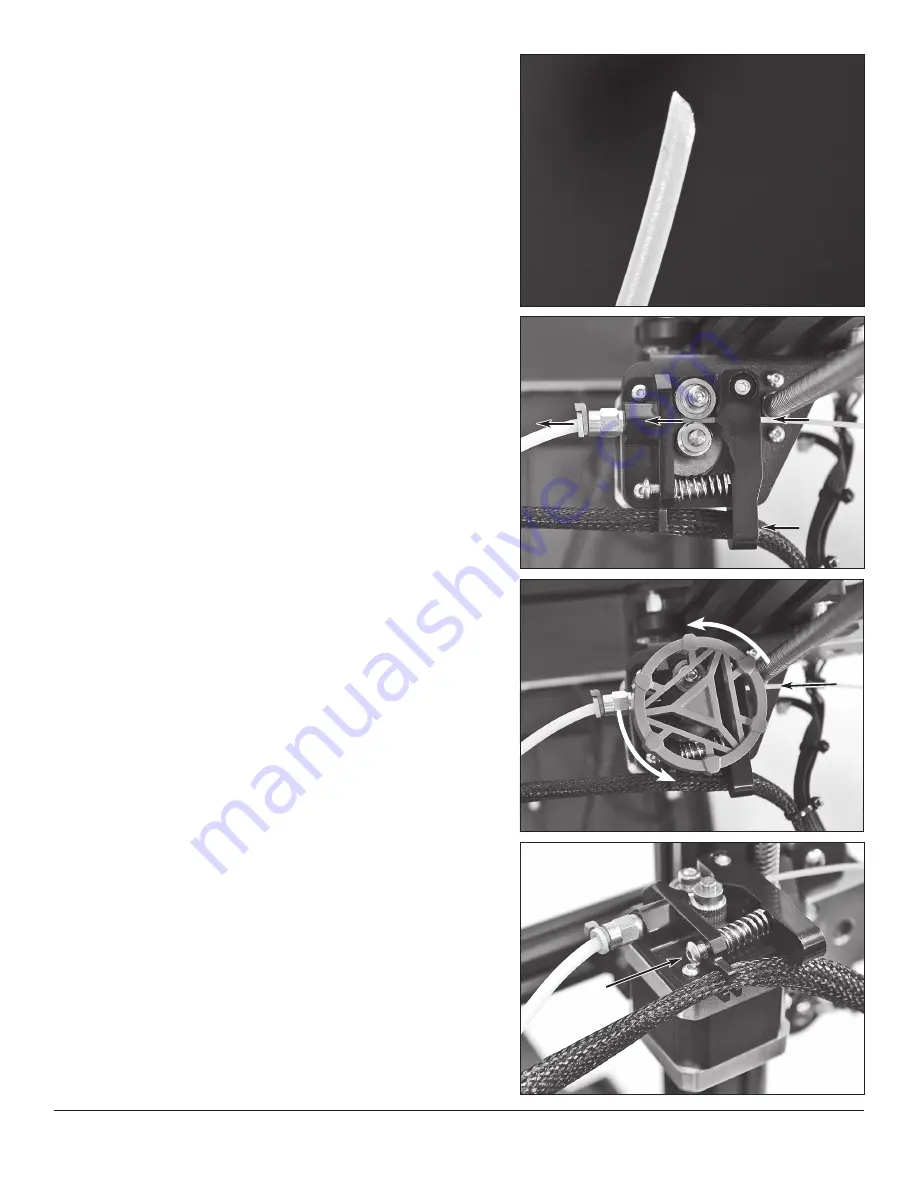
• Place filament spool on the holder at the top of the machine. Cut the end of the
filament at an angle to assist with feeding
(FIG 39)
.
• Power on the machine and heat the extruder to a suitable temperature for
printing the material being loaded.
• Hold the filament tensioner arm open and insert the filament into and through
the extruder motor assembly, past the gear, and guide it through into the tube
(FIG 40)
. Alternatively, the Extruder Manual Drive Wheel
[S]
can be used to
rotate the filament in with tension
(FIG 41)
.
• With the extruder up to temperature, continue holding the tension arm open and
feed the filament through the tube until filament comes out of the nozzle in a
steady stream and solid color.
• The filament is now loaded, and the Cooldown feature can be used to cool off the
extruder.
NOTE:
It is a good practice when 3D printing to never leave the nozzle fully
heated with the filament stationary for long periods of time. This can lead to
heat creep and create filament jams.
UNLOADING FILAMENT
• Similar to loading filament, but in reverse. Heat up the extruder to a suitable
temperature for printing.
• Once heated, depress the filament tensioner arm, and push some filament
through the nozzle and, in the same stroke, rapidly pull it back out. Doing this
will ensure the nozzle is as clear as possible for the next filament loading.
• Continue to pull the filament out completely and Cooldown the machine if
filament is not being reloaded immediately.
ADJUSTING FILAMENT TENSION
• Tension is preset from the factory and should be ample to feed filament through
in most situations, but the tension can be adjusted by tightening or loosening the
spring tension screw
(FIG 42)
.
FIG. 41
FIG. 41
FIG. 39
FIG. 39
FIG. 40
FIG. 40
✓
Push to
Push to
release
release
tension
tension
✓
✓
✓
Rotate
Rotate
✓
FIG. 42
FIG. 42
Filament
Filament
tension
tension
adjustment
adjustment
screw
screw
✓


