


OUTDOOR USE ONLY / NEVER LEAVE UNATTENDED
Page 7 of 19
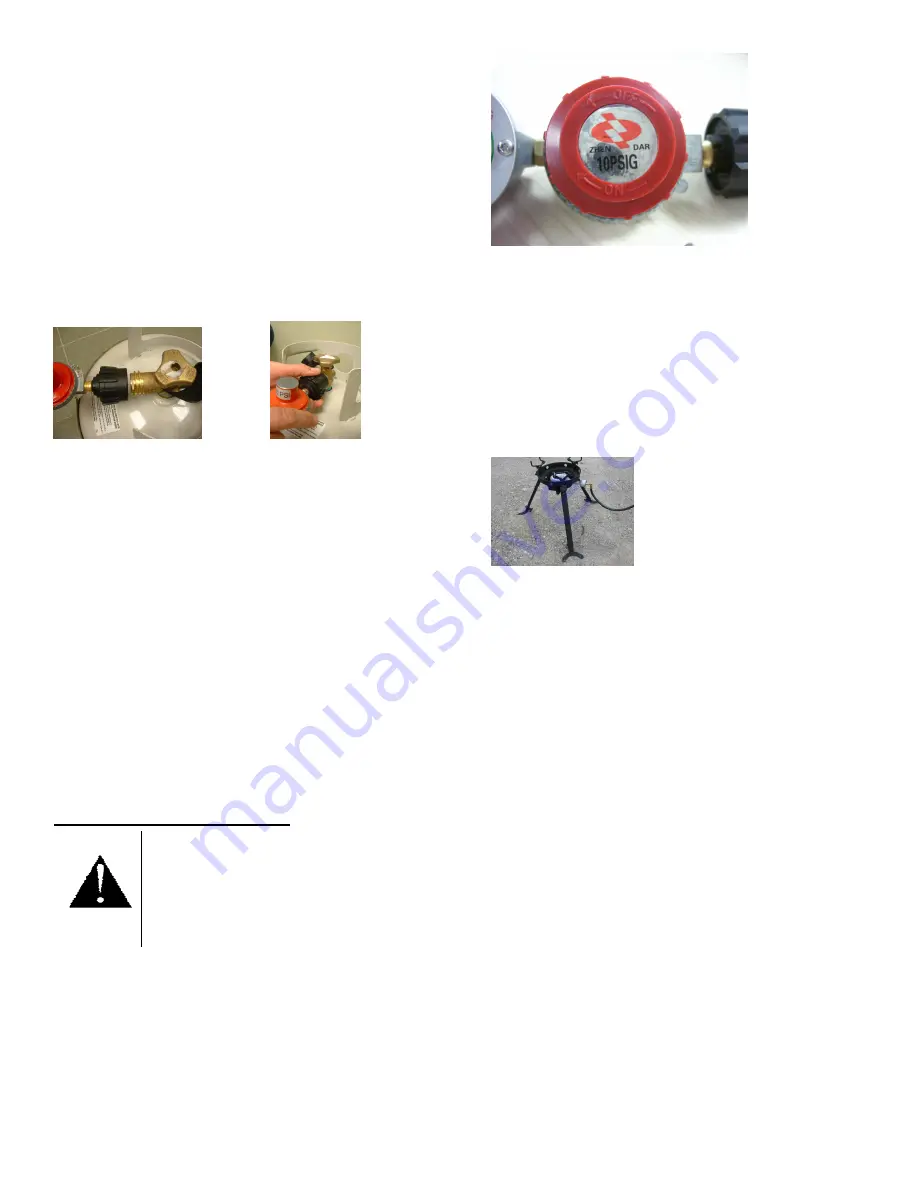
Make sure the regulator control valve is in the off
position by turning the valve counter clockwise until
it is tight (figures 16). This will not allow gas to flow
through the hose.
Fig. 16
Make sure the valve on LP tank is clean. Attach regulator (in up position) and hose to LP tank by sliding the
black portion of the QCC1 fitting overtop LP tank valve threads (figure 17). Turn QCC1 fitting clockwise until
hand tight (figure 18).
Do not use a wrench to tighten Type I (QCC1) fitting (hand tighten only).
Fig. 17
Fig. 18
Make sure burner orifice/hose connection is in the
down position so the hose curves to the ground
(figure 19). If hose does not curve to the ground,
turn hose at the orifice hose connection end until the
hose curves to the ground.
Fig. 19
The LP tank must be in the upright position for proper function of the cylinder supply system so it is
arranged for vapor withdrawal.
NOTE:
Most LP tanks are equipped with a safety device to shut off the flow of gas if the hose is cut or
severed. Sometimes this safety device may be tripped when lighting the burner or opening the LP tank
valve too quickly. To prevent this, always make sure regulator control valve is closed before opening
LP tank valve and always open LP tank valve slowly.
If the safety device is activated (shuts off/limits gas supply to appliance), close LP tank valve and open
regulator control valve to release gas remaining in the regulator. Close regulator control valve and
disconnect the QCC1 fitting from LP tank. This will reset the safety shut off device. Reconnect the
QCC1 to the LP tank by following above instructions.
Step 1.5 Leak Testing
Close regulator control valve, by turning it clockwise. Apply a mixture of equal parts liquid detergent
(dishwashing soap) and water to LP tank valve, QCC1 connection, regulator control valve, timer shutoff,
all connections, hose crimps, entire length of hose and hose/burner attachment connections with a
sponge (figures 20, 21 and 22).
•
Conduct leak test every time LP tank is connected or reconnected.
•
Do not use open flame to check for gas leaks.
•
Do not smoke during the leak test.
•
Always conduct leak test outdoors in well ventilated area away
from ignition sources such as gasoline, open flame, sparks or
electrical appliances.


