Copyright © 2003-2005 Eagle Tree Systems, LLC
Page 13
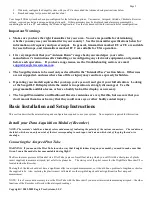
NOTE: See the “Servo” section below for information on Servo setup.
NOTE: If you have a Flight System and select Climbrate, see the “Configuring Climbrate Alarms” section below.
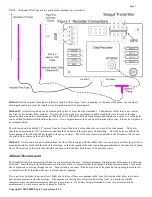
To enable a “High Alarm” for a parameter, meaning that the alarm should activate if the parameter
exceeds
the set value, check the
High Alarm Enabled button.
To enable a “Low Alarm” for a parameter, meaning that the alarm should activate if the parameter
falls below
the set value, check the
High Alarm Enabled button.
NOTE: only a high
or
a low alarm can be configured for each parameter (not both).
To enter the alarm value, type the high or low threshold in the “Enter the Alarm Trigger Value” window. For values, such as RX
voltage, with a decimal place, enter the fractional part in the box to the right of the decimal point. For example, to set an alarm if
your RX voltage drops below 4.8 volts, enter 4 and 8 in the two boxes.
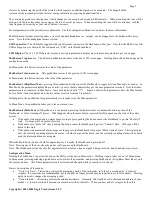
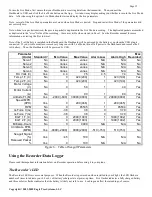
See the Parameter table in Figure 6 for high and low alarm limits. NOTE: when an alarm is triggered, a “!” appears to the right of the
parameter label on the LCD, to indicate the parameter is in an alarm state.
If you wish to have an audible beep sound when the alarm is triggered, configure the beep alarm as follows:
•
Select the number of beeps to sound in the “Number of Beeps” window.
•
Select the beep length in the “Length of each Beep” window.
•
Select the length of the “silence” between each of the beeps in the “Length of silent pause between beeps” window.
If you wish the beeps to repeatedly sound when the alarm condition occurs, click on the “Check here to cause the alarm beeps to
sound continuously…” checkbox. If you wish the alarm to only sound once when the condition occurs, uncheck this box. Note that
when the alarm condition goes away, and then recurs, the alarm will sound again in both these cases. See the muting section in the
“Seagull Dashboard Receiver Instructions” above for information on muting the alarms.
If you want to have the Dashboard switch to the LCD page that has the alarming parameter, check the “Check here to automatically
Switch…” checkbox.
NOTE: If two or more alarm conditions occur simultaneously, only the last occurring condition will be signaled. If the last
condition to trigger an alarm goes away, the second to last currently active condition will be signaled, etc.
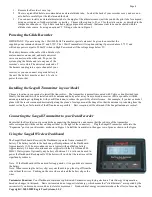
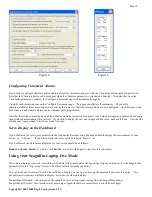
Once all the parameters you wish to display are configured, you can review the parameters by clicking the Preview button as shown in
Figure 5. The Preview window is a handy way to see which parameters are configured on which LCD page locations. A “***” in a
page location indicates that no parameter is displayed in that location.
Once the parameters are configured to your satisfaction, click OK, which will download the settings to the Dashboard. Note that you
can change the parameters at any time by following the above steps.
Note: If you wish to clear
all
previously configured parameters, hit the Clear button on the bottom of the utility.


